Project: Remove rotting timbers and replace with cedar risers.
Location: Leshi
[dropcap type=”circle” color=”#ffffff” background=”#ef7f2c”]P[/dropcap]roject: Terrace backyard of residential home. Build cedar risers up hillside.
Location: Shoreline
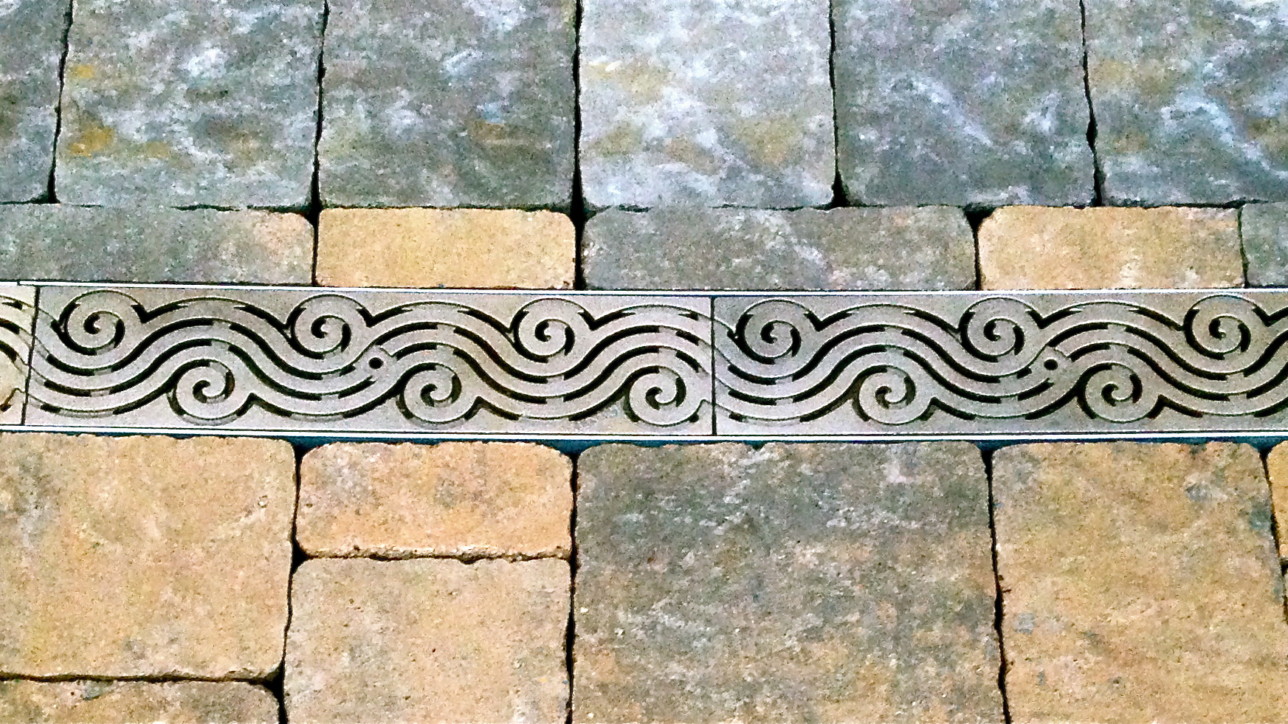
[dropcap type=”circle” color=”#ffffff” background=”#ef7f2c”]Ᾰ[/dropcap]Project: Driveway Installation
Location: Phinney ridge
Installation of small driveway using interlocking pavers.
Pavers were Terra Villa from Mutual Materials. 4 sizes, modified herringbone pattern. Perimeter soldier course created using opposing slate colored 8×12 paver.
Channel drain used was an industrial type, with cast iron grating from Iron Age Designs.
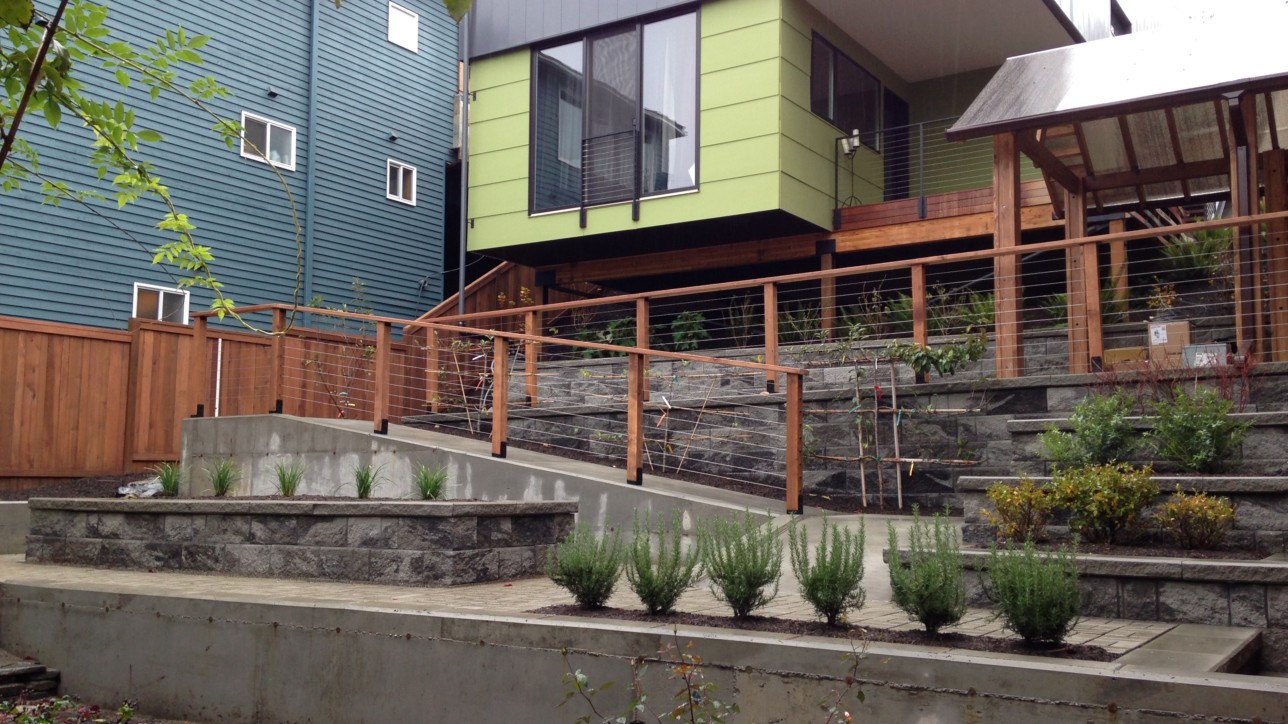
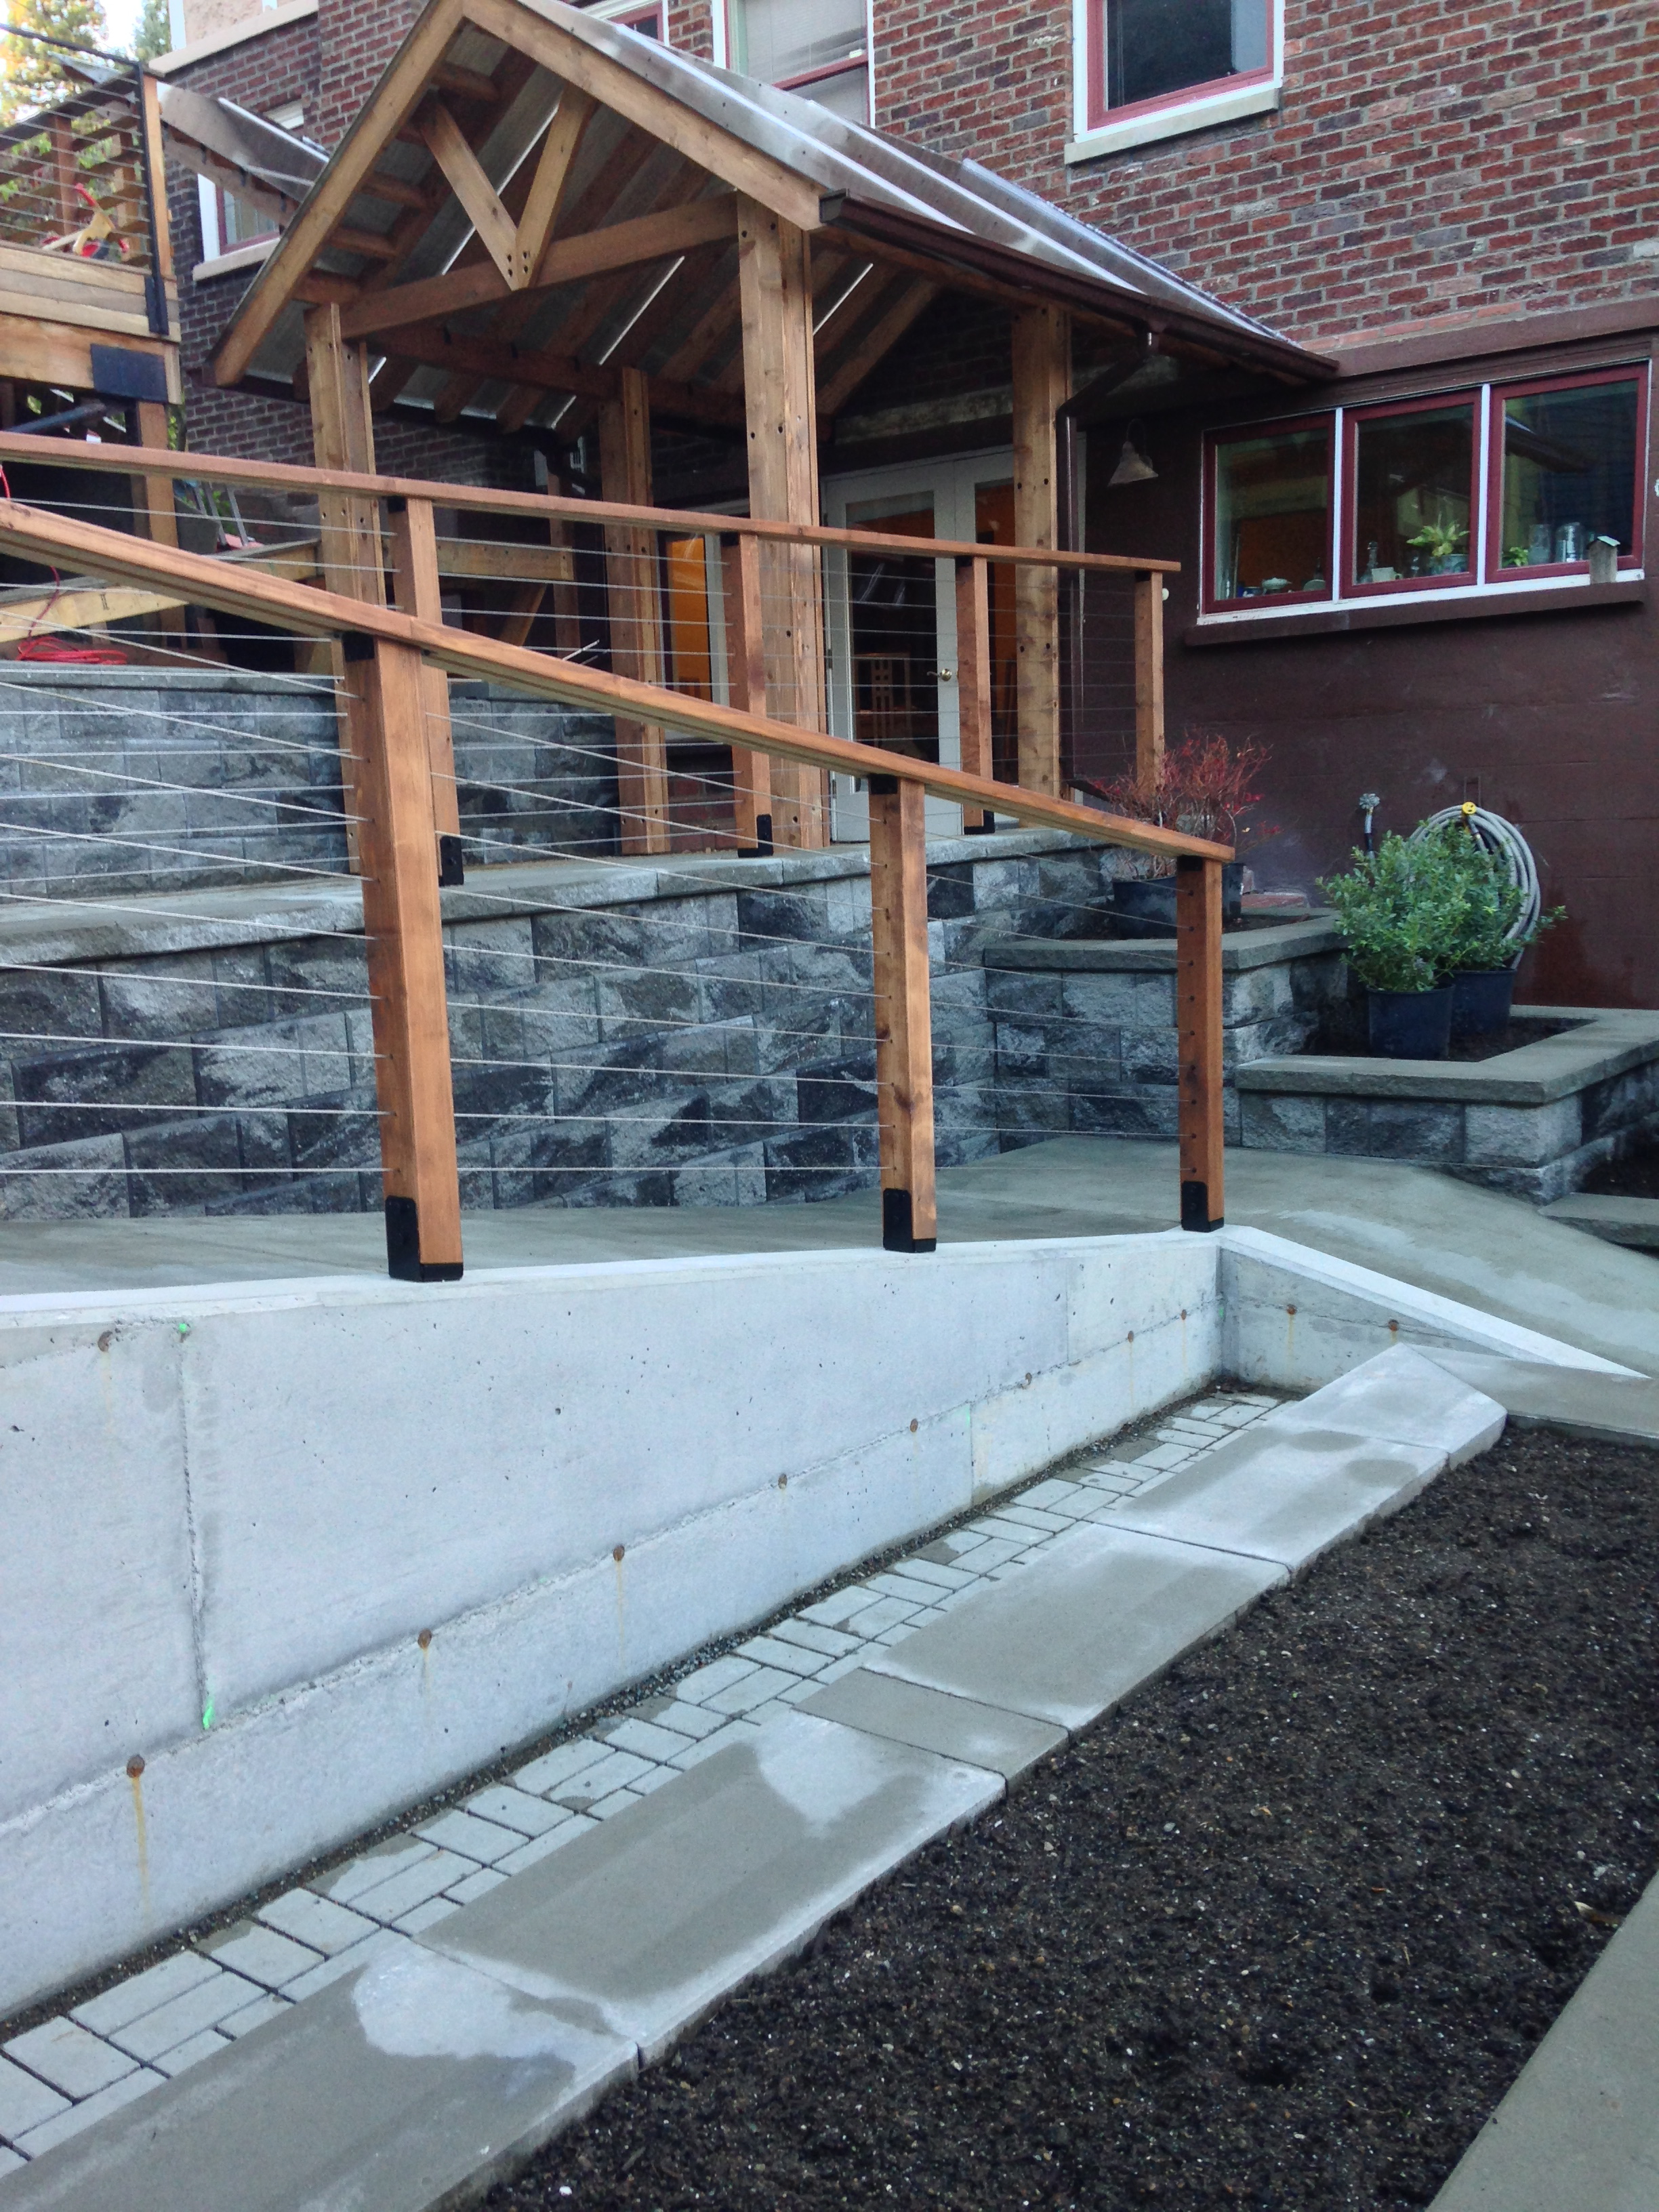
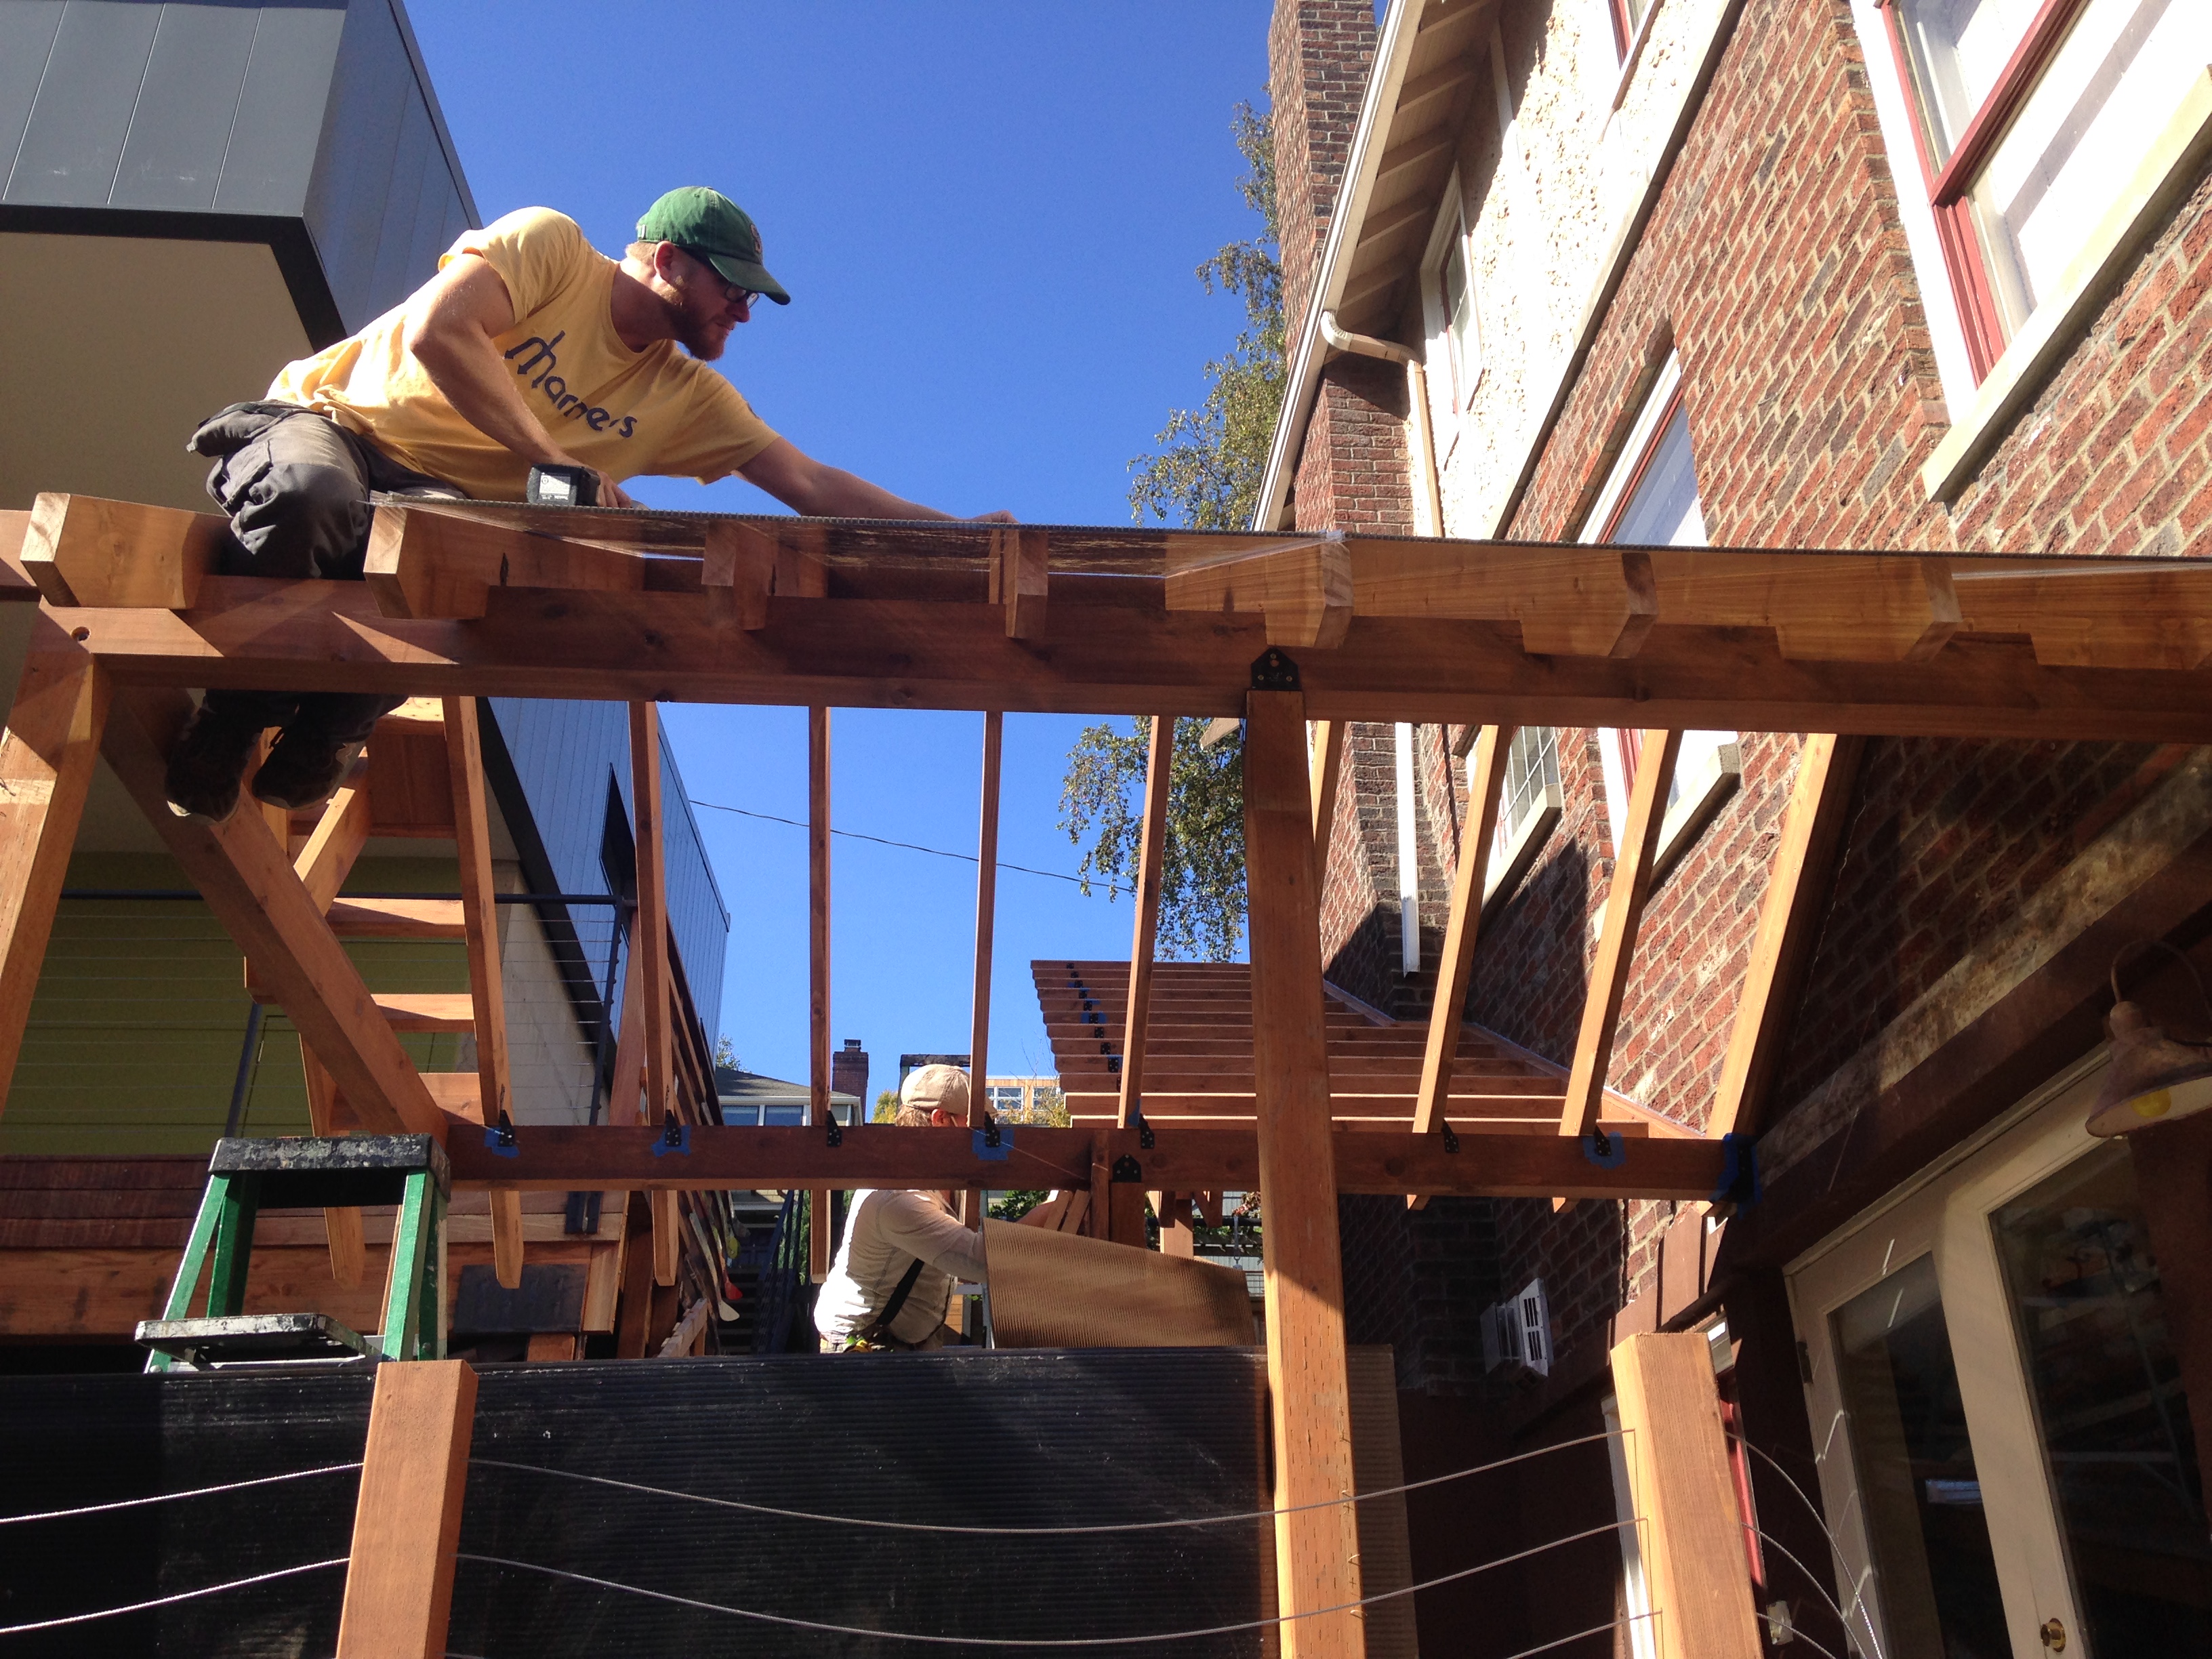
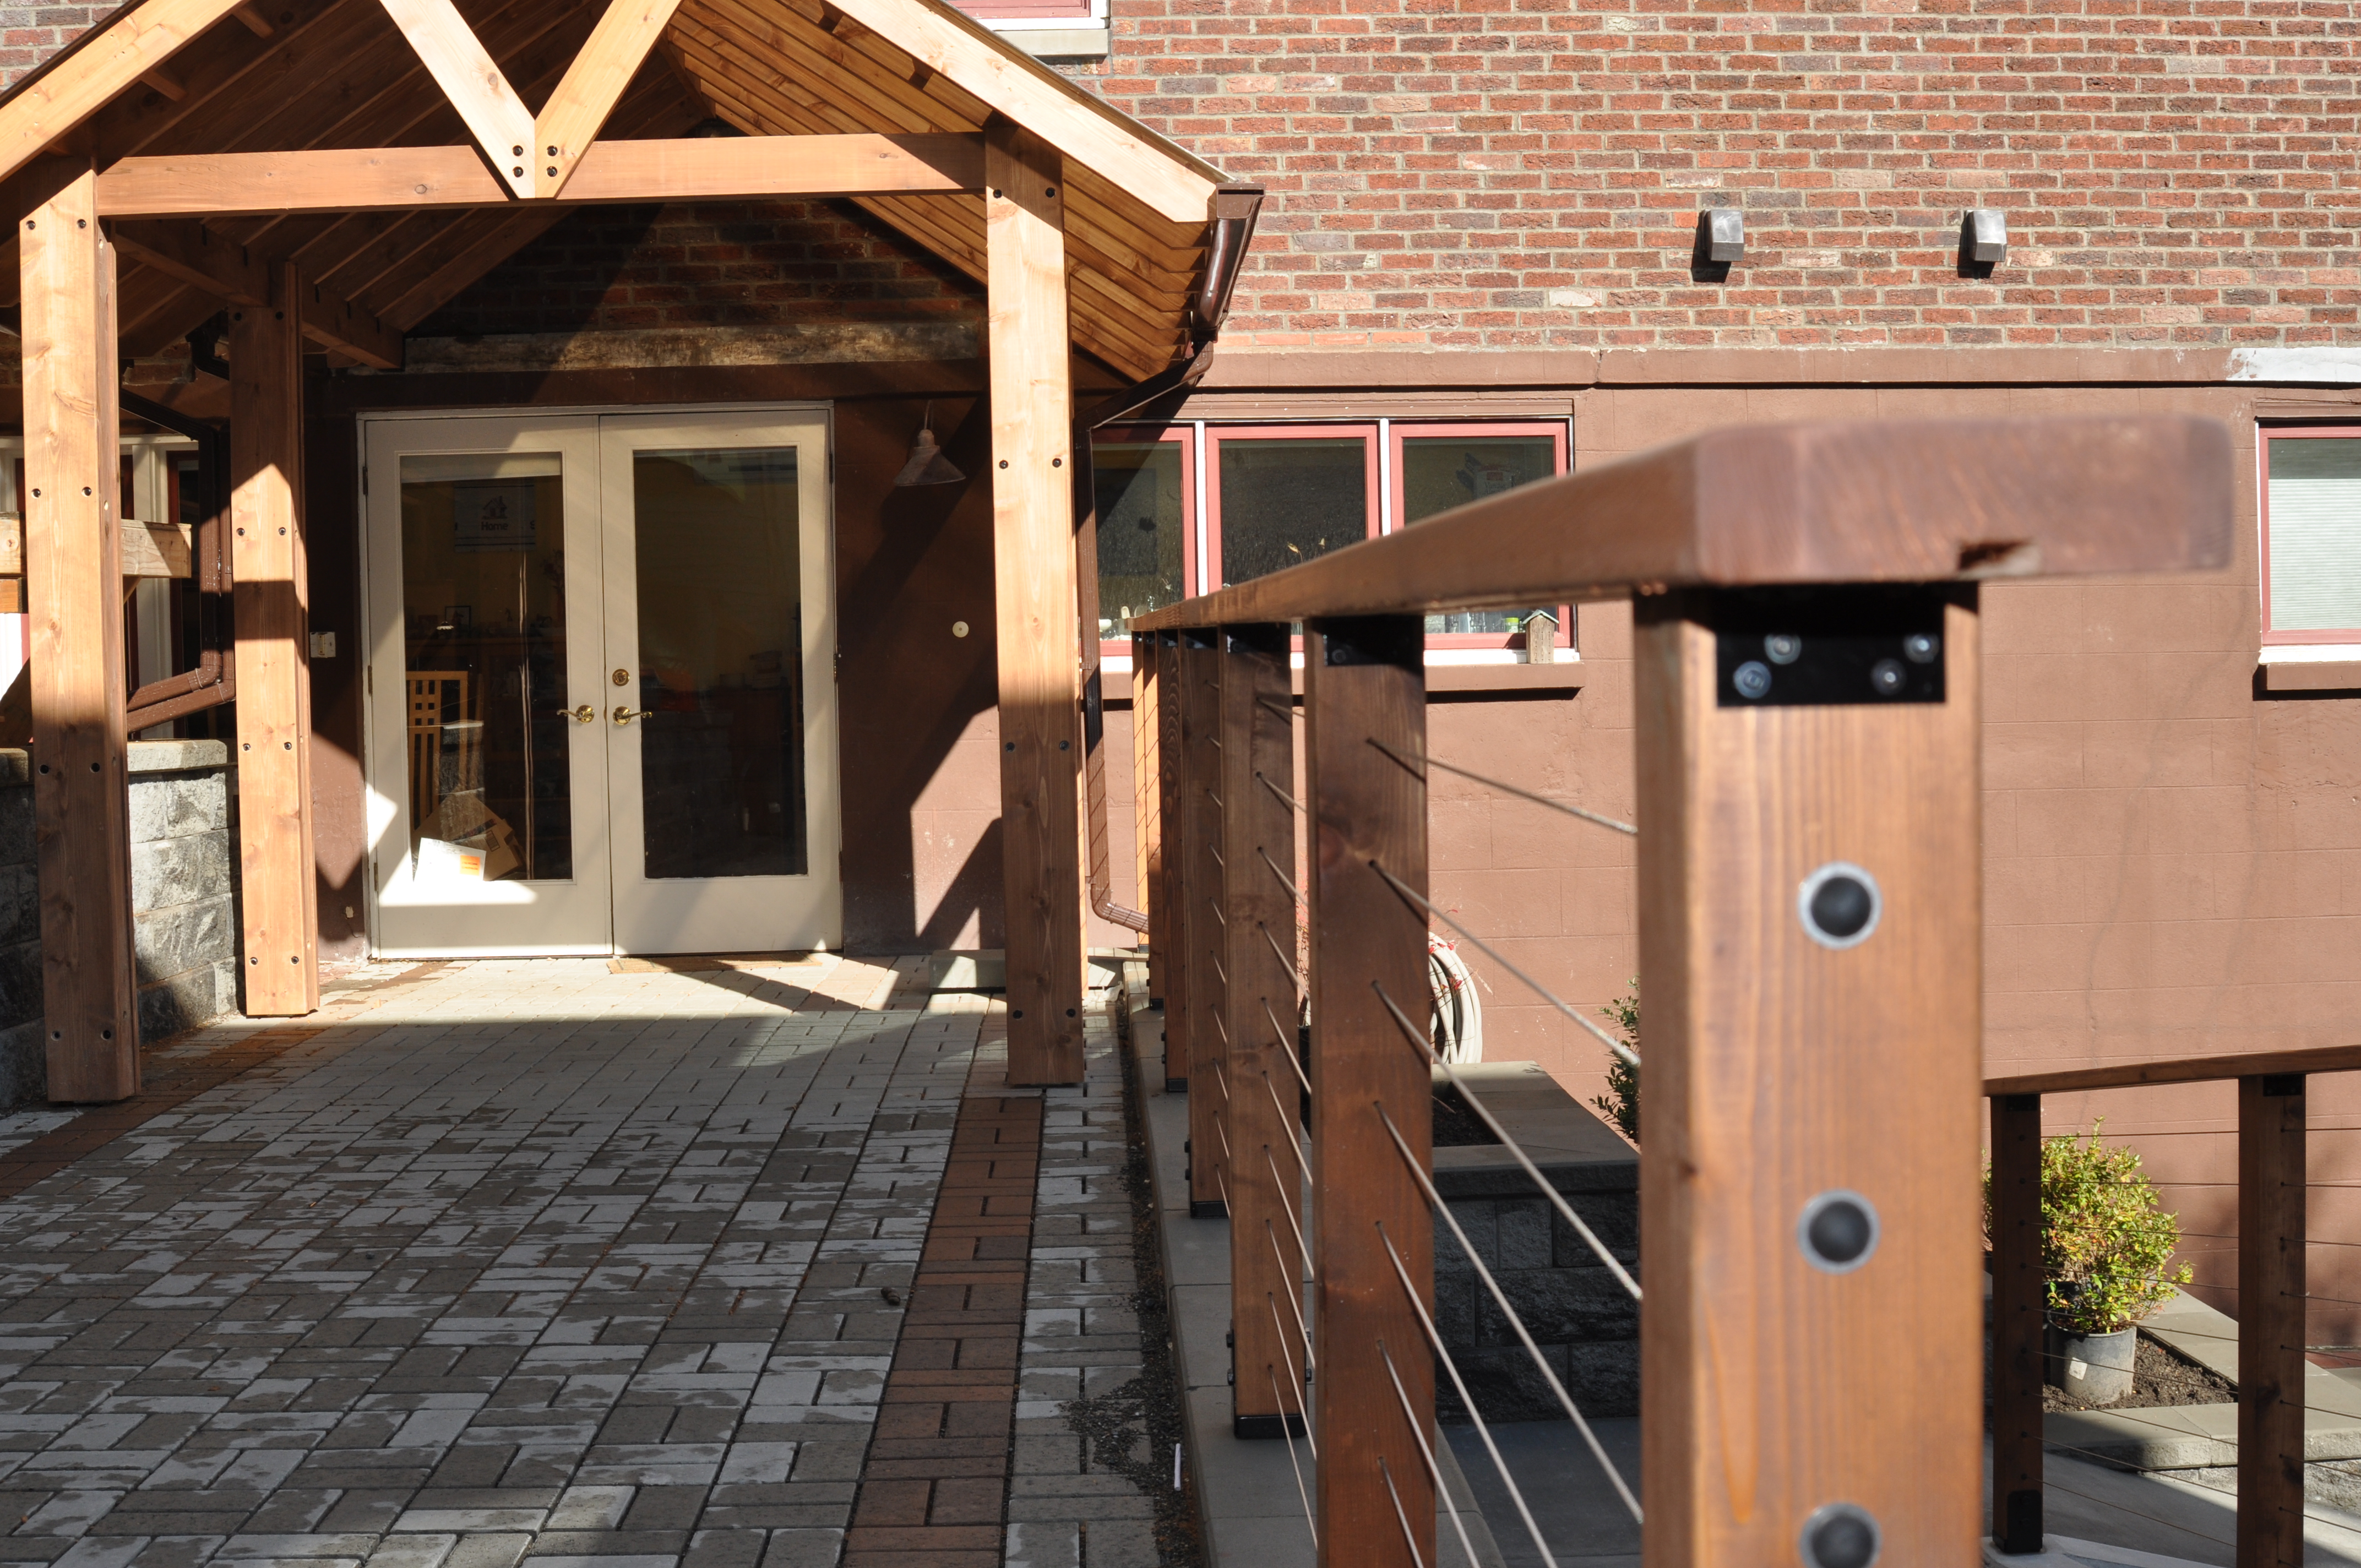
[dropcap type=”circle” color=”#ffffff” background=”#ef7f2c”]P[/dropcap]roject: Extensive remodel
Location: Capitol Hill
A Brothers Zollinger Installation
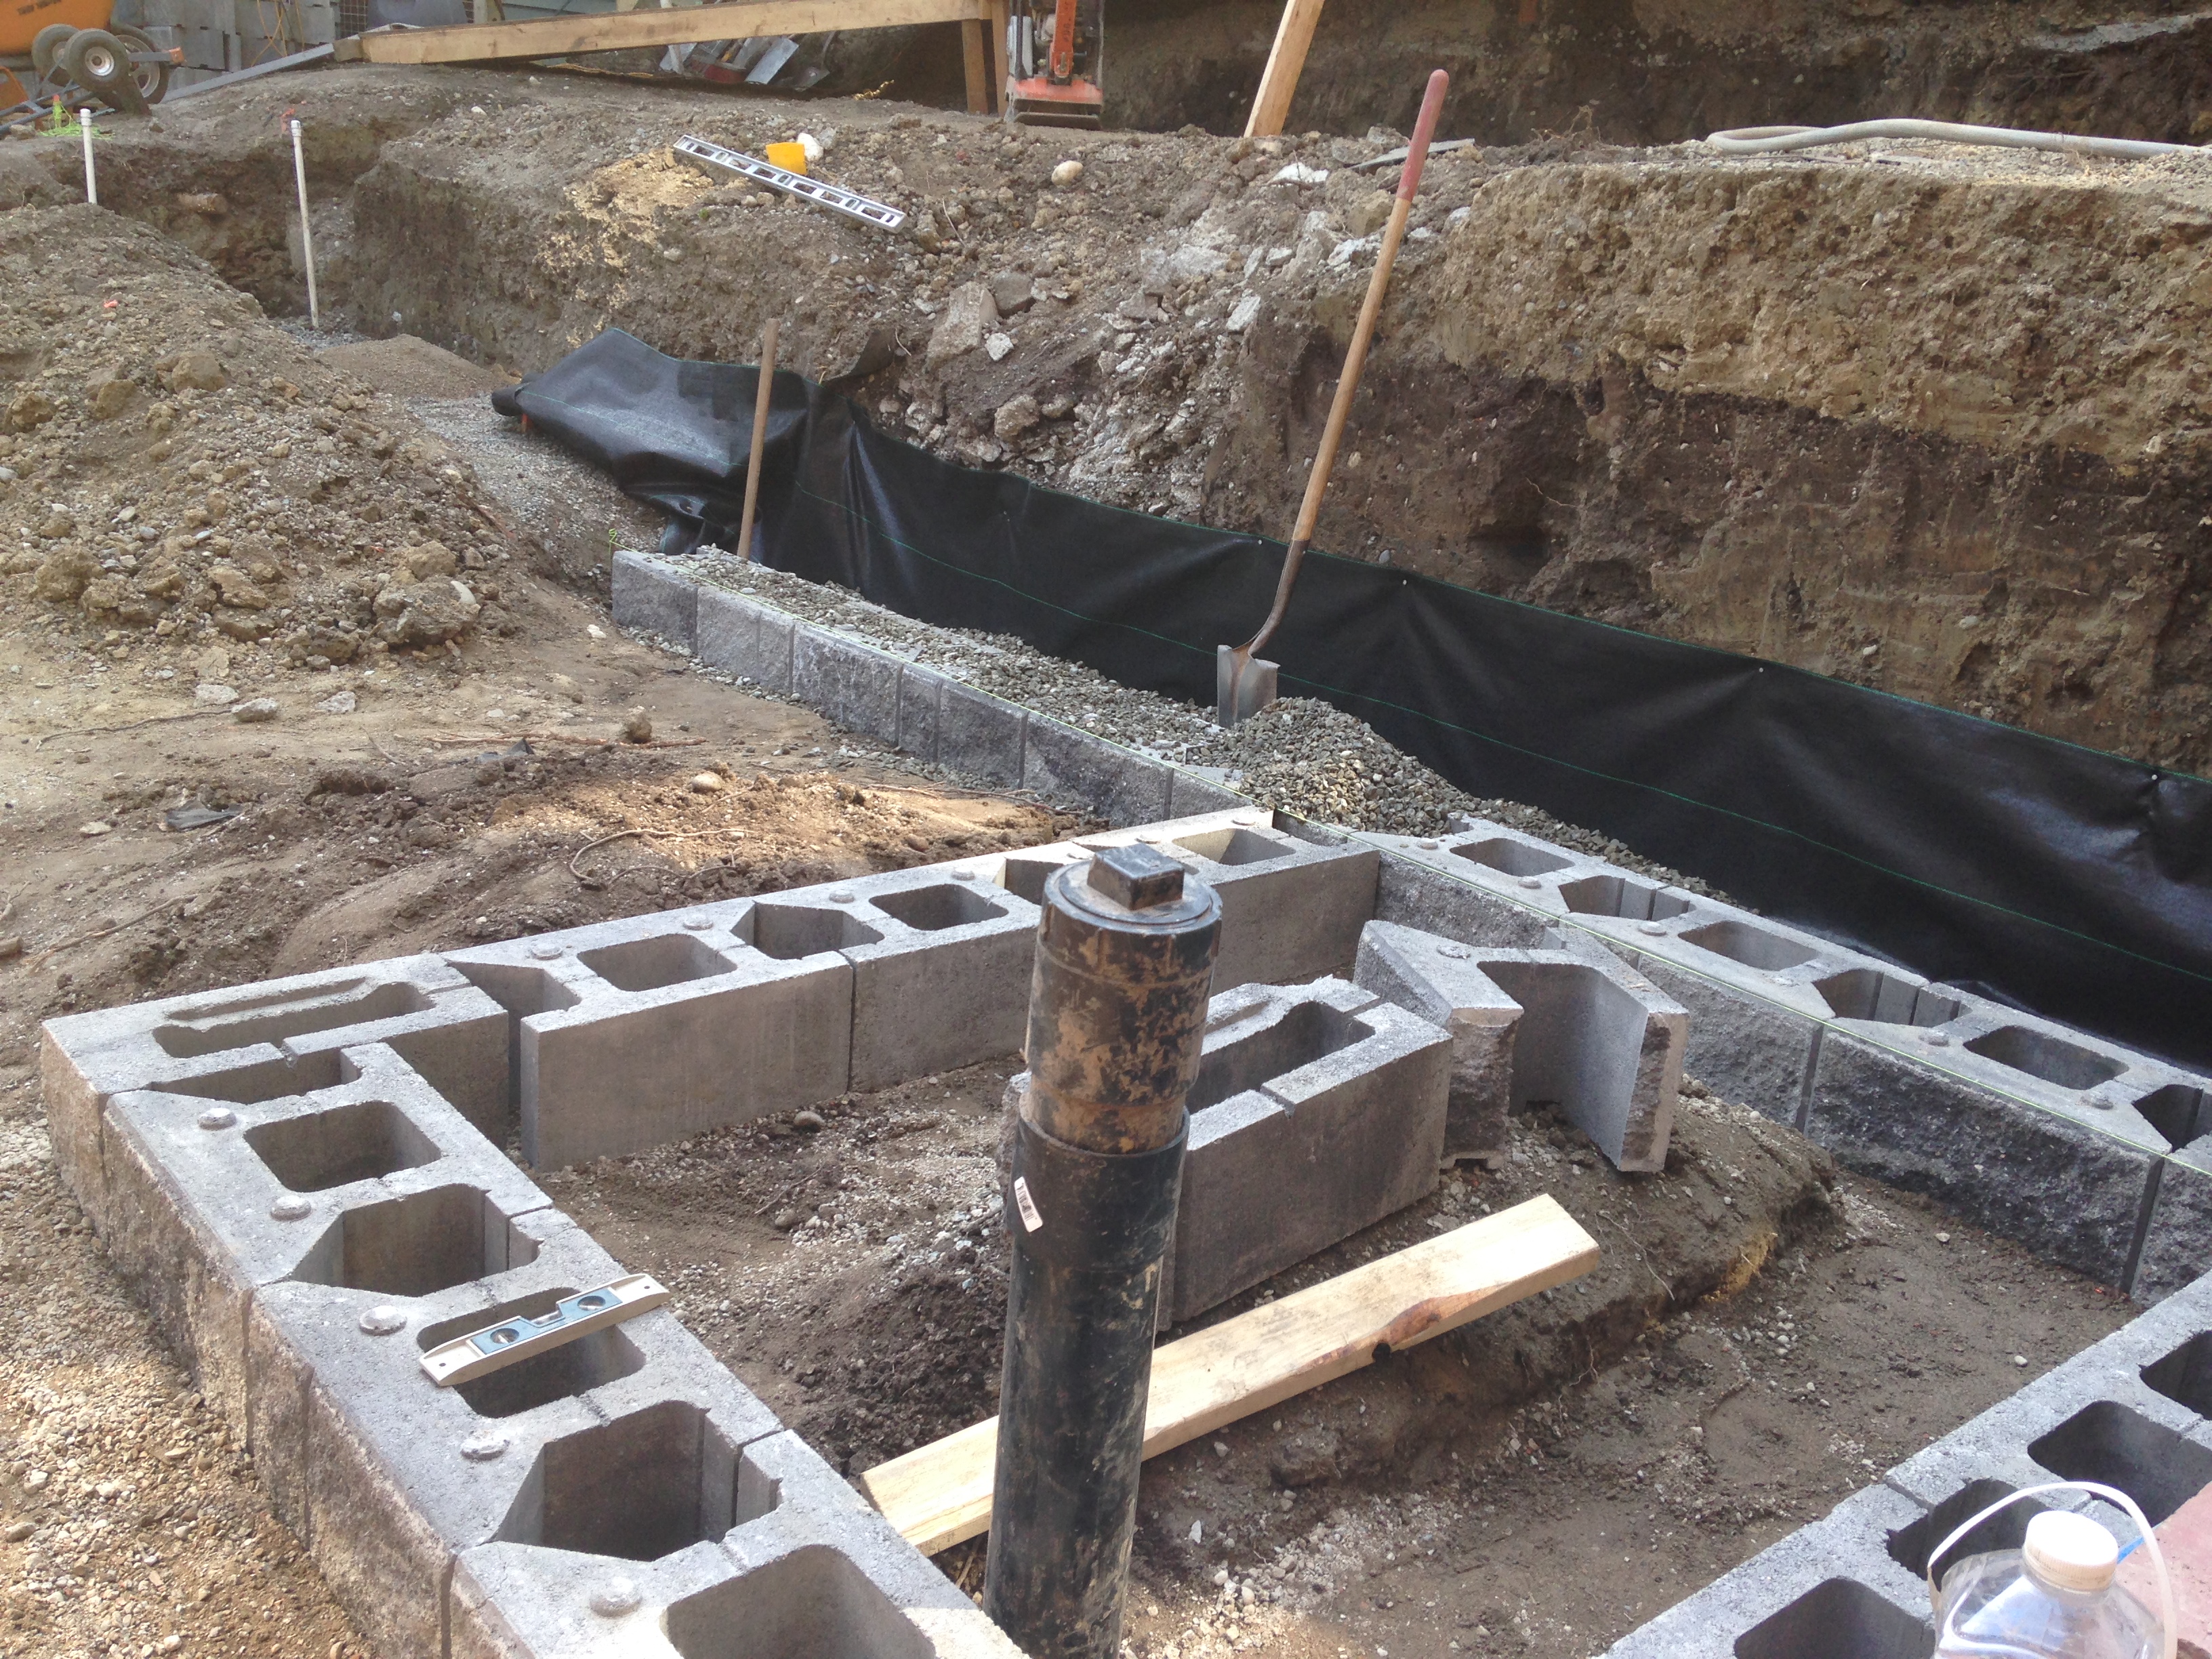
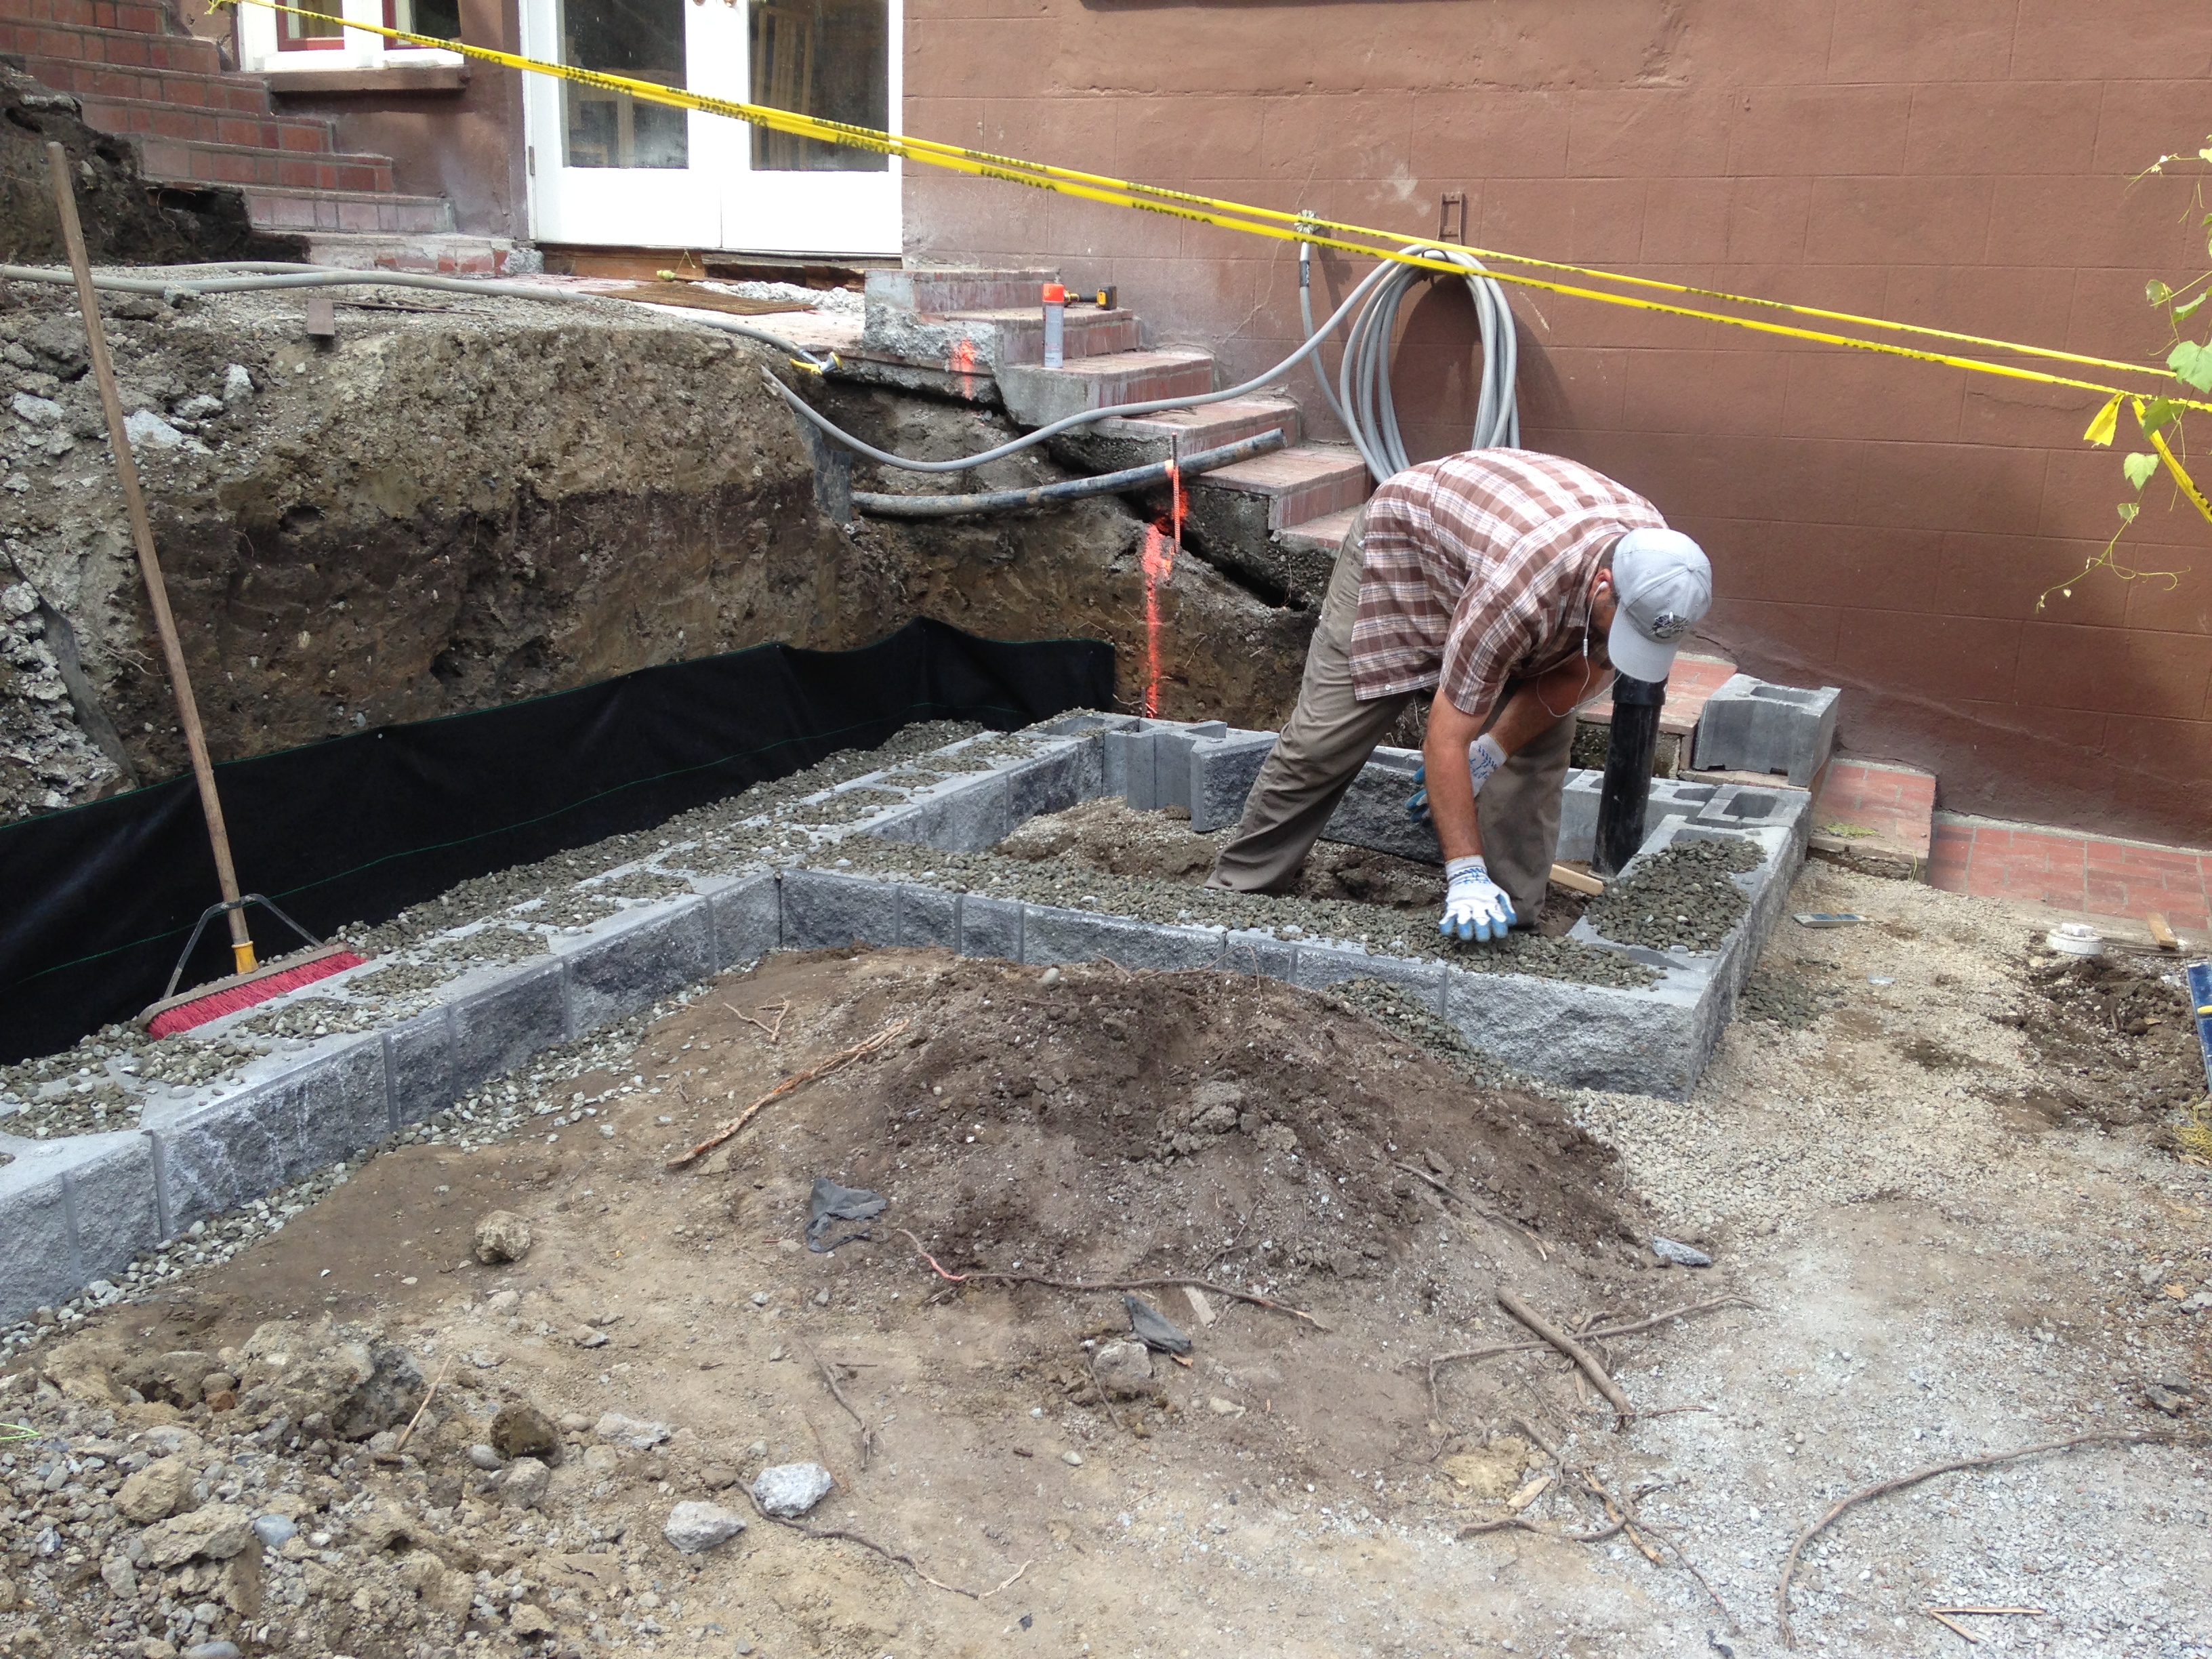
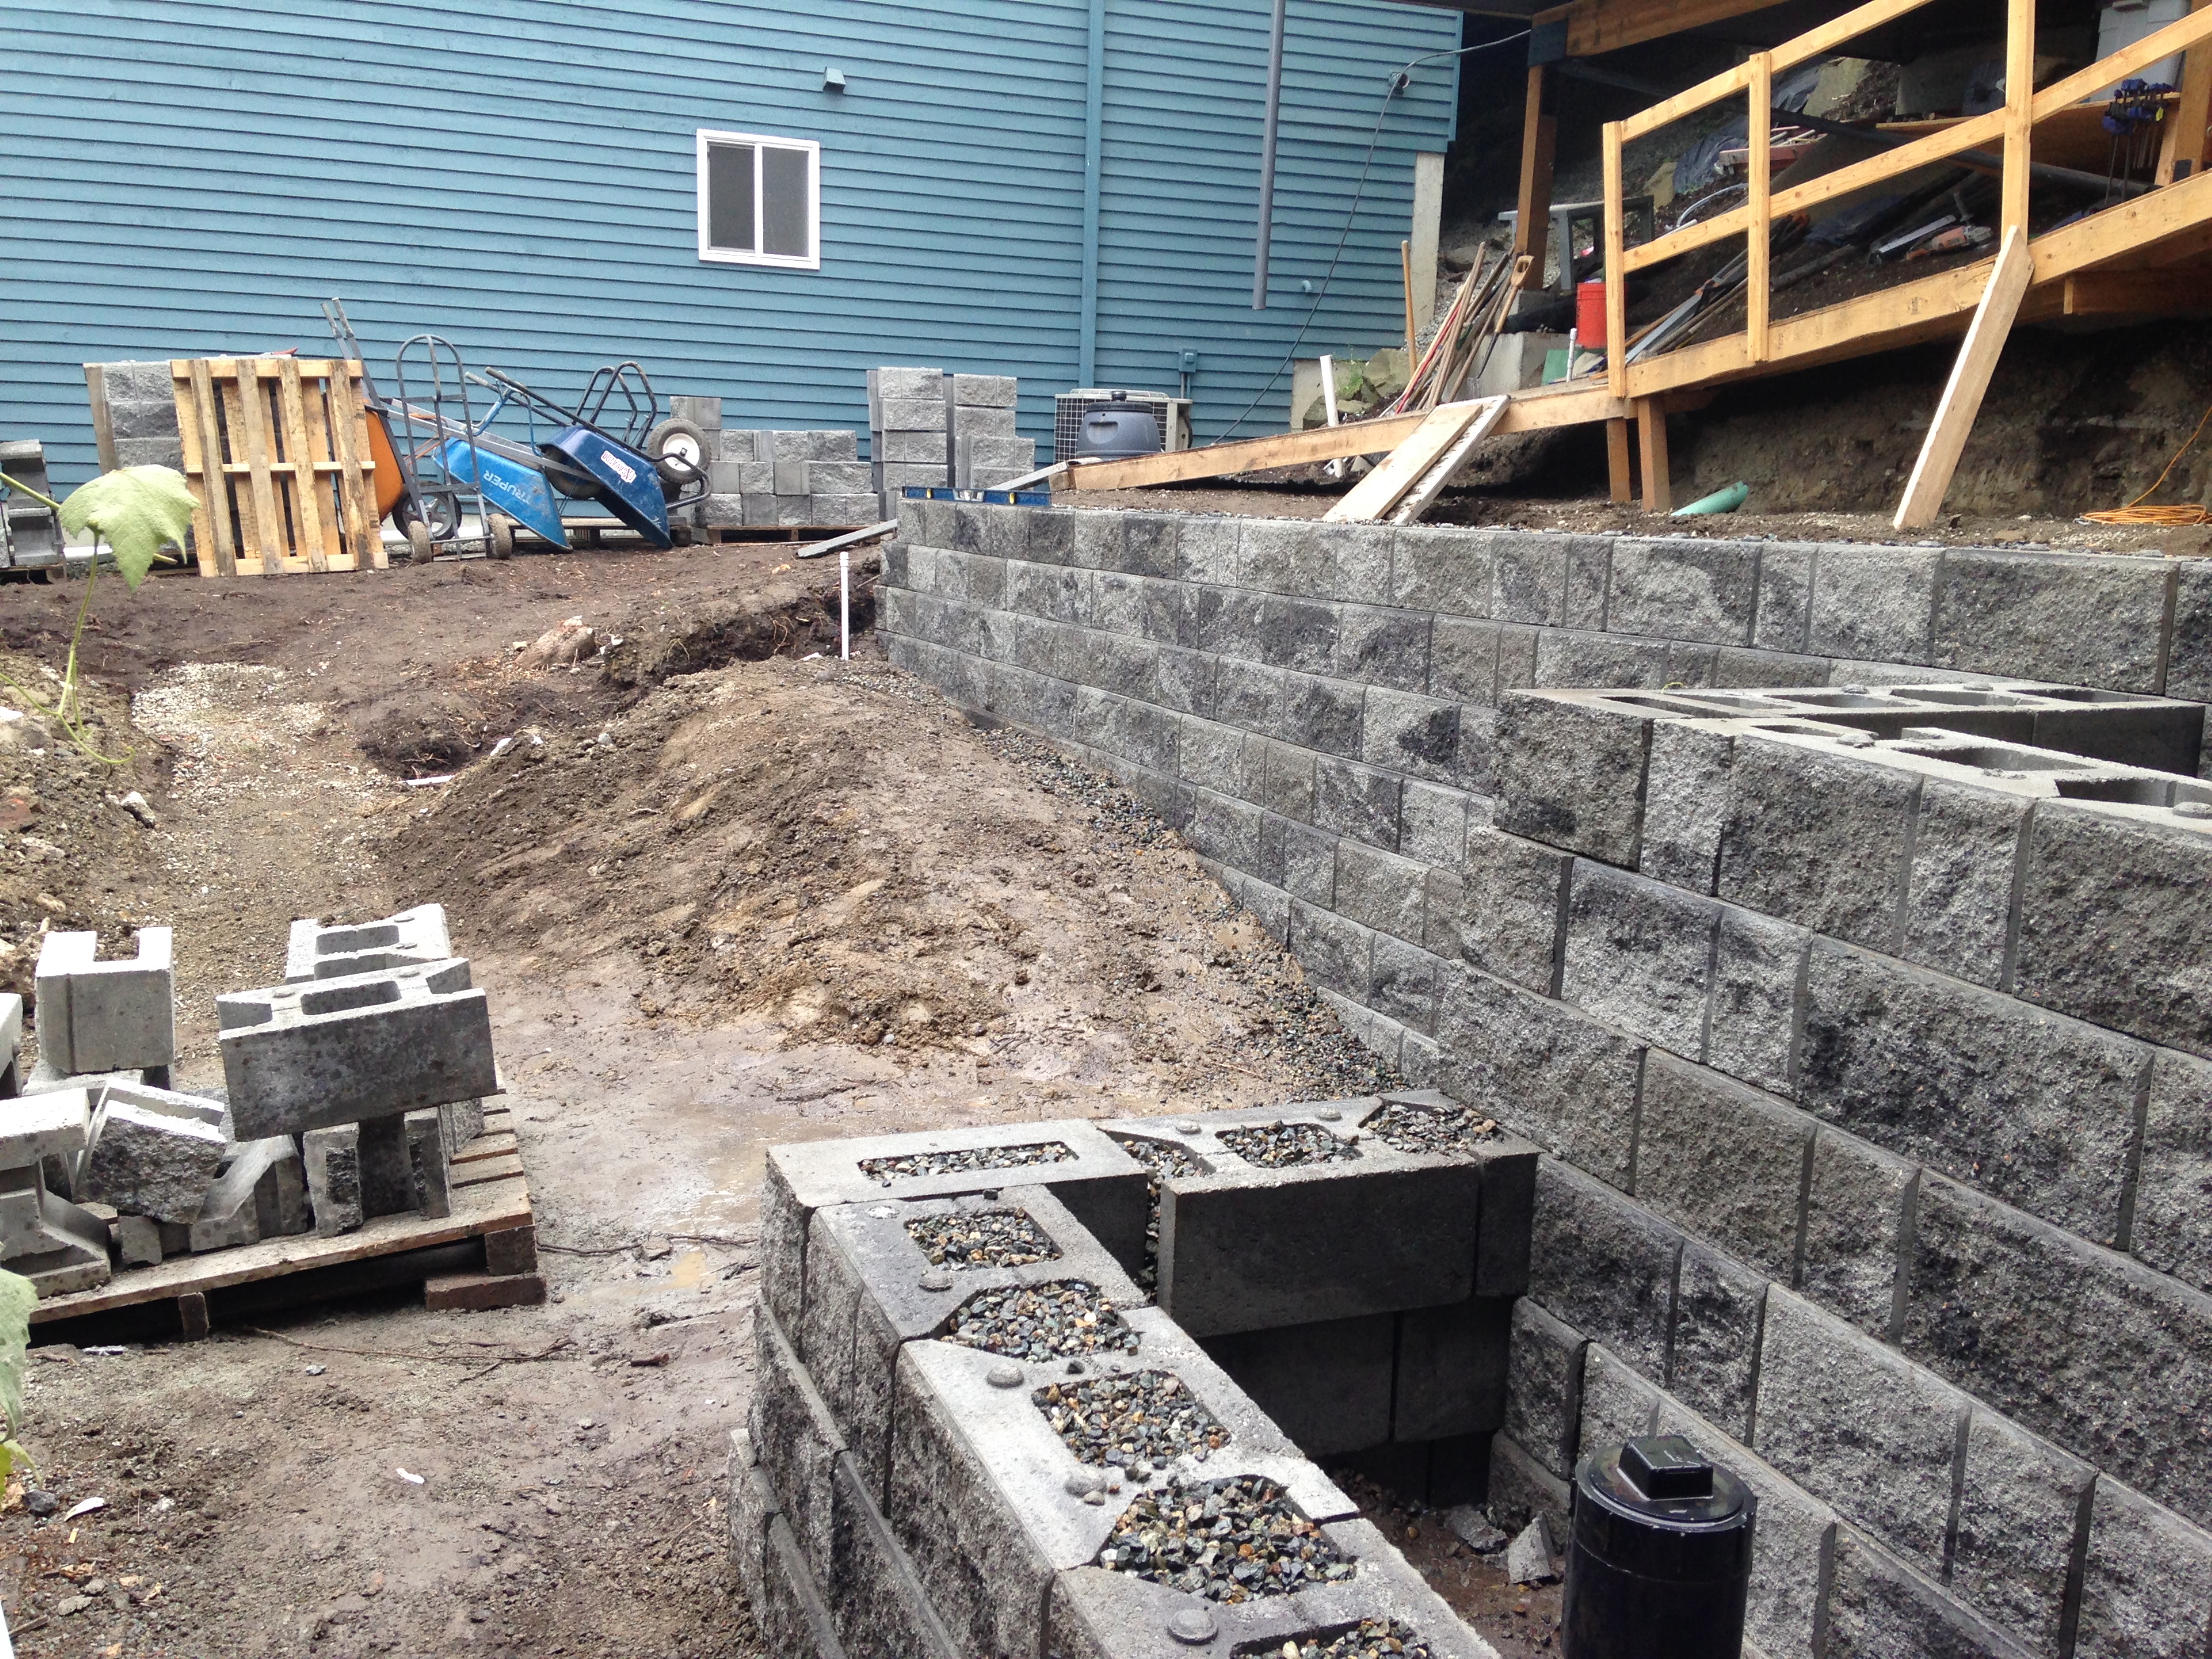
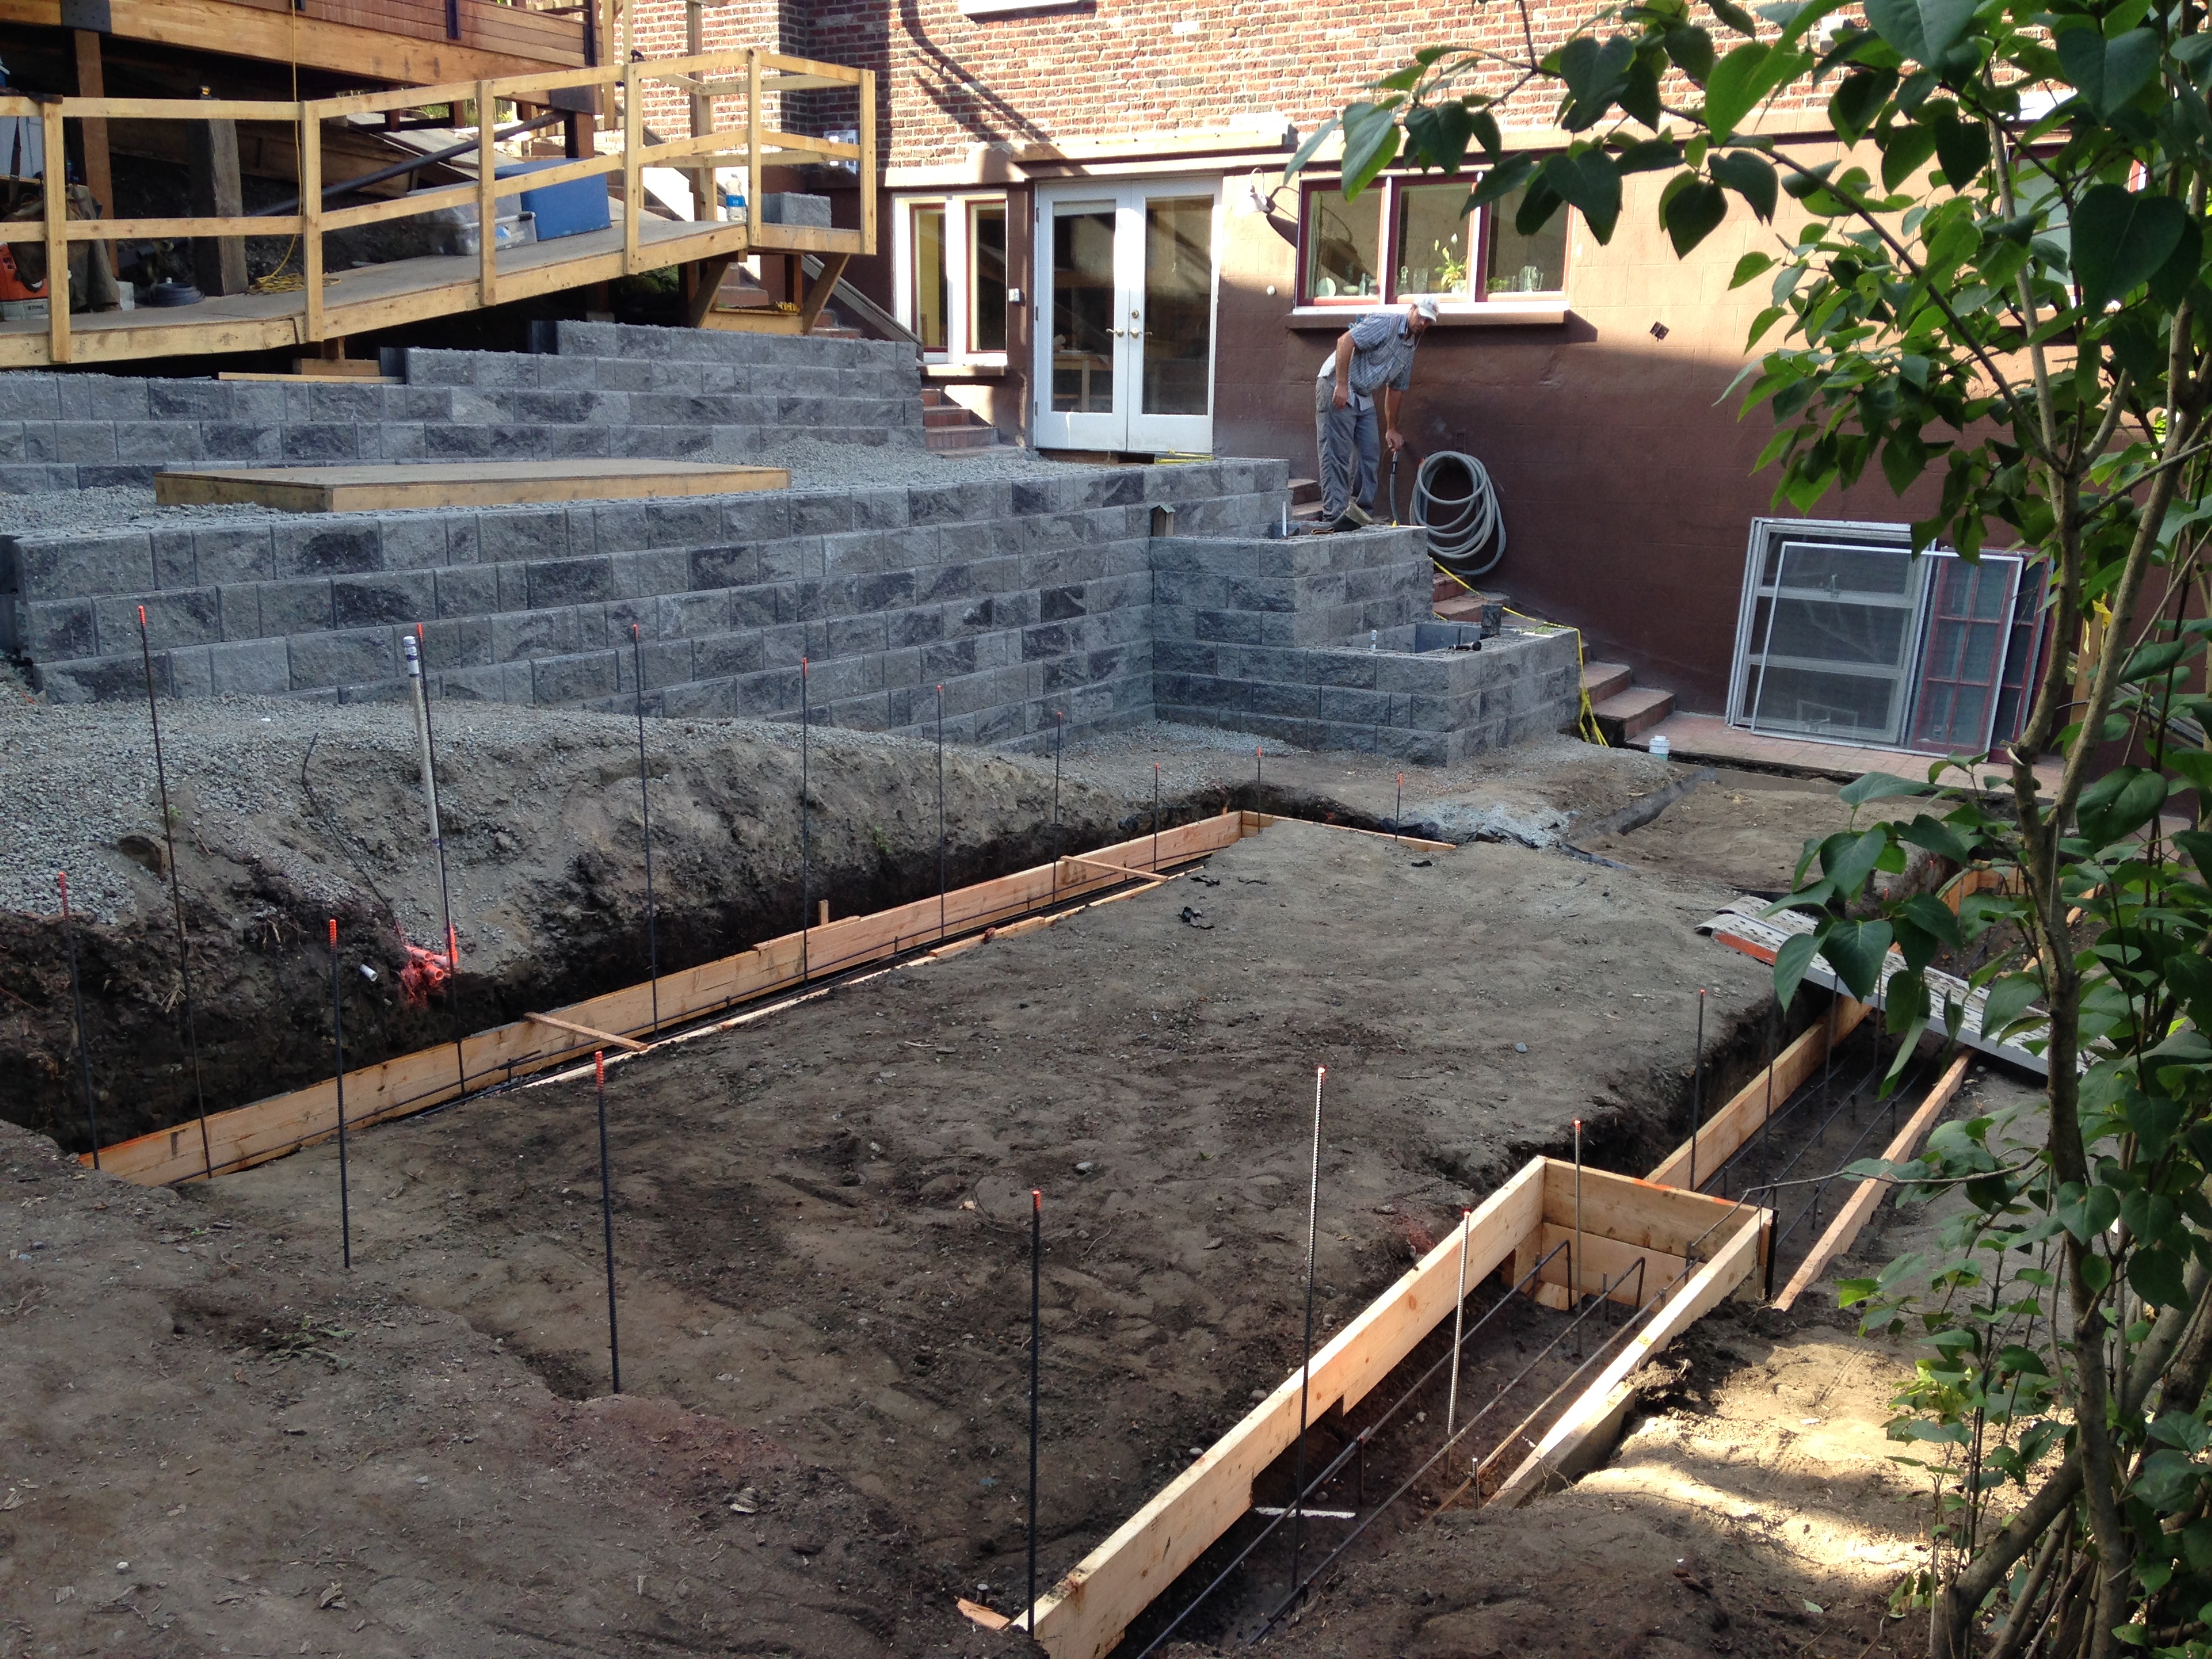
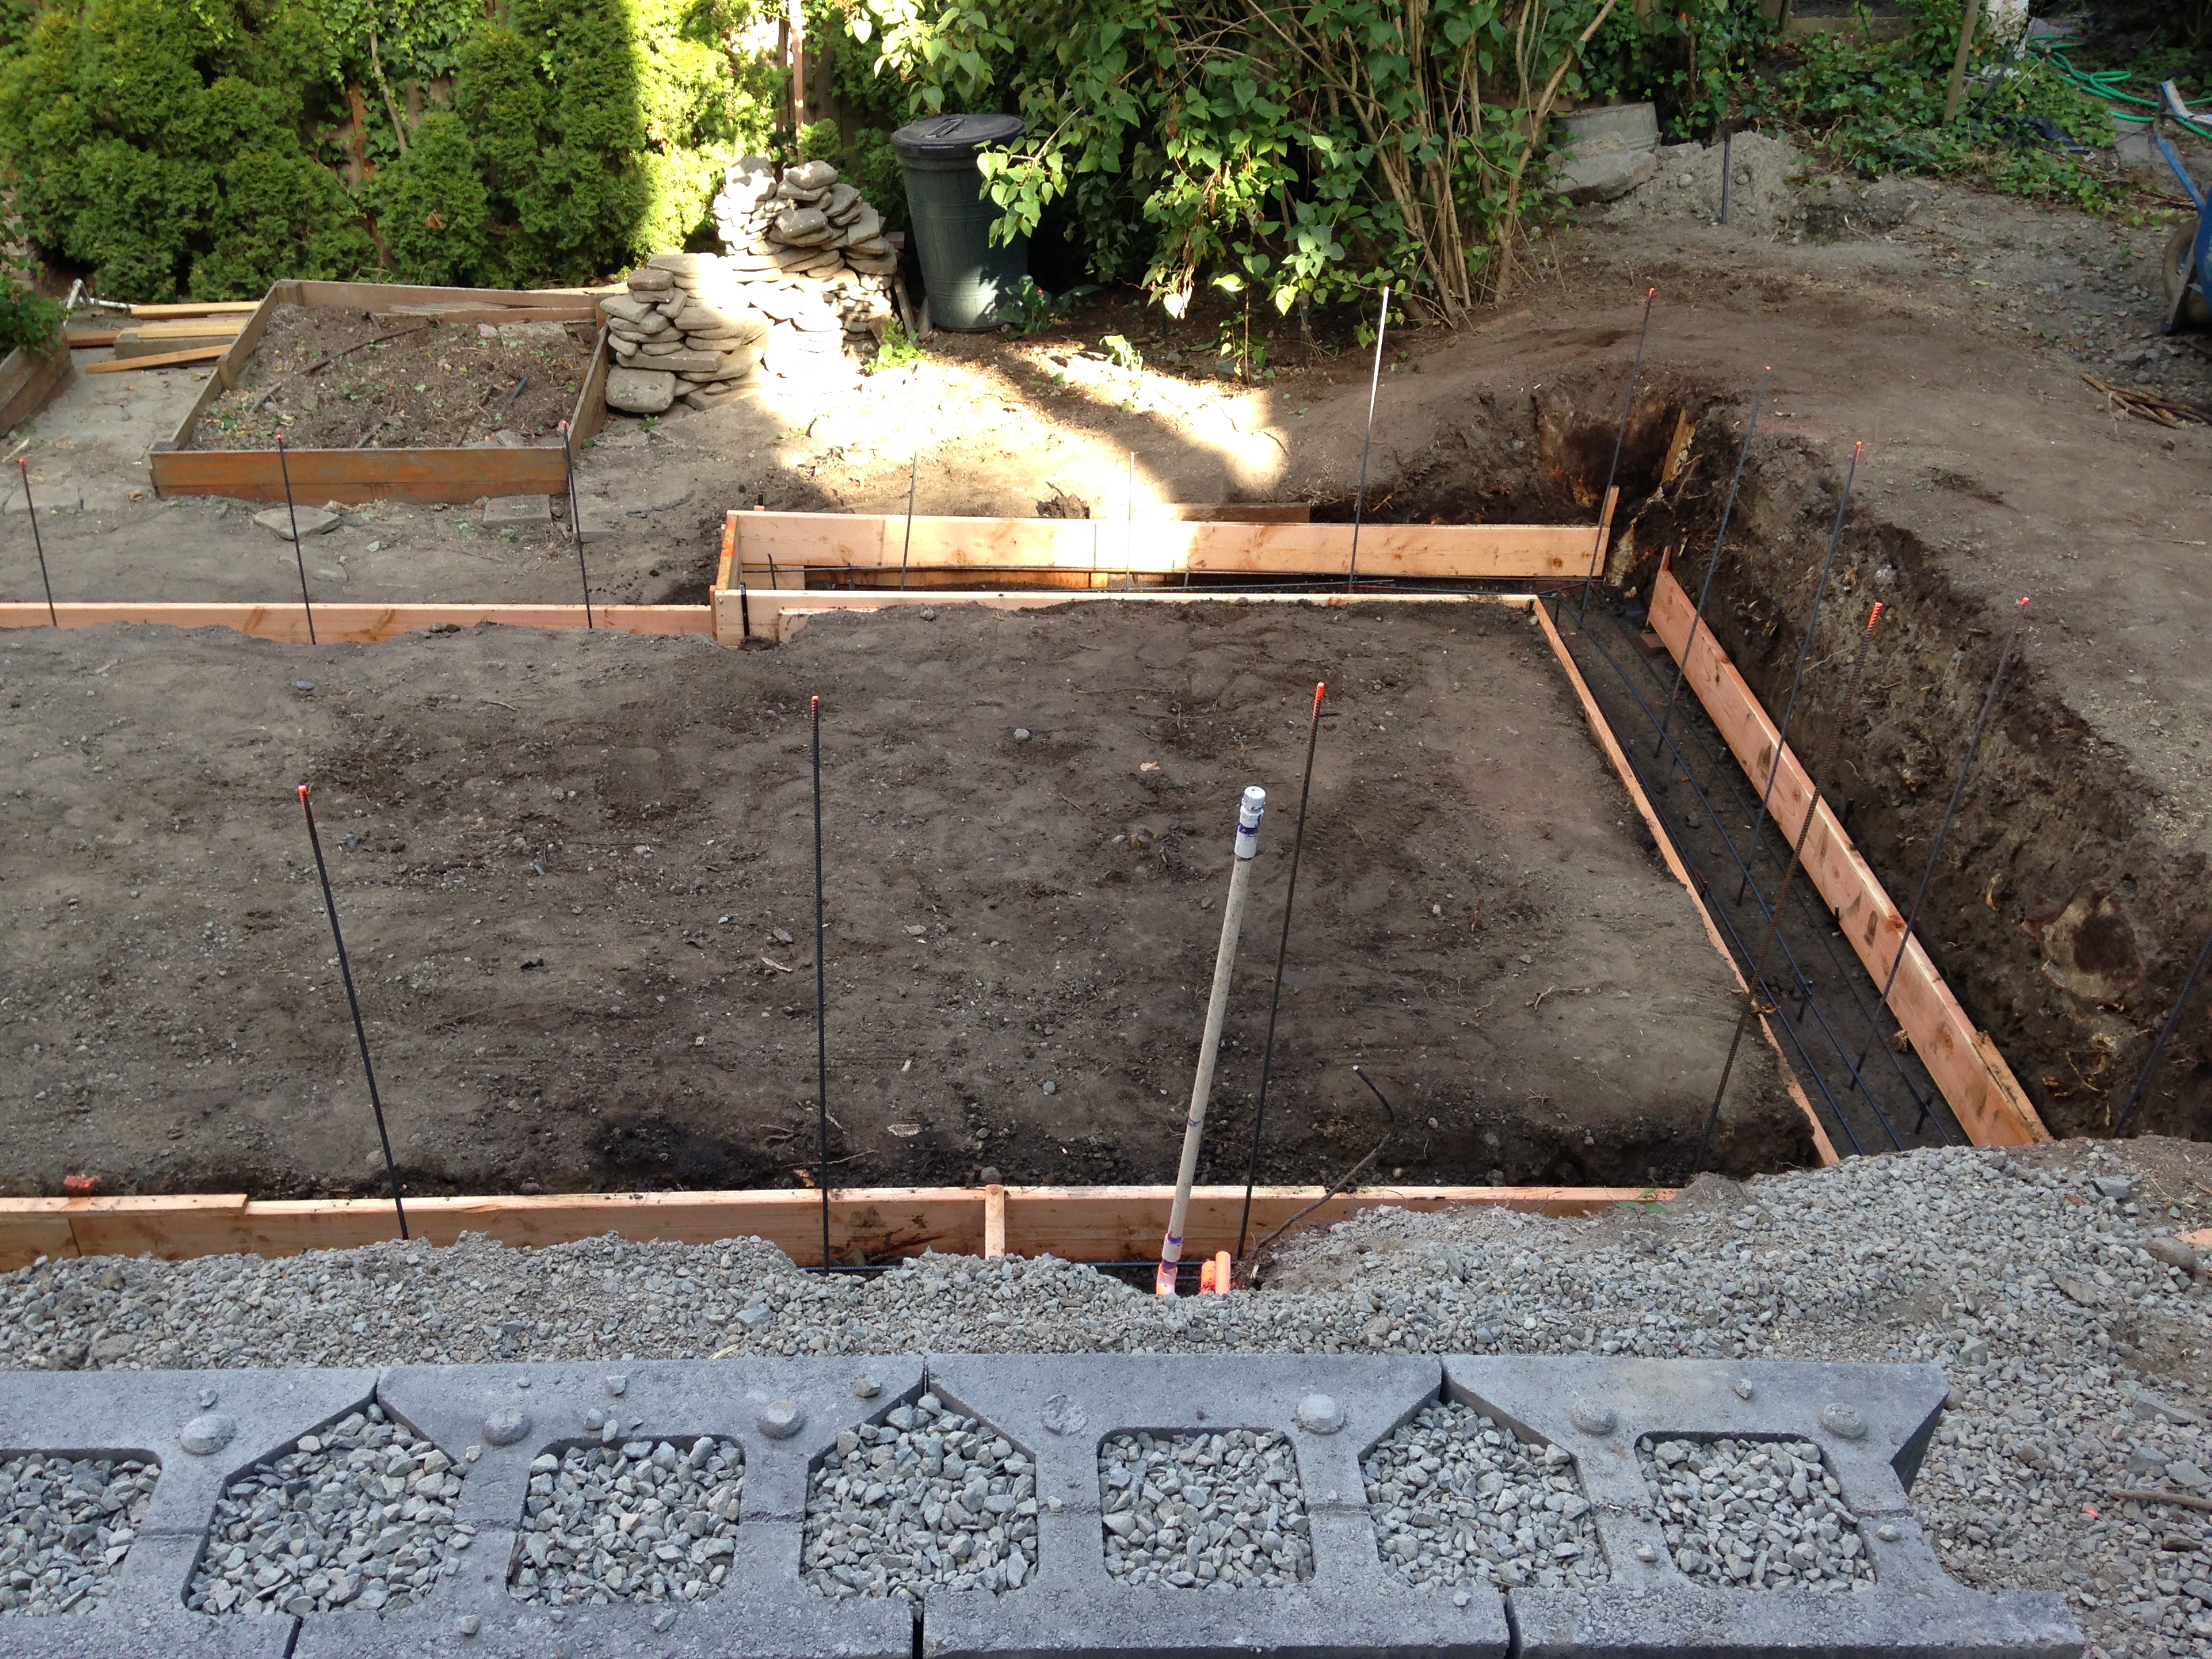
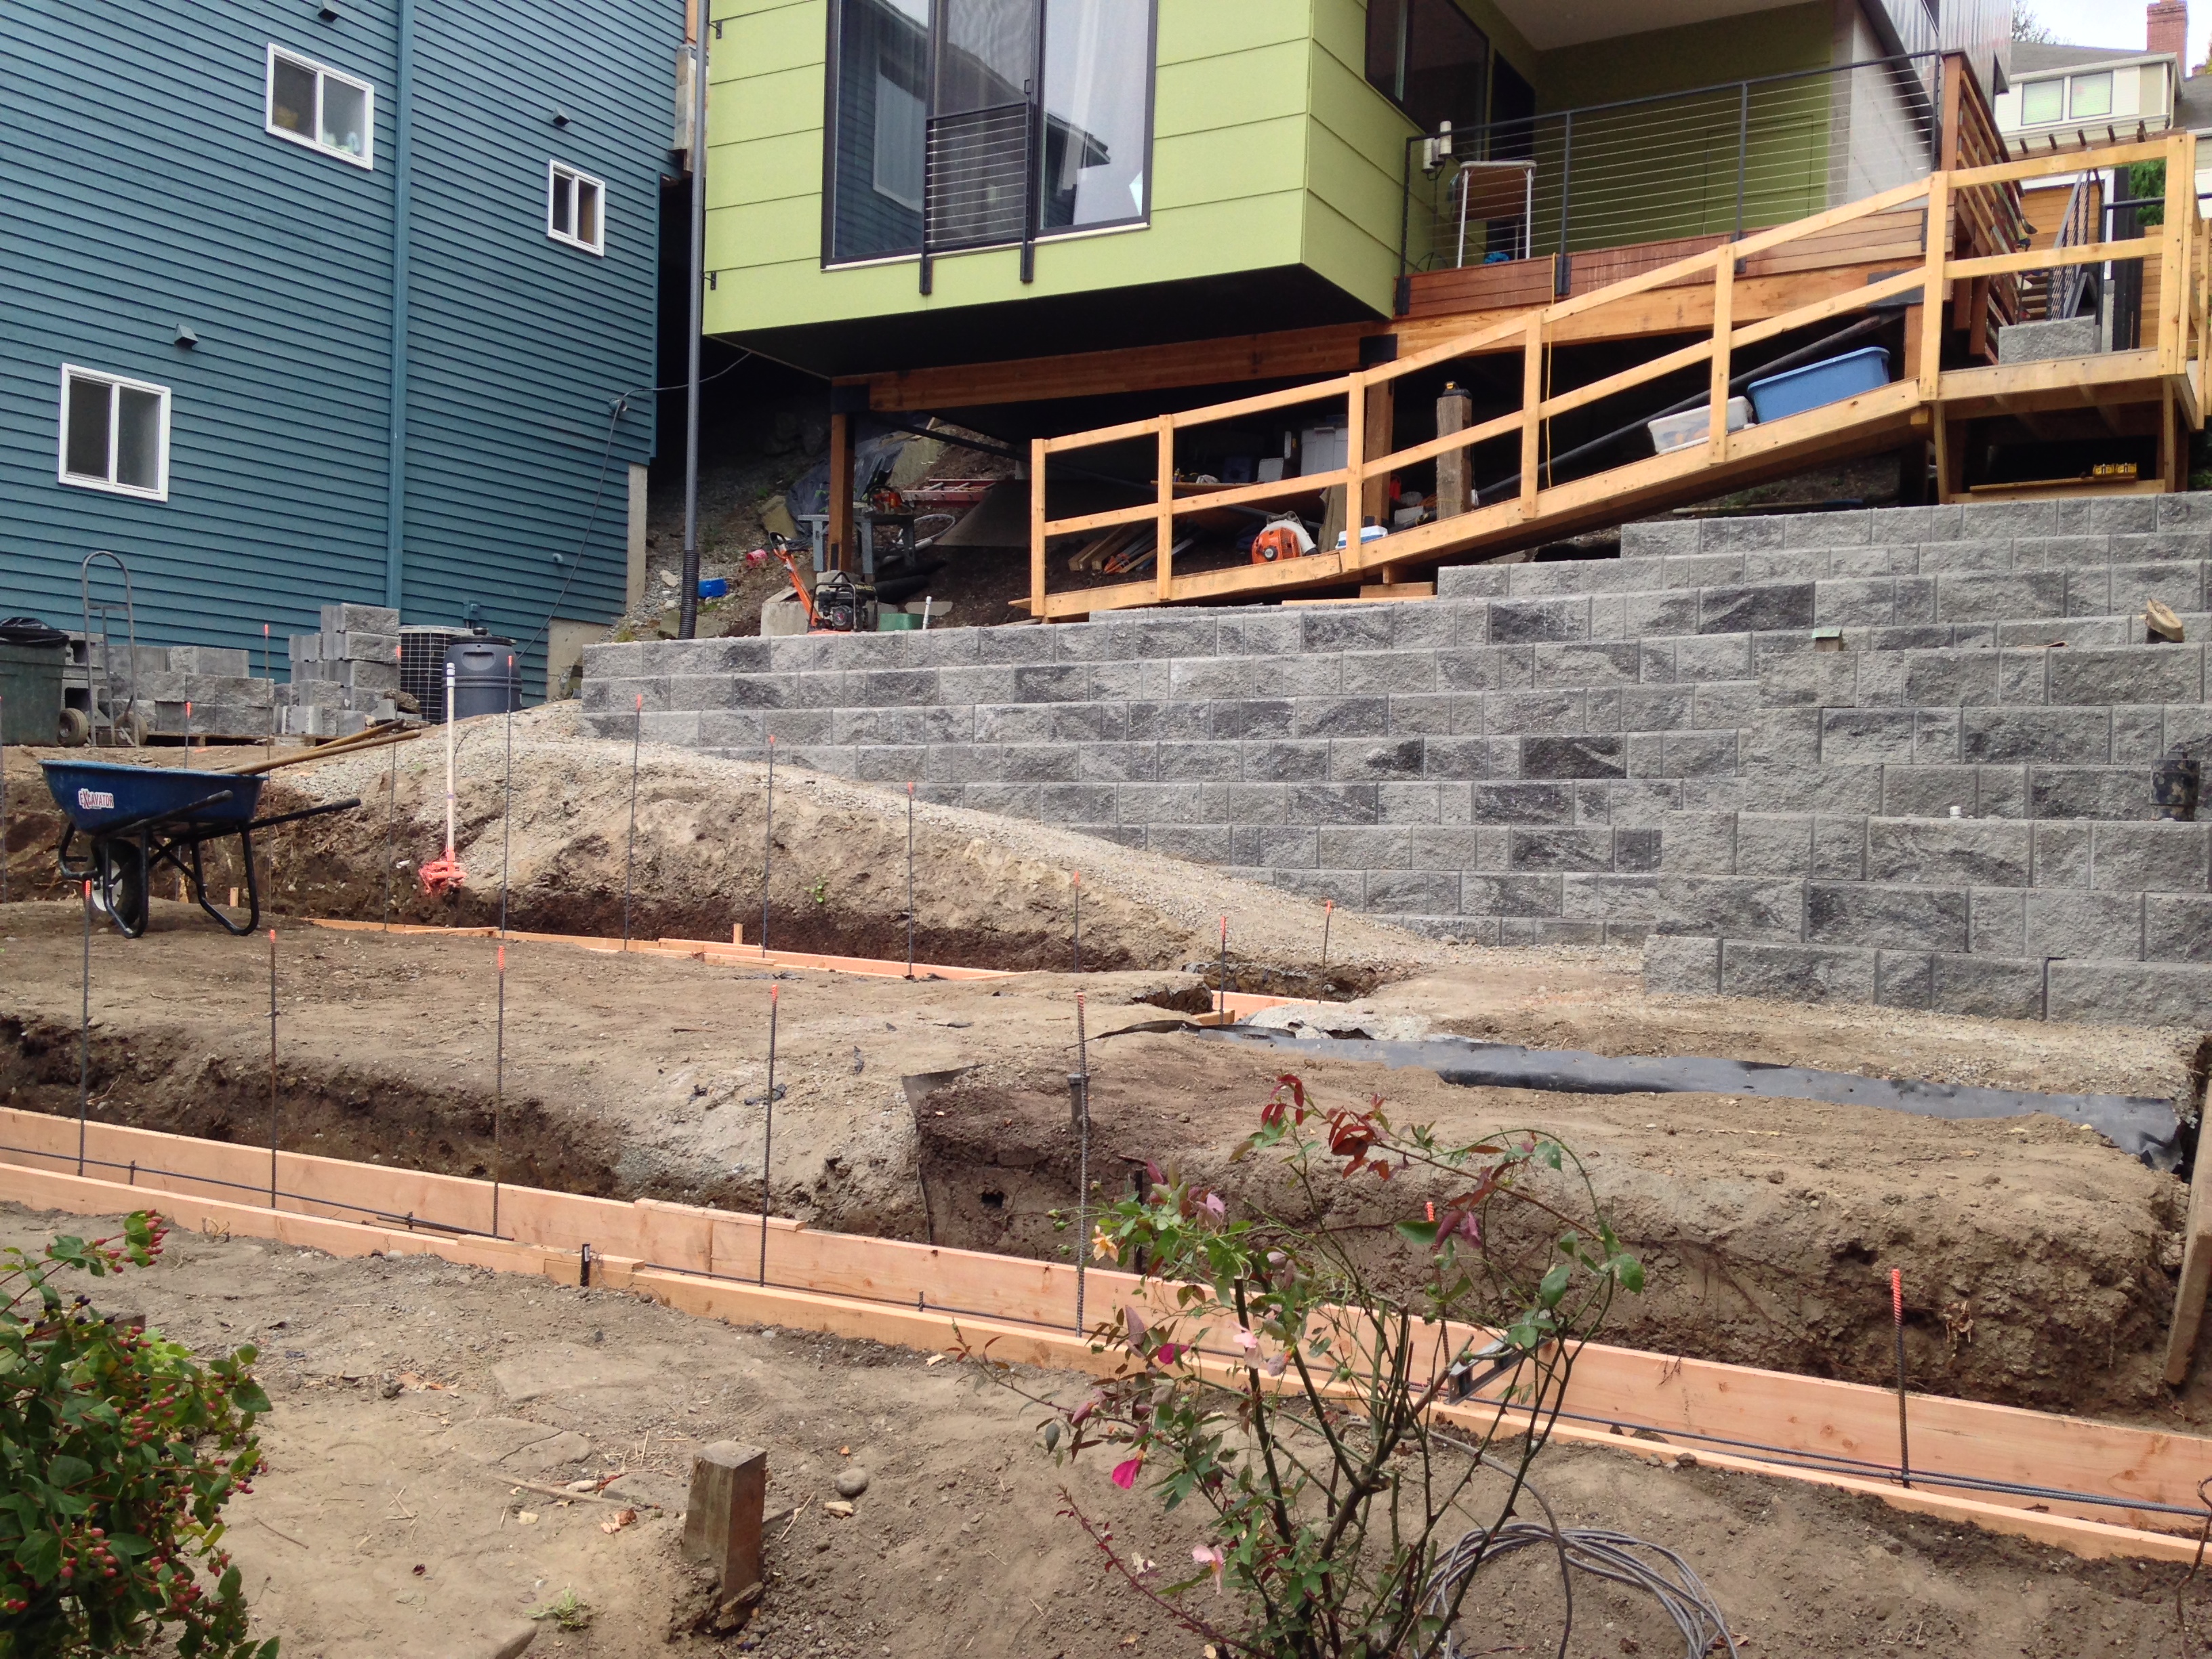
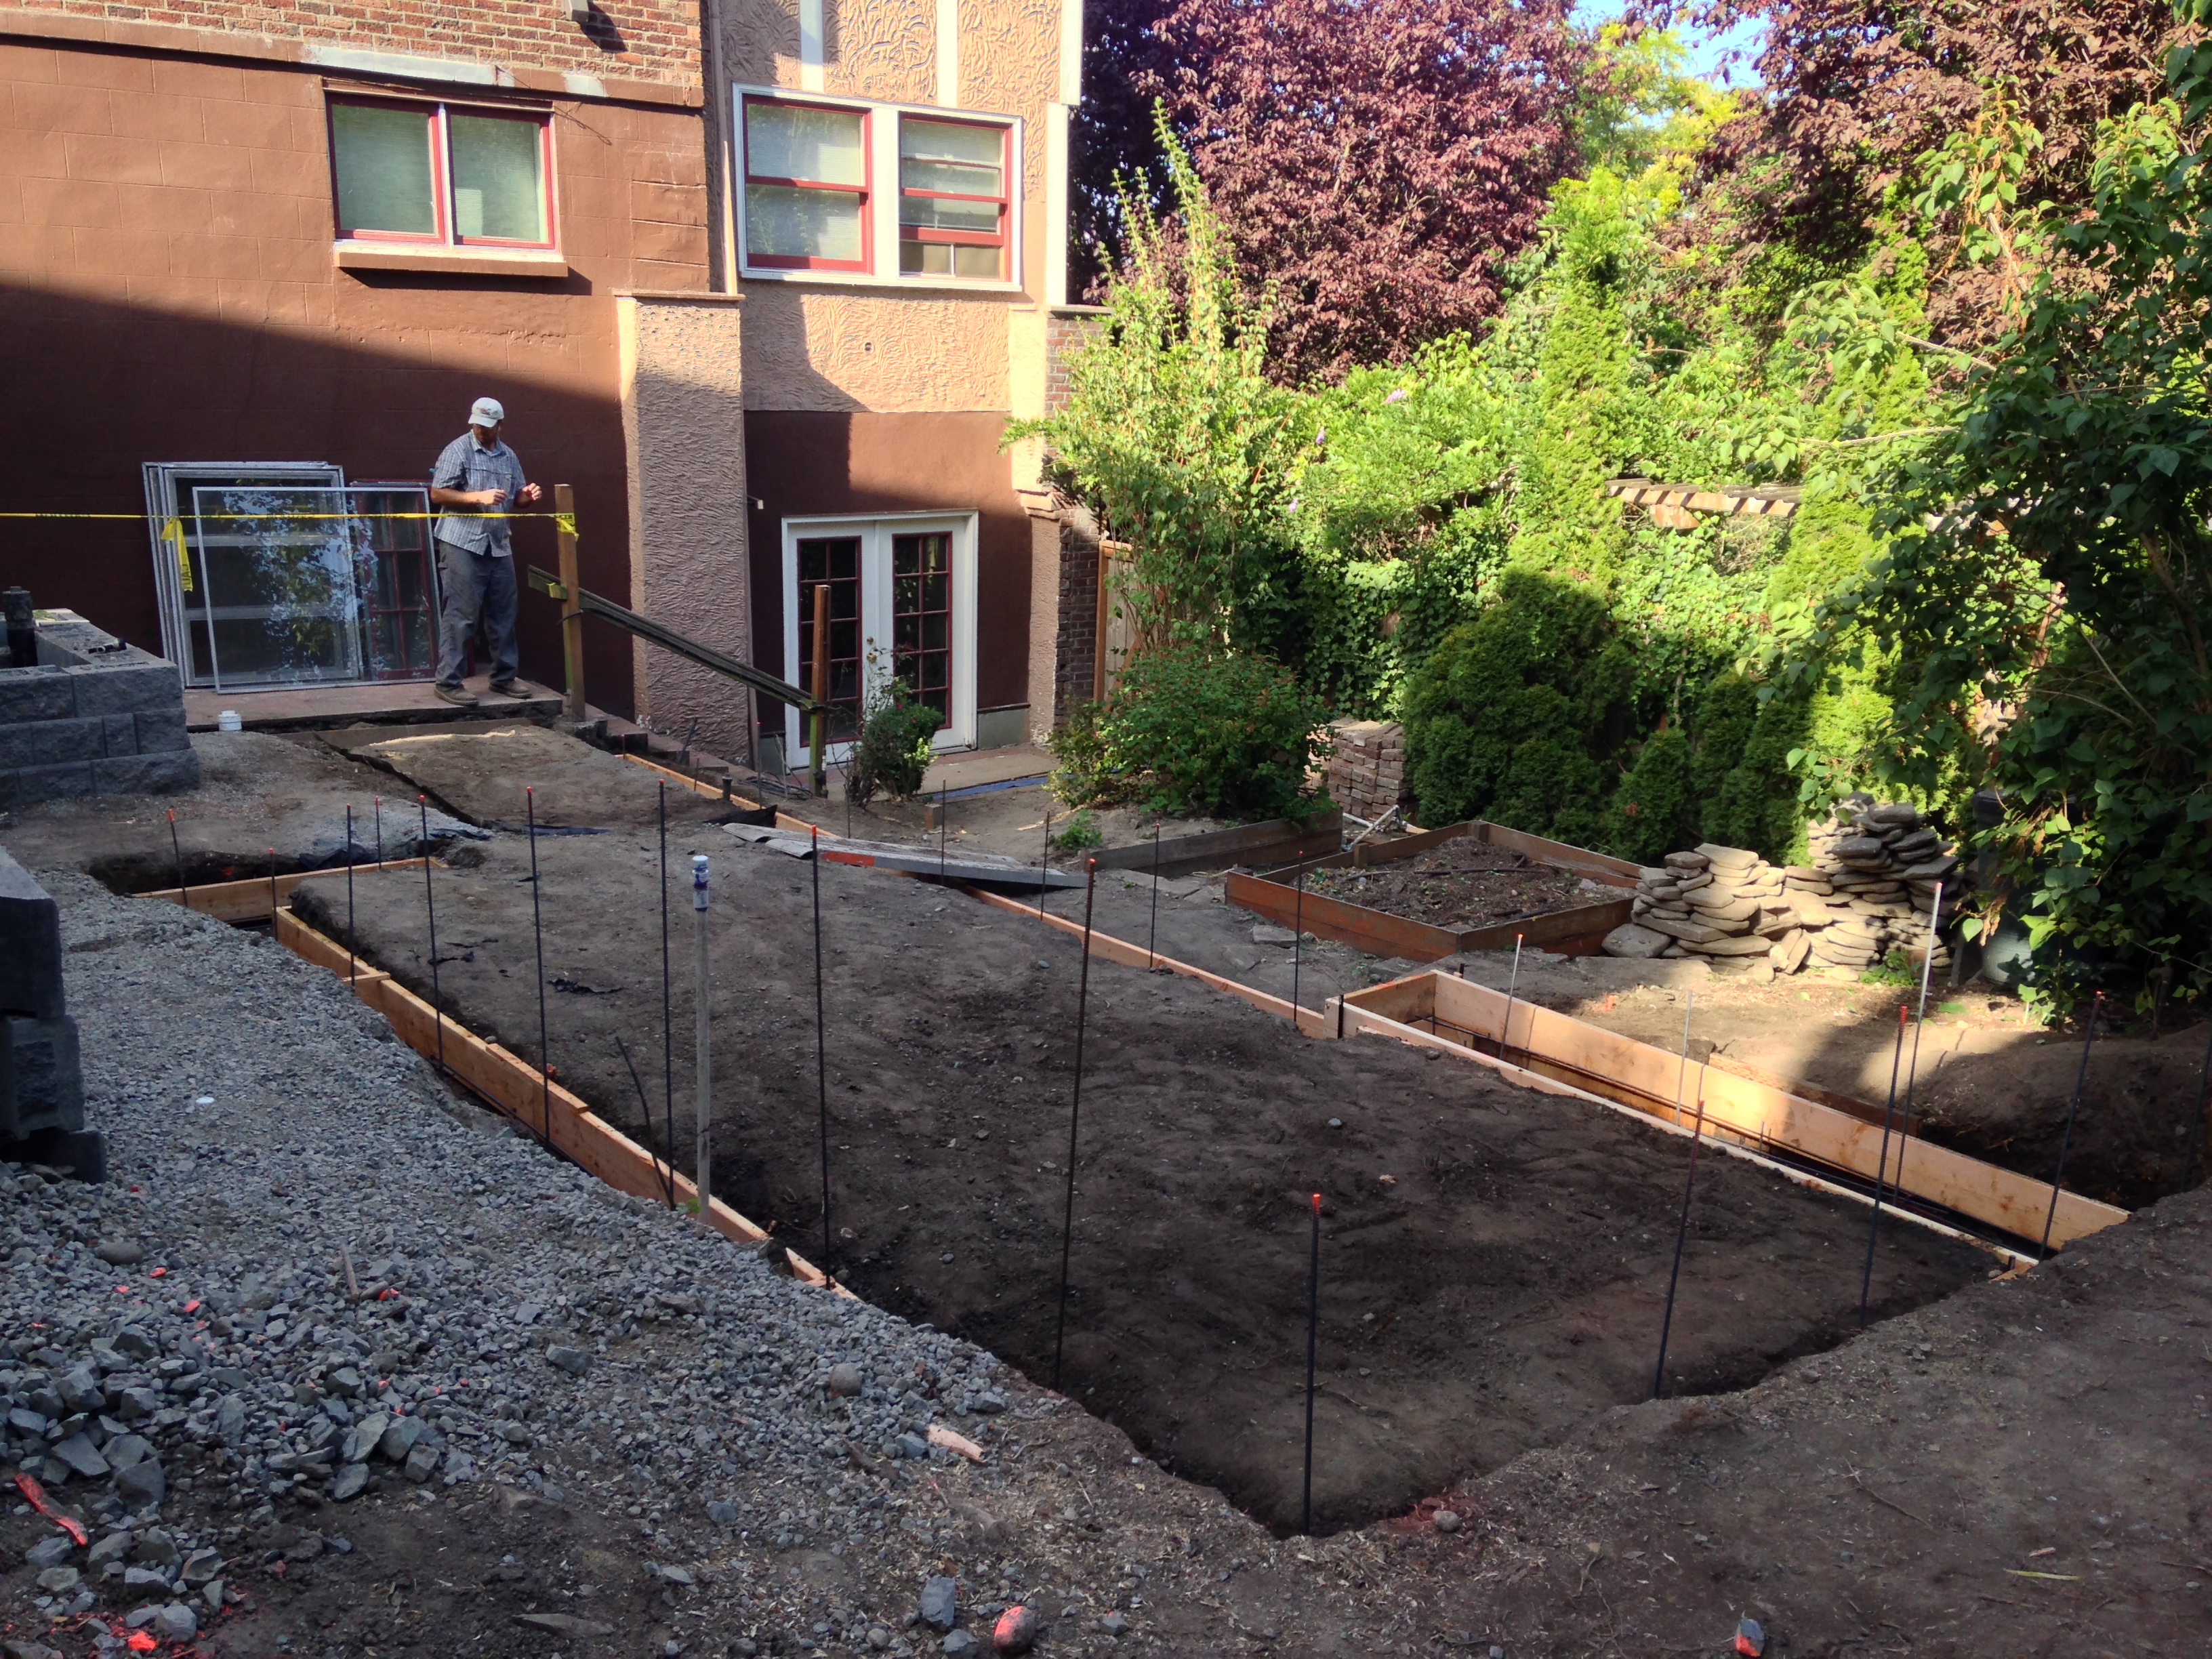
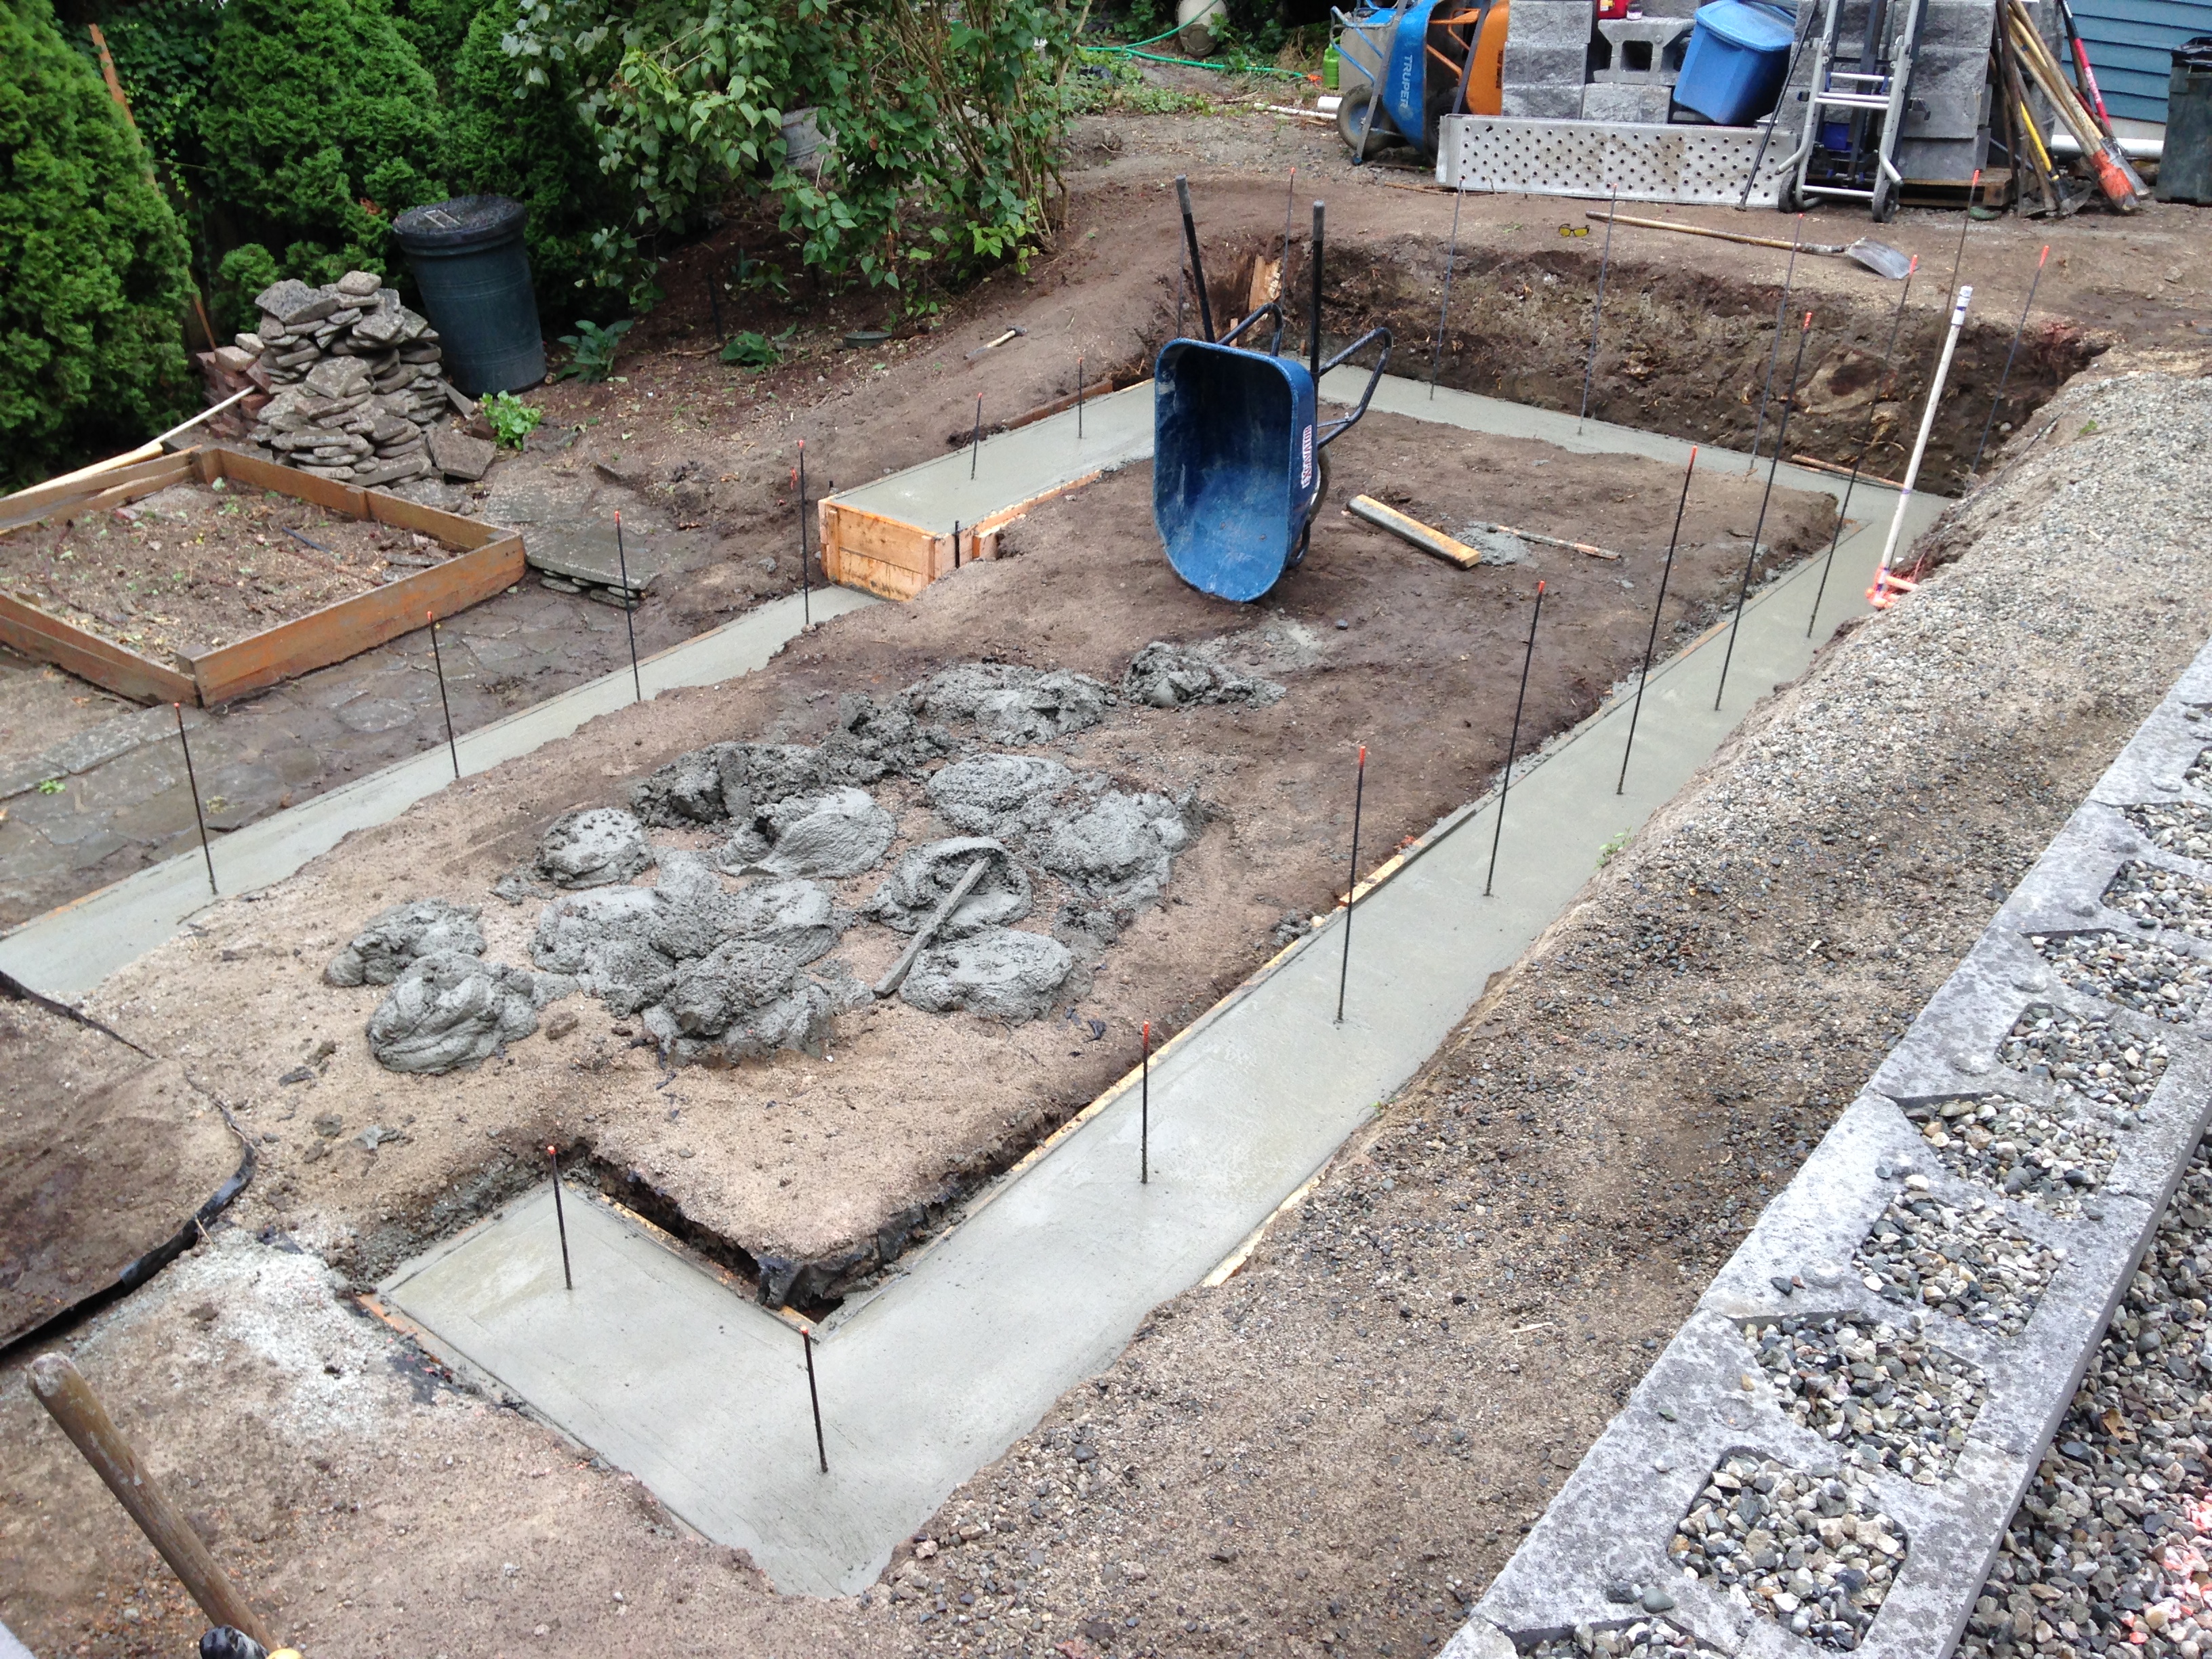
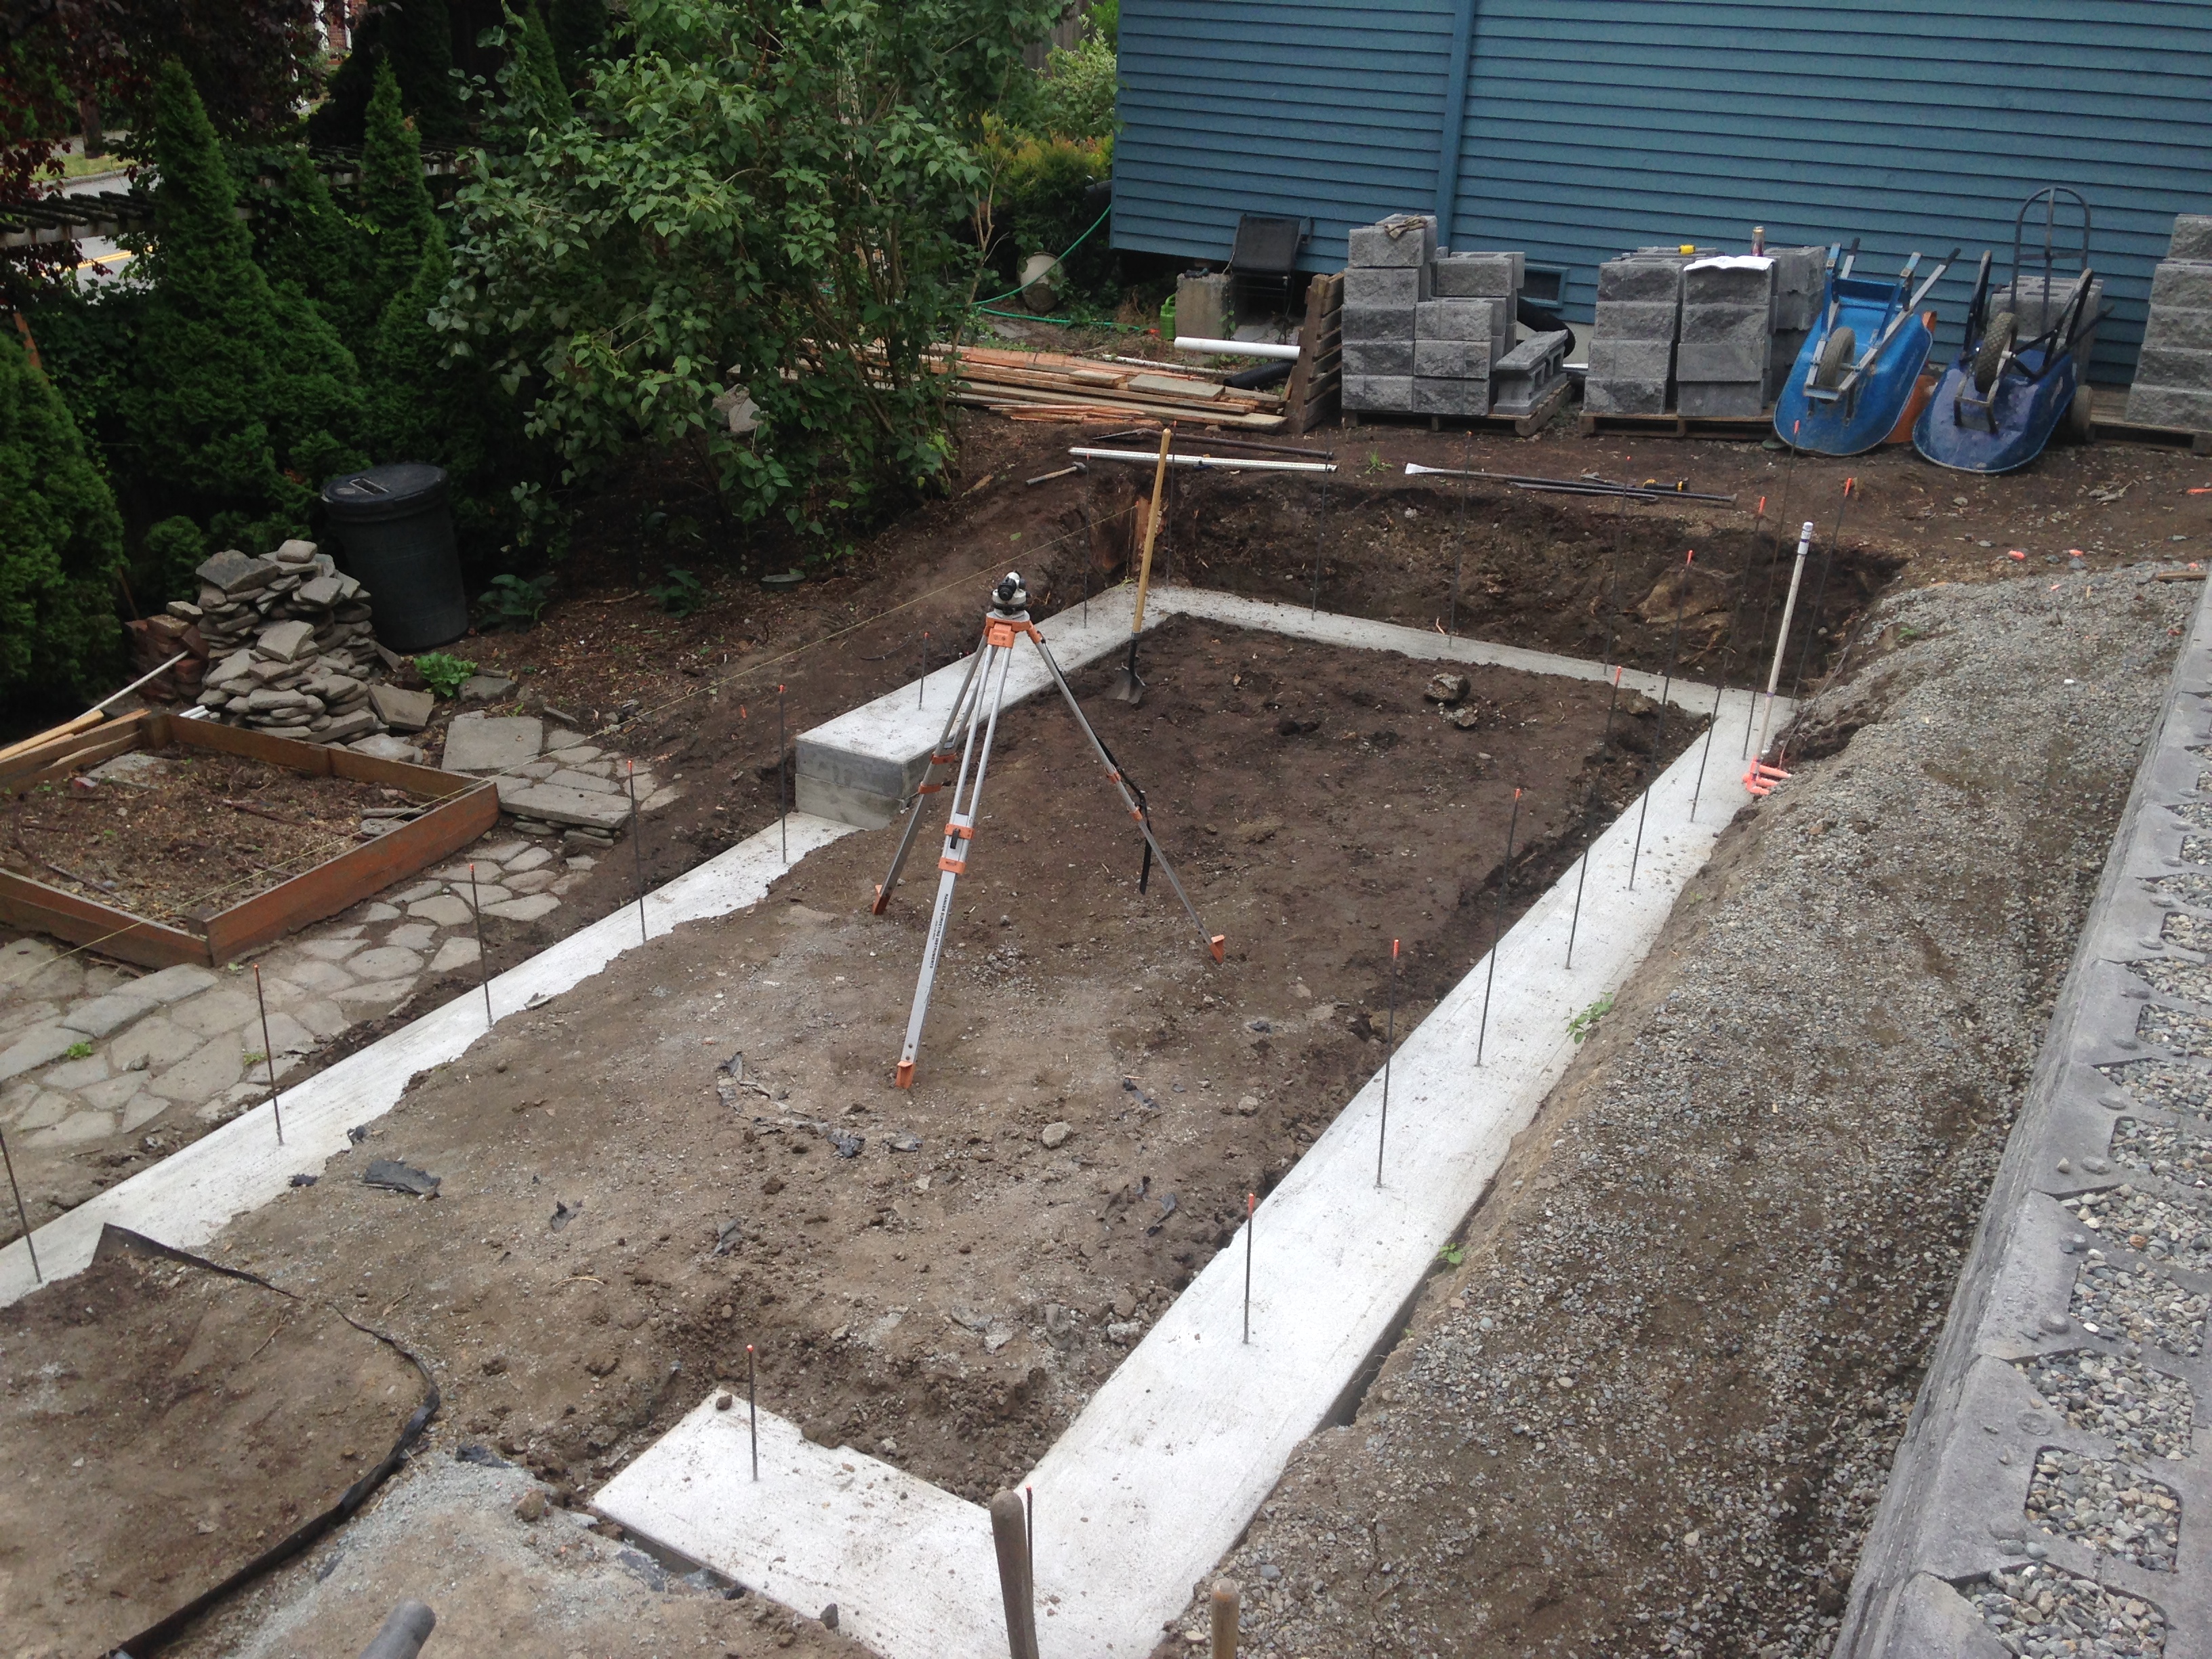
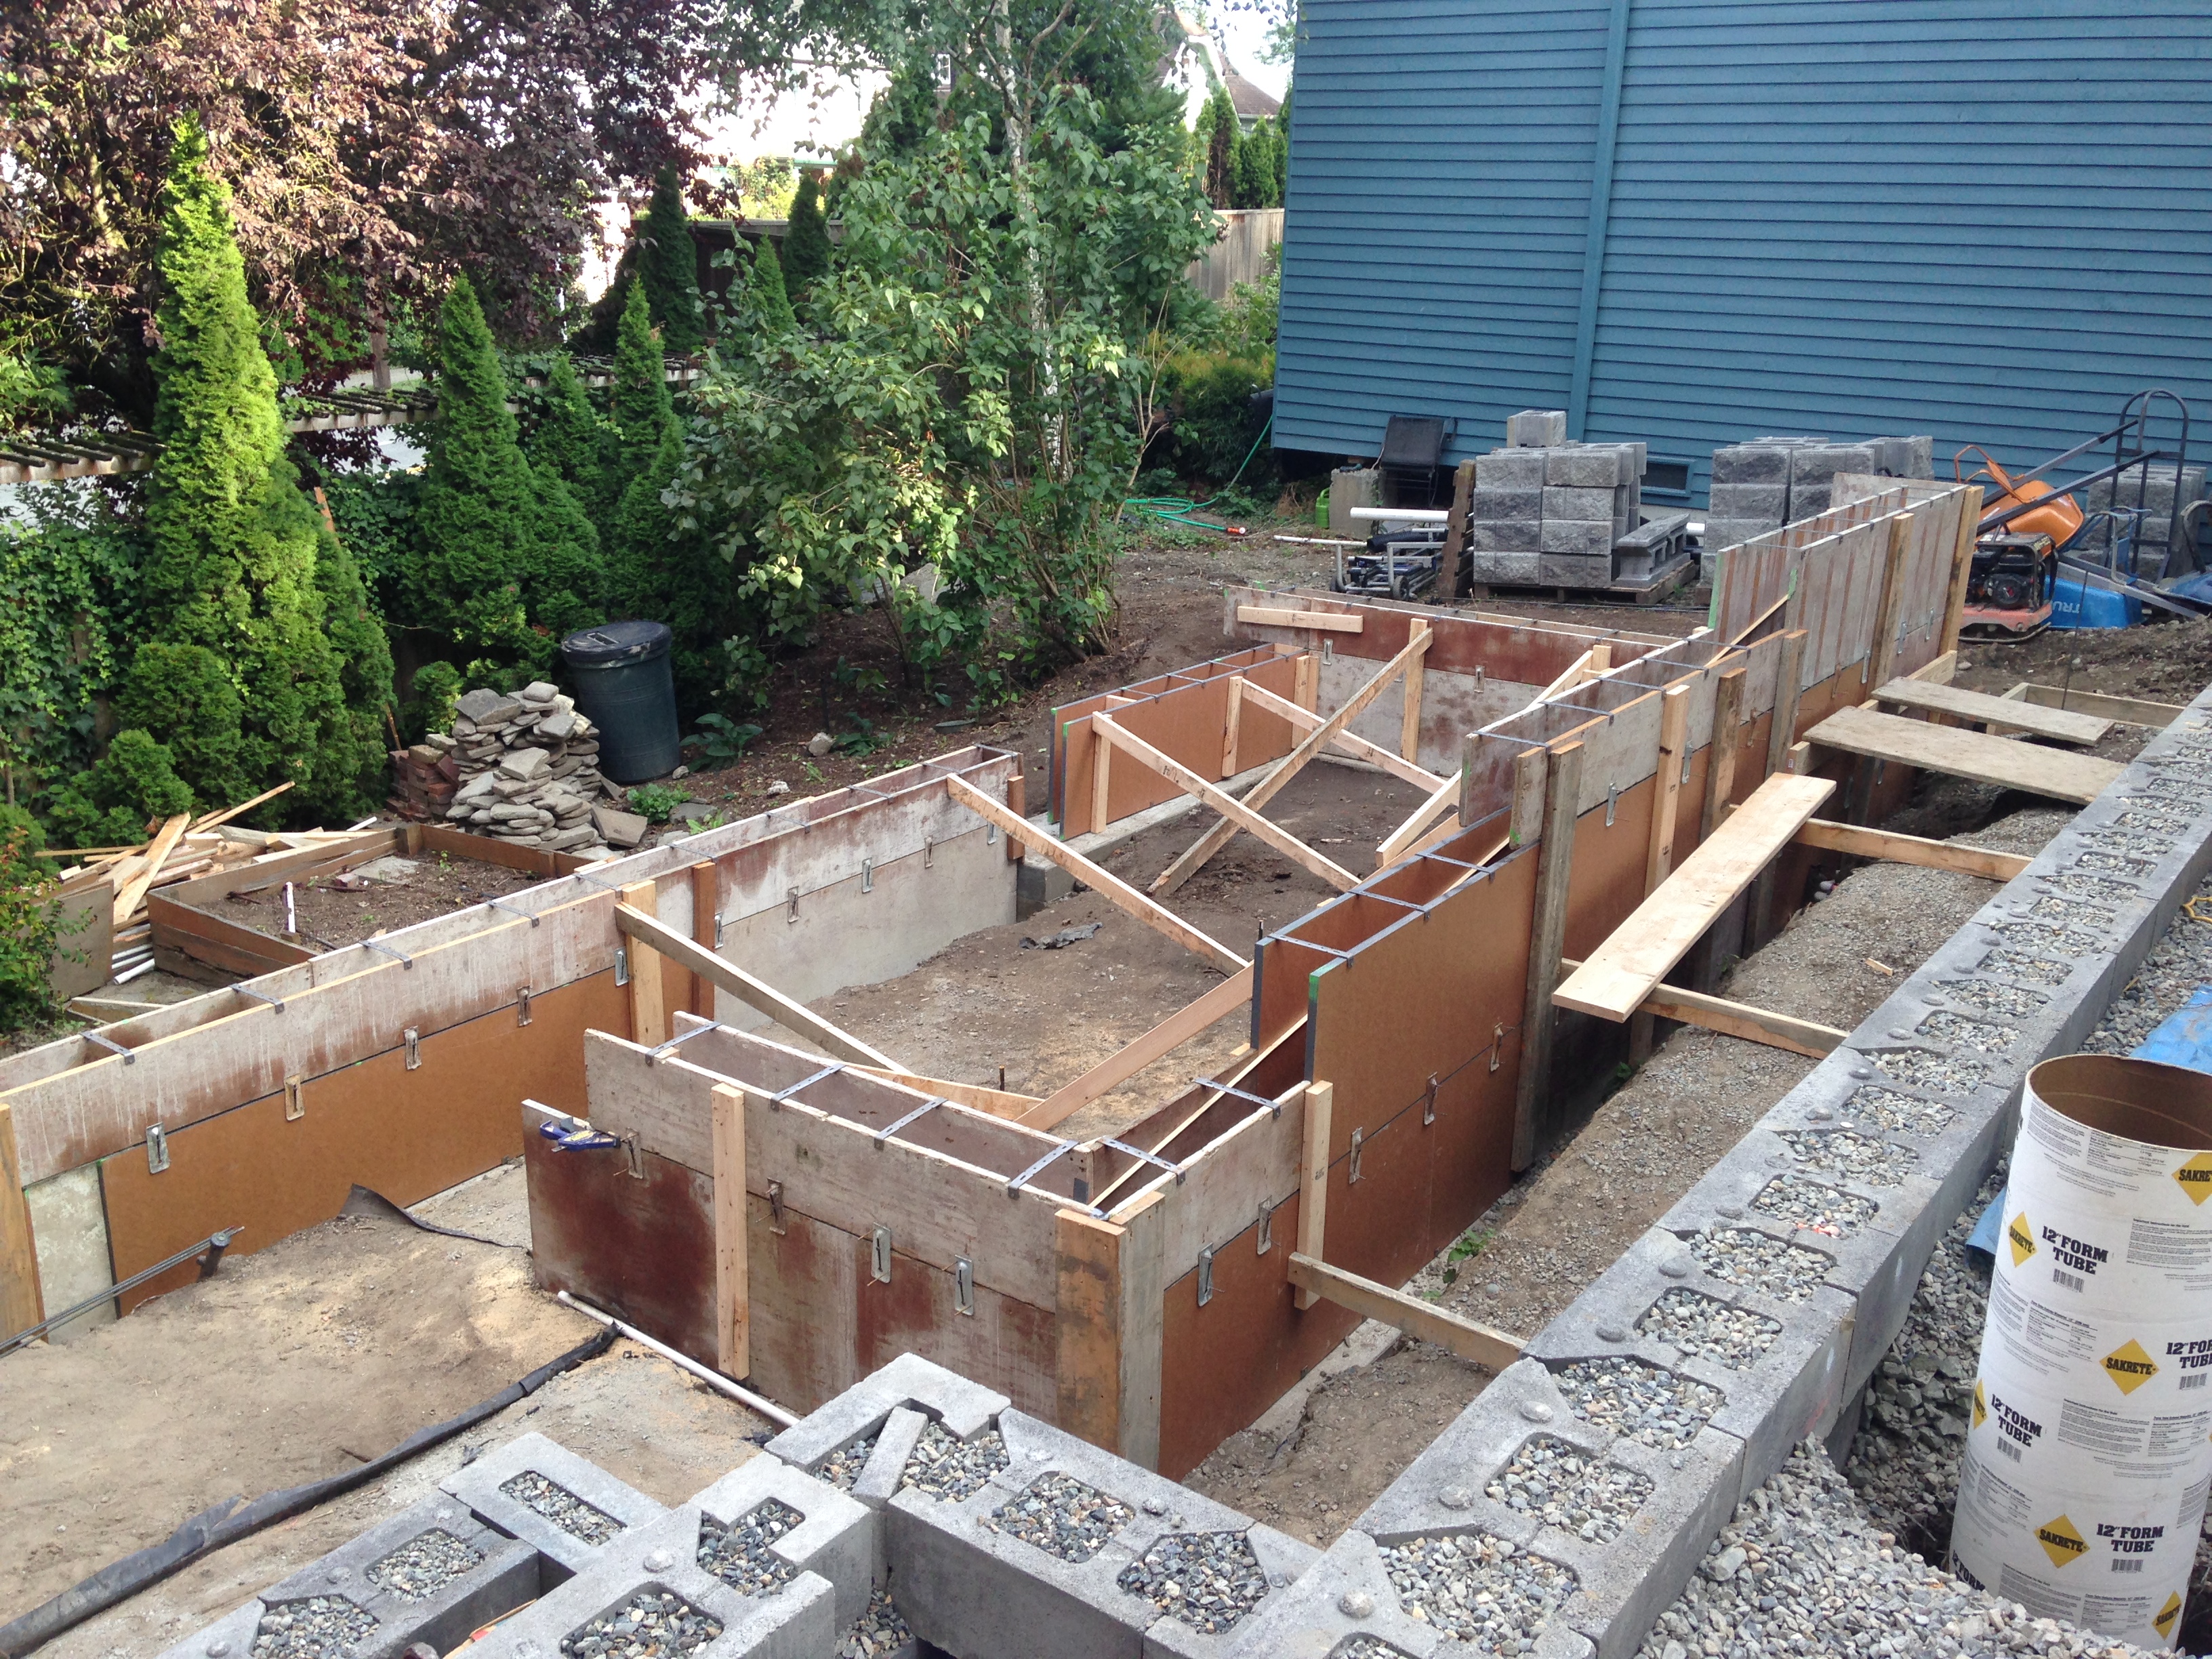
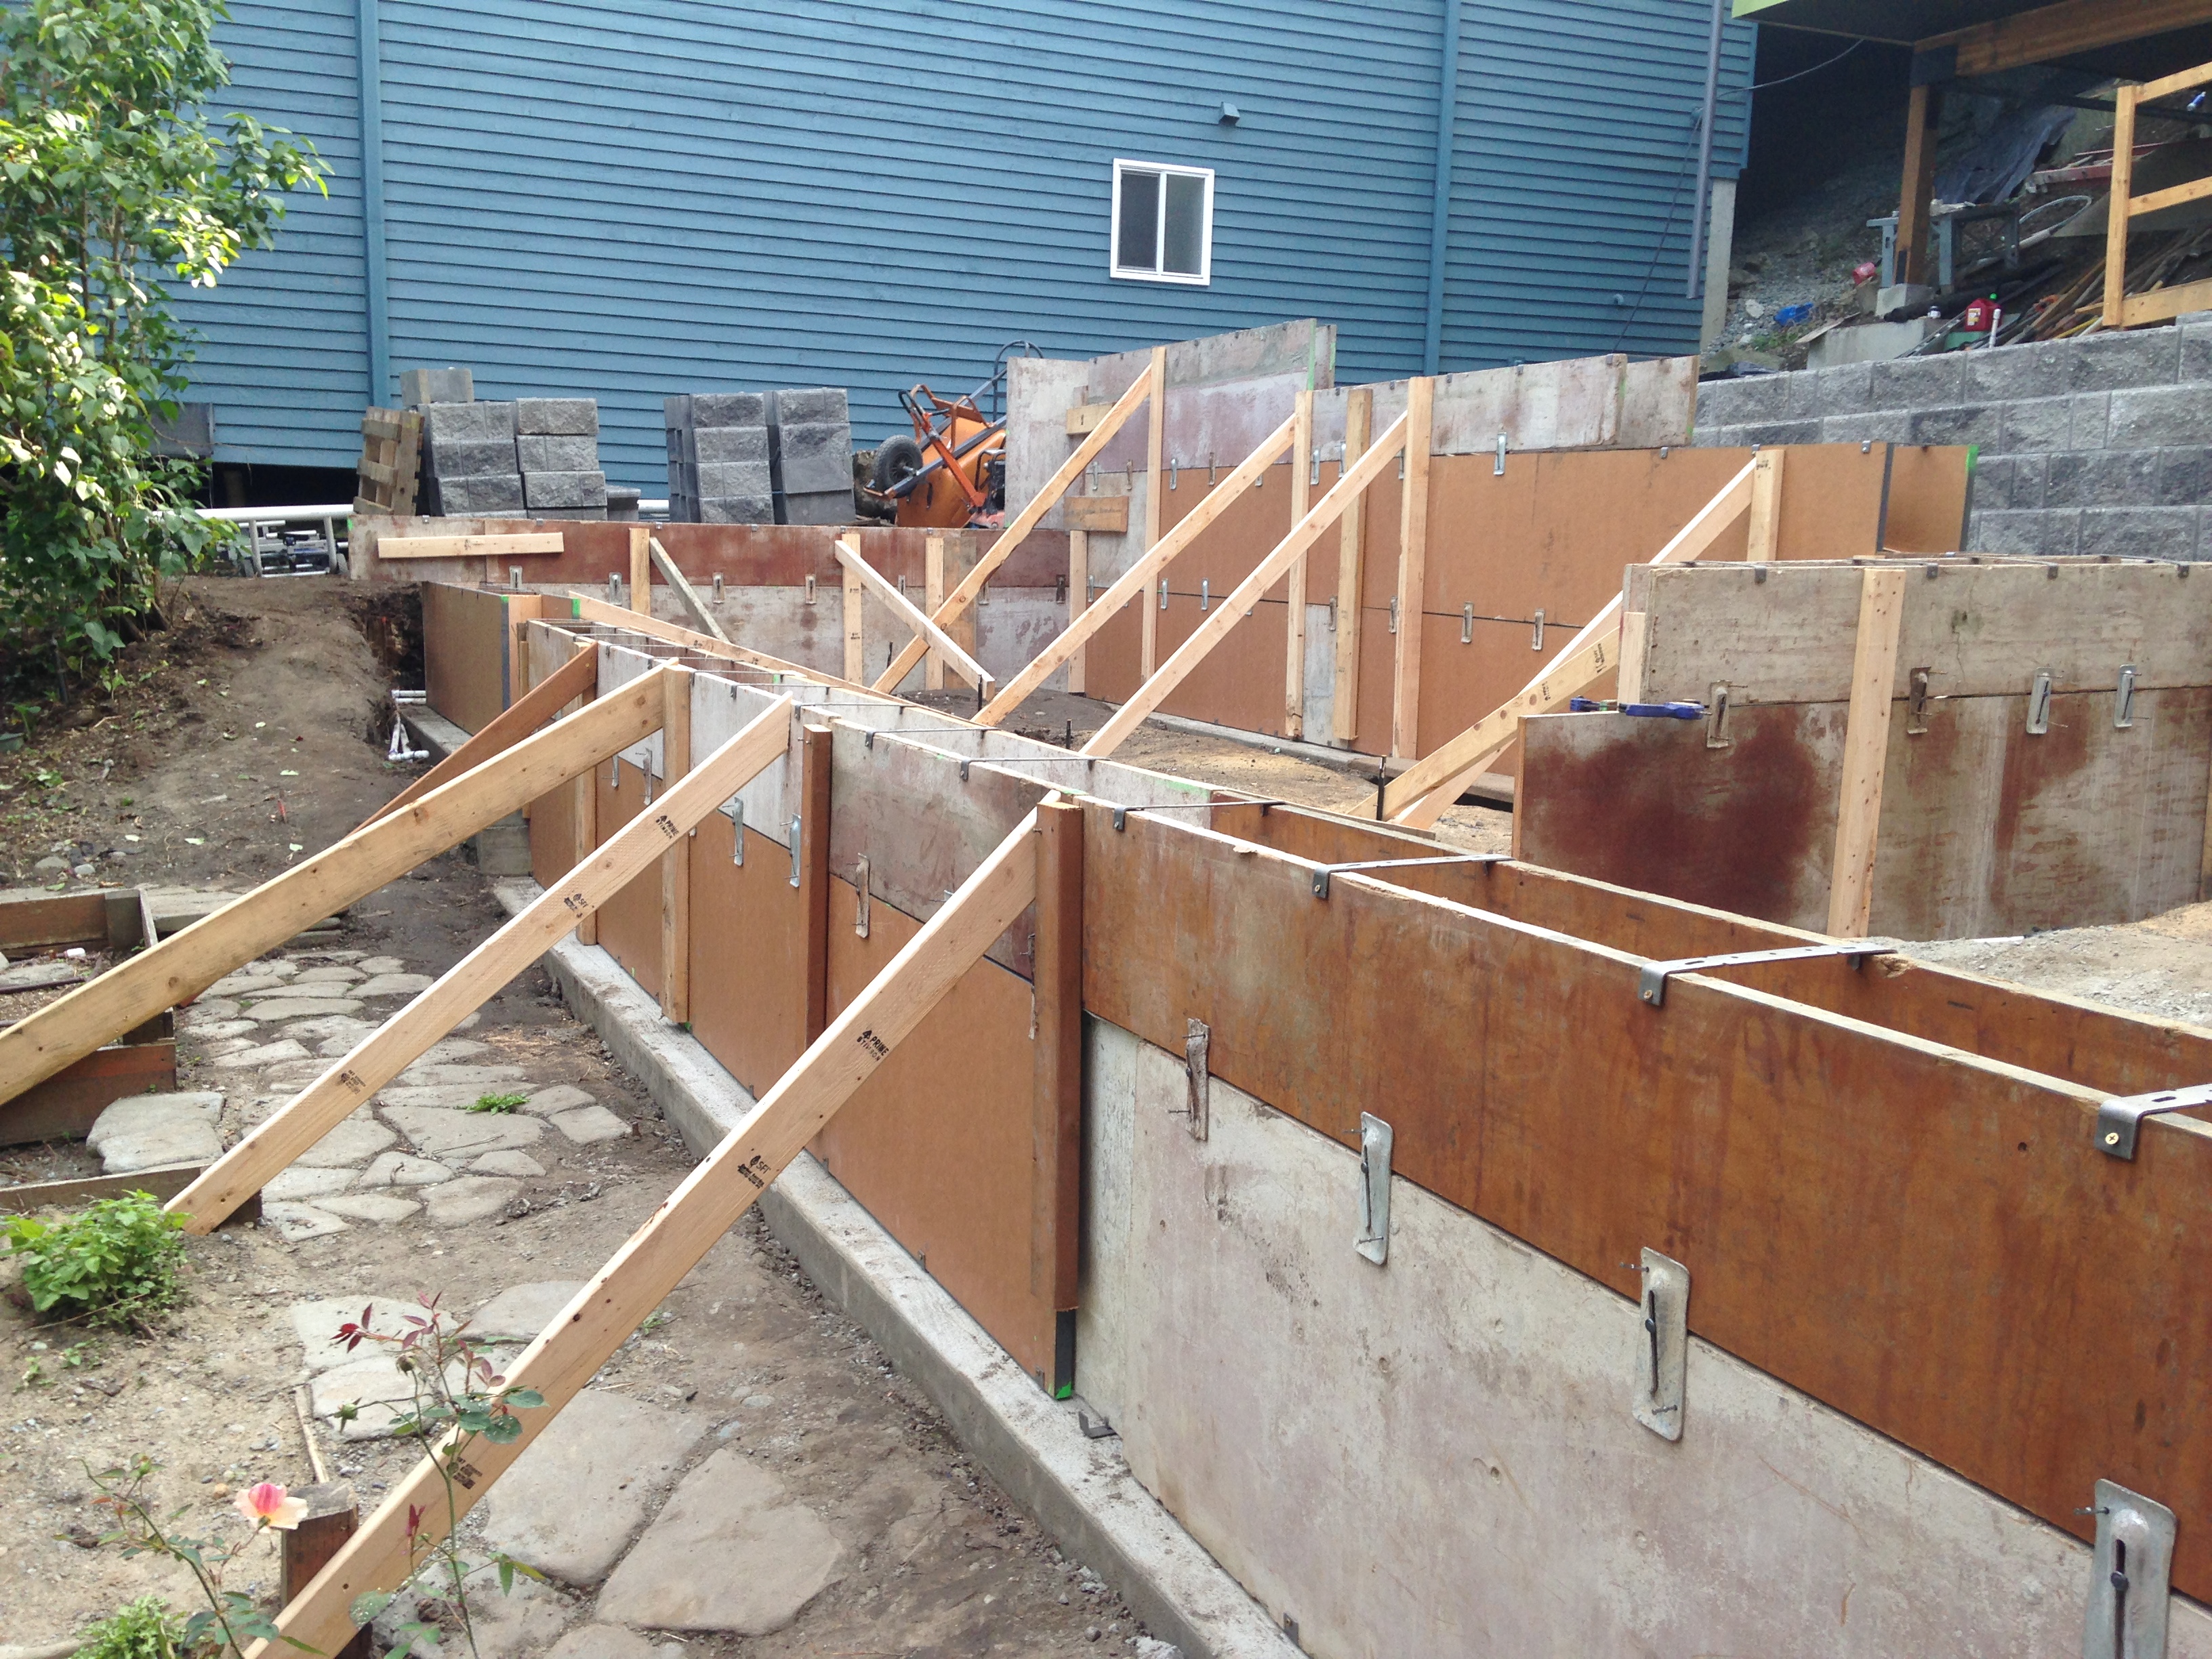
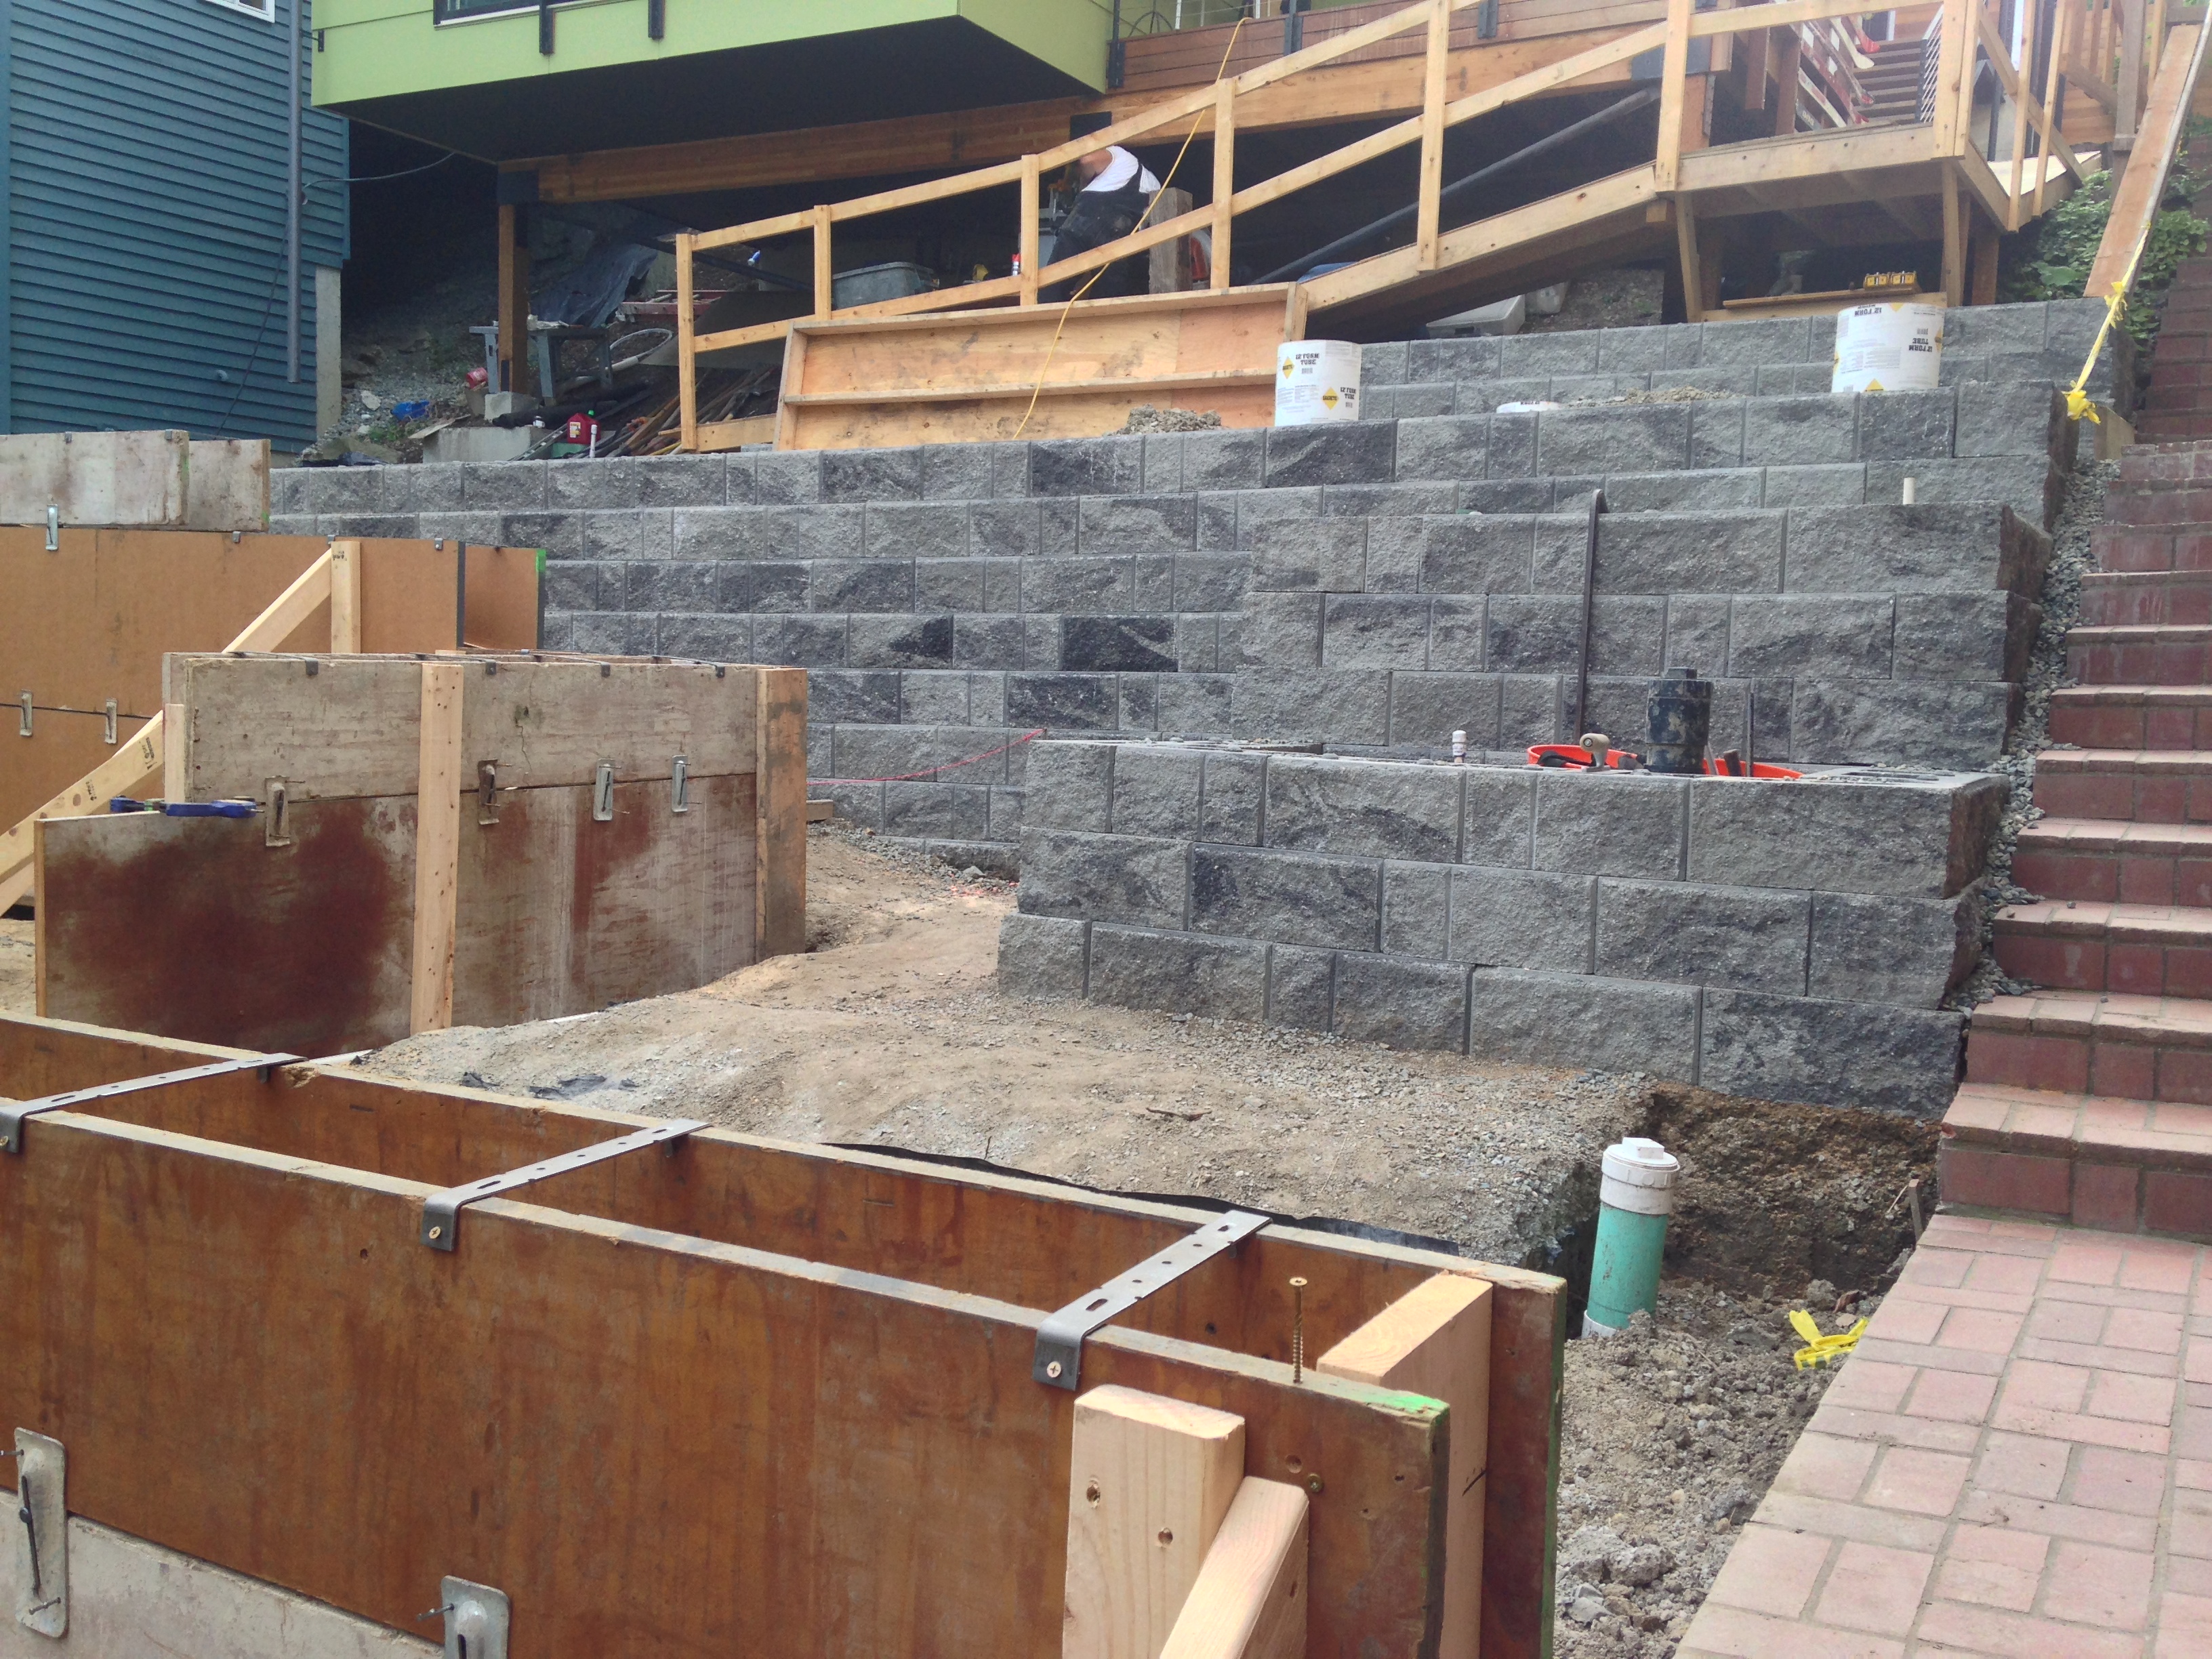
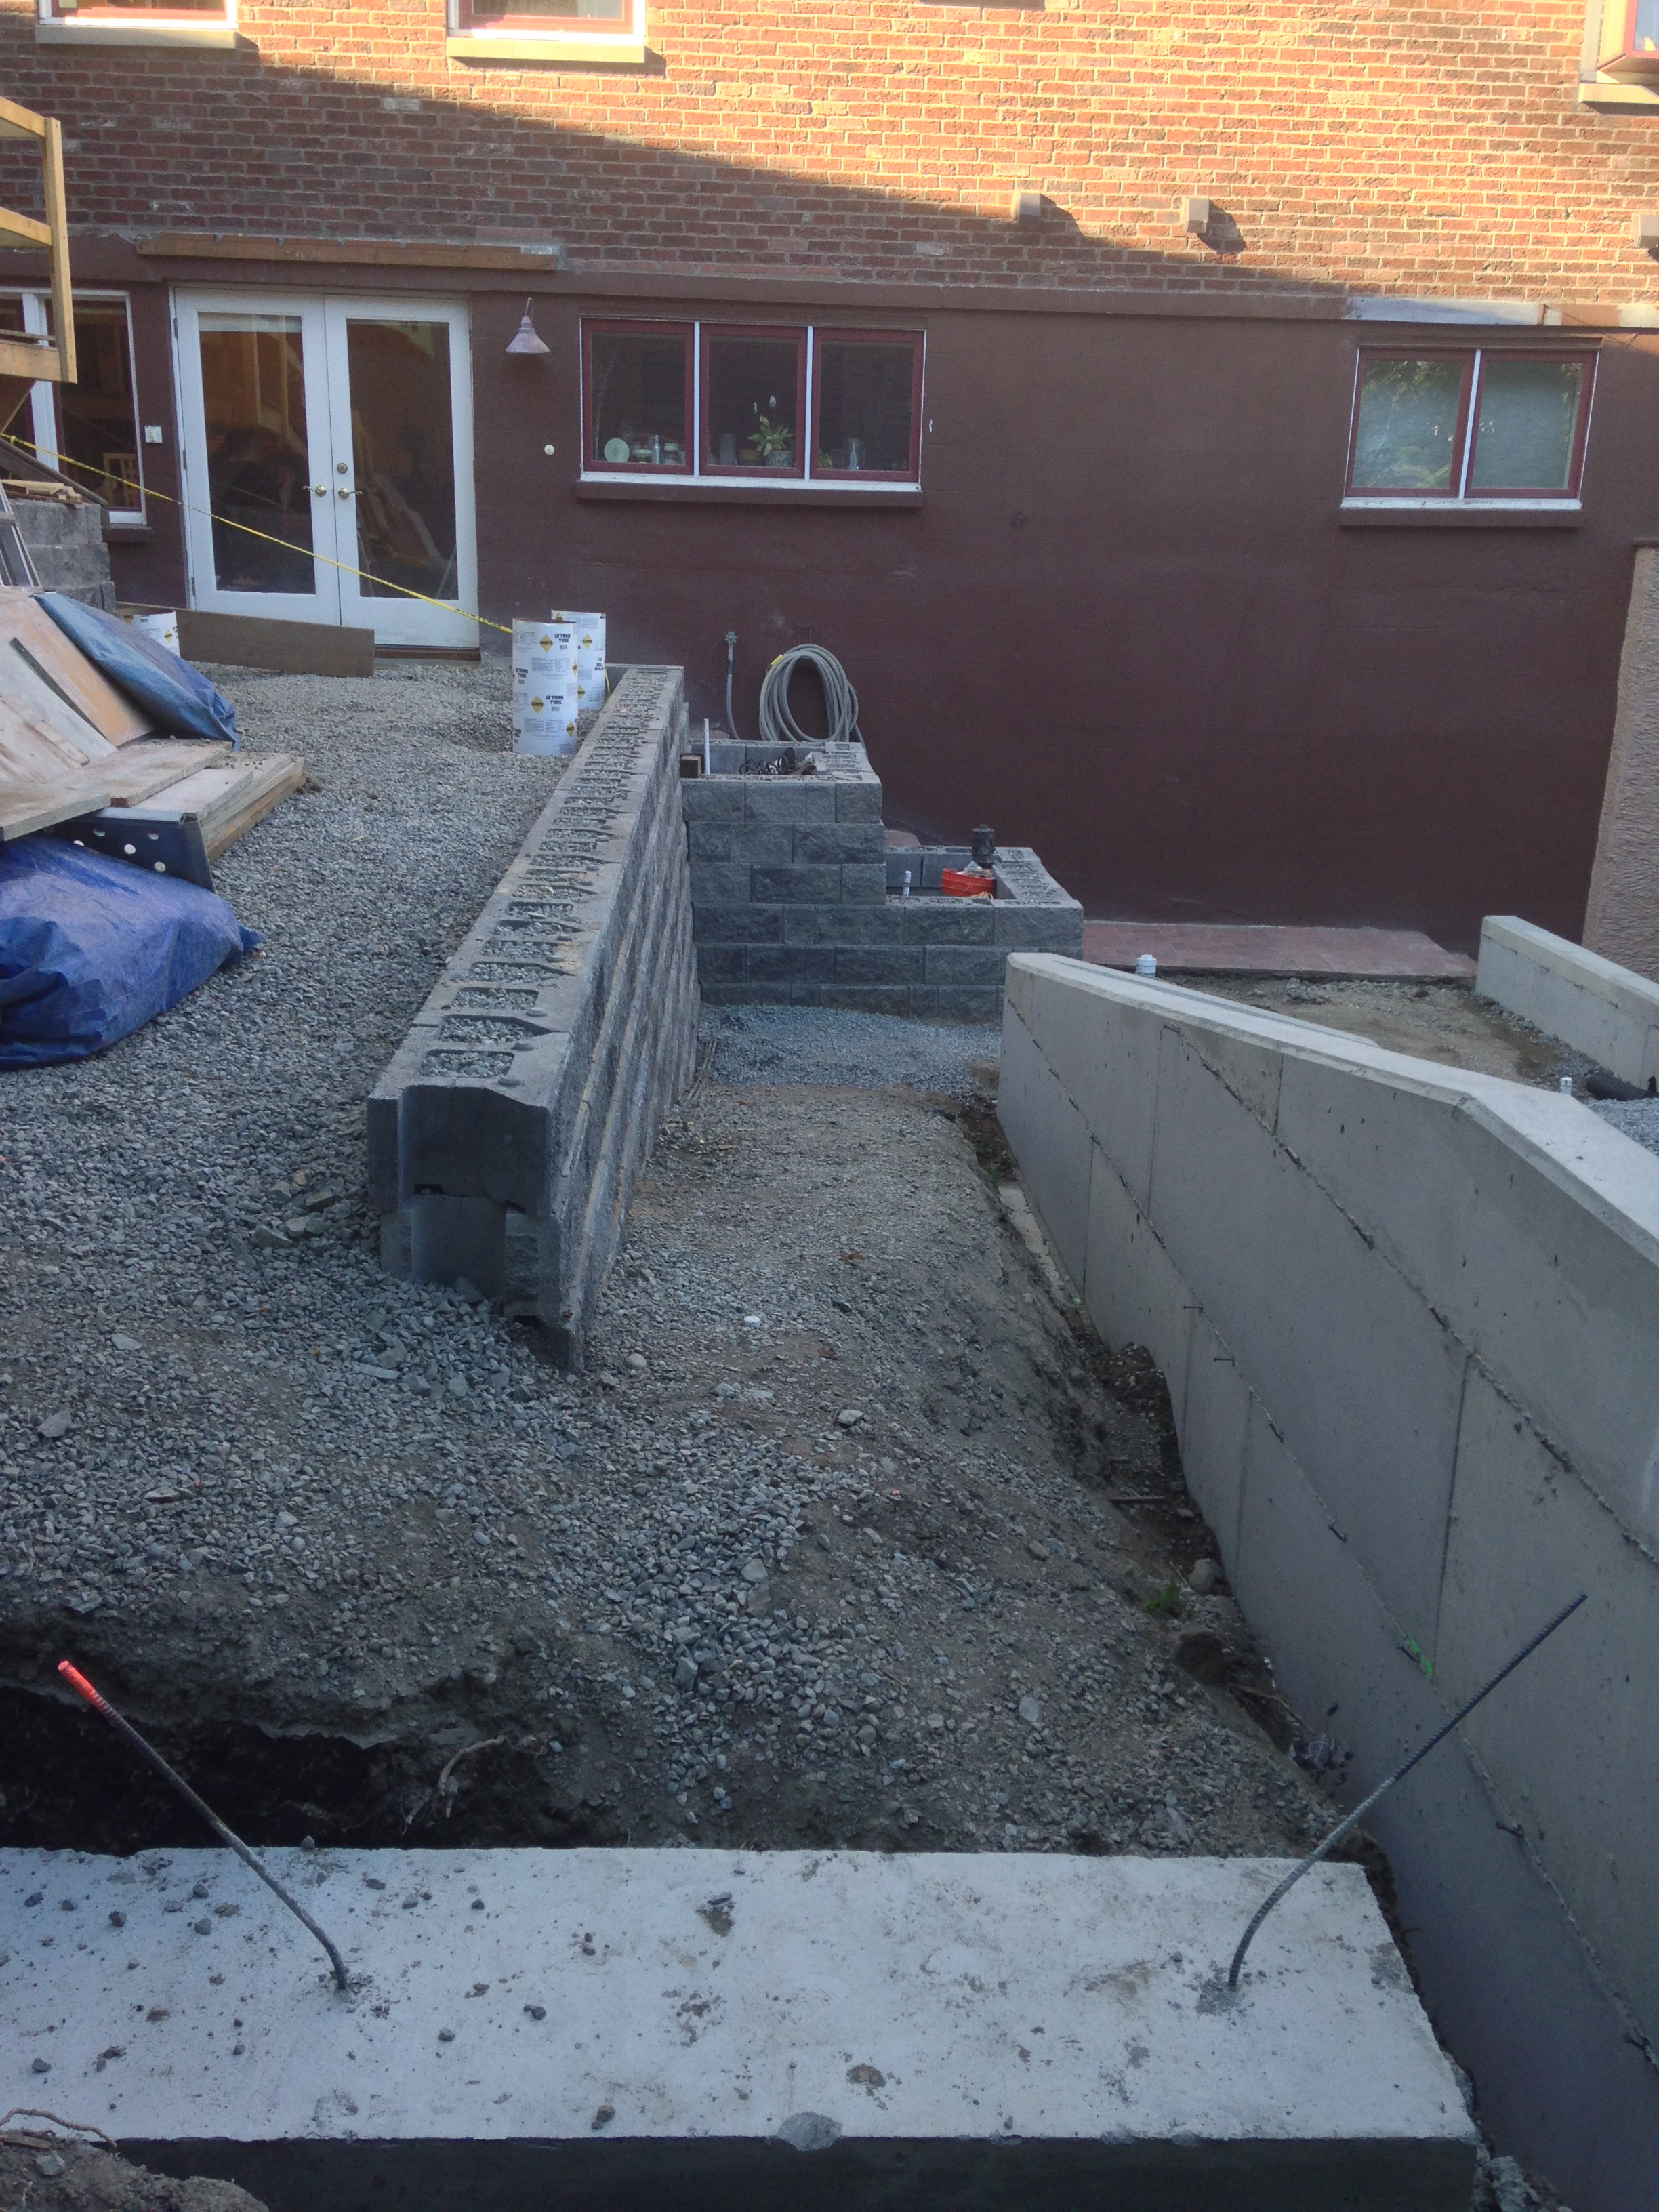
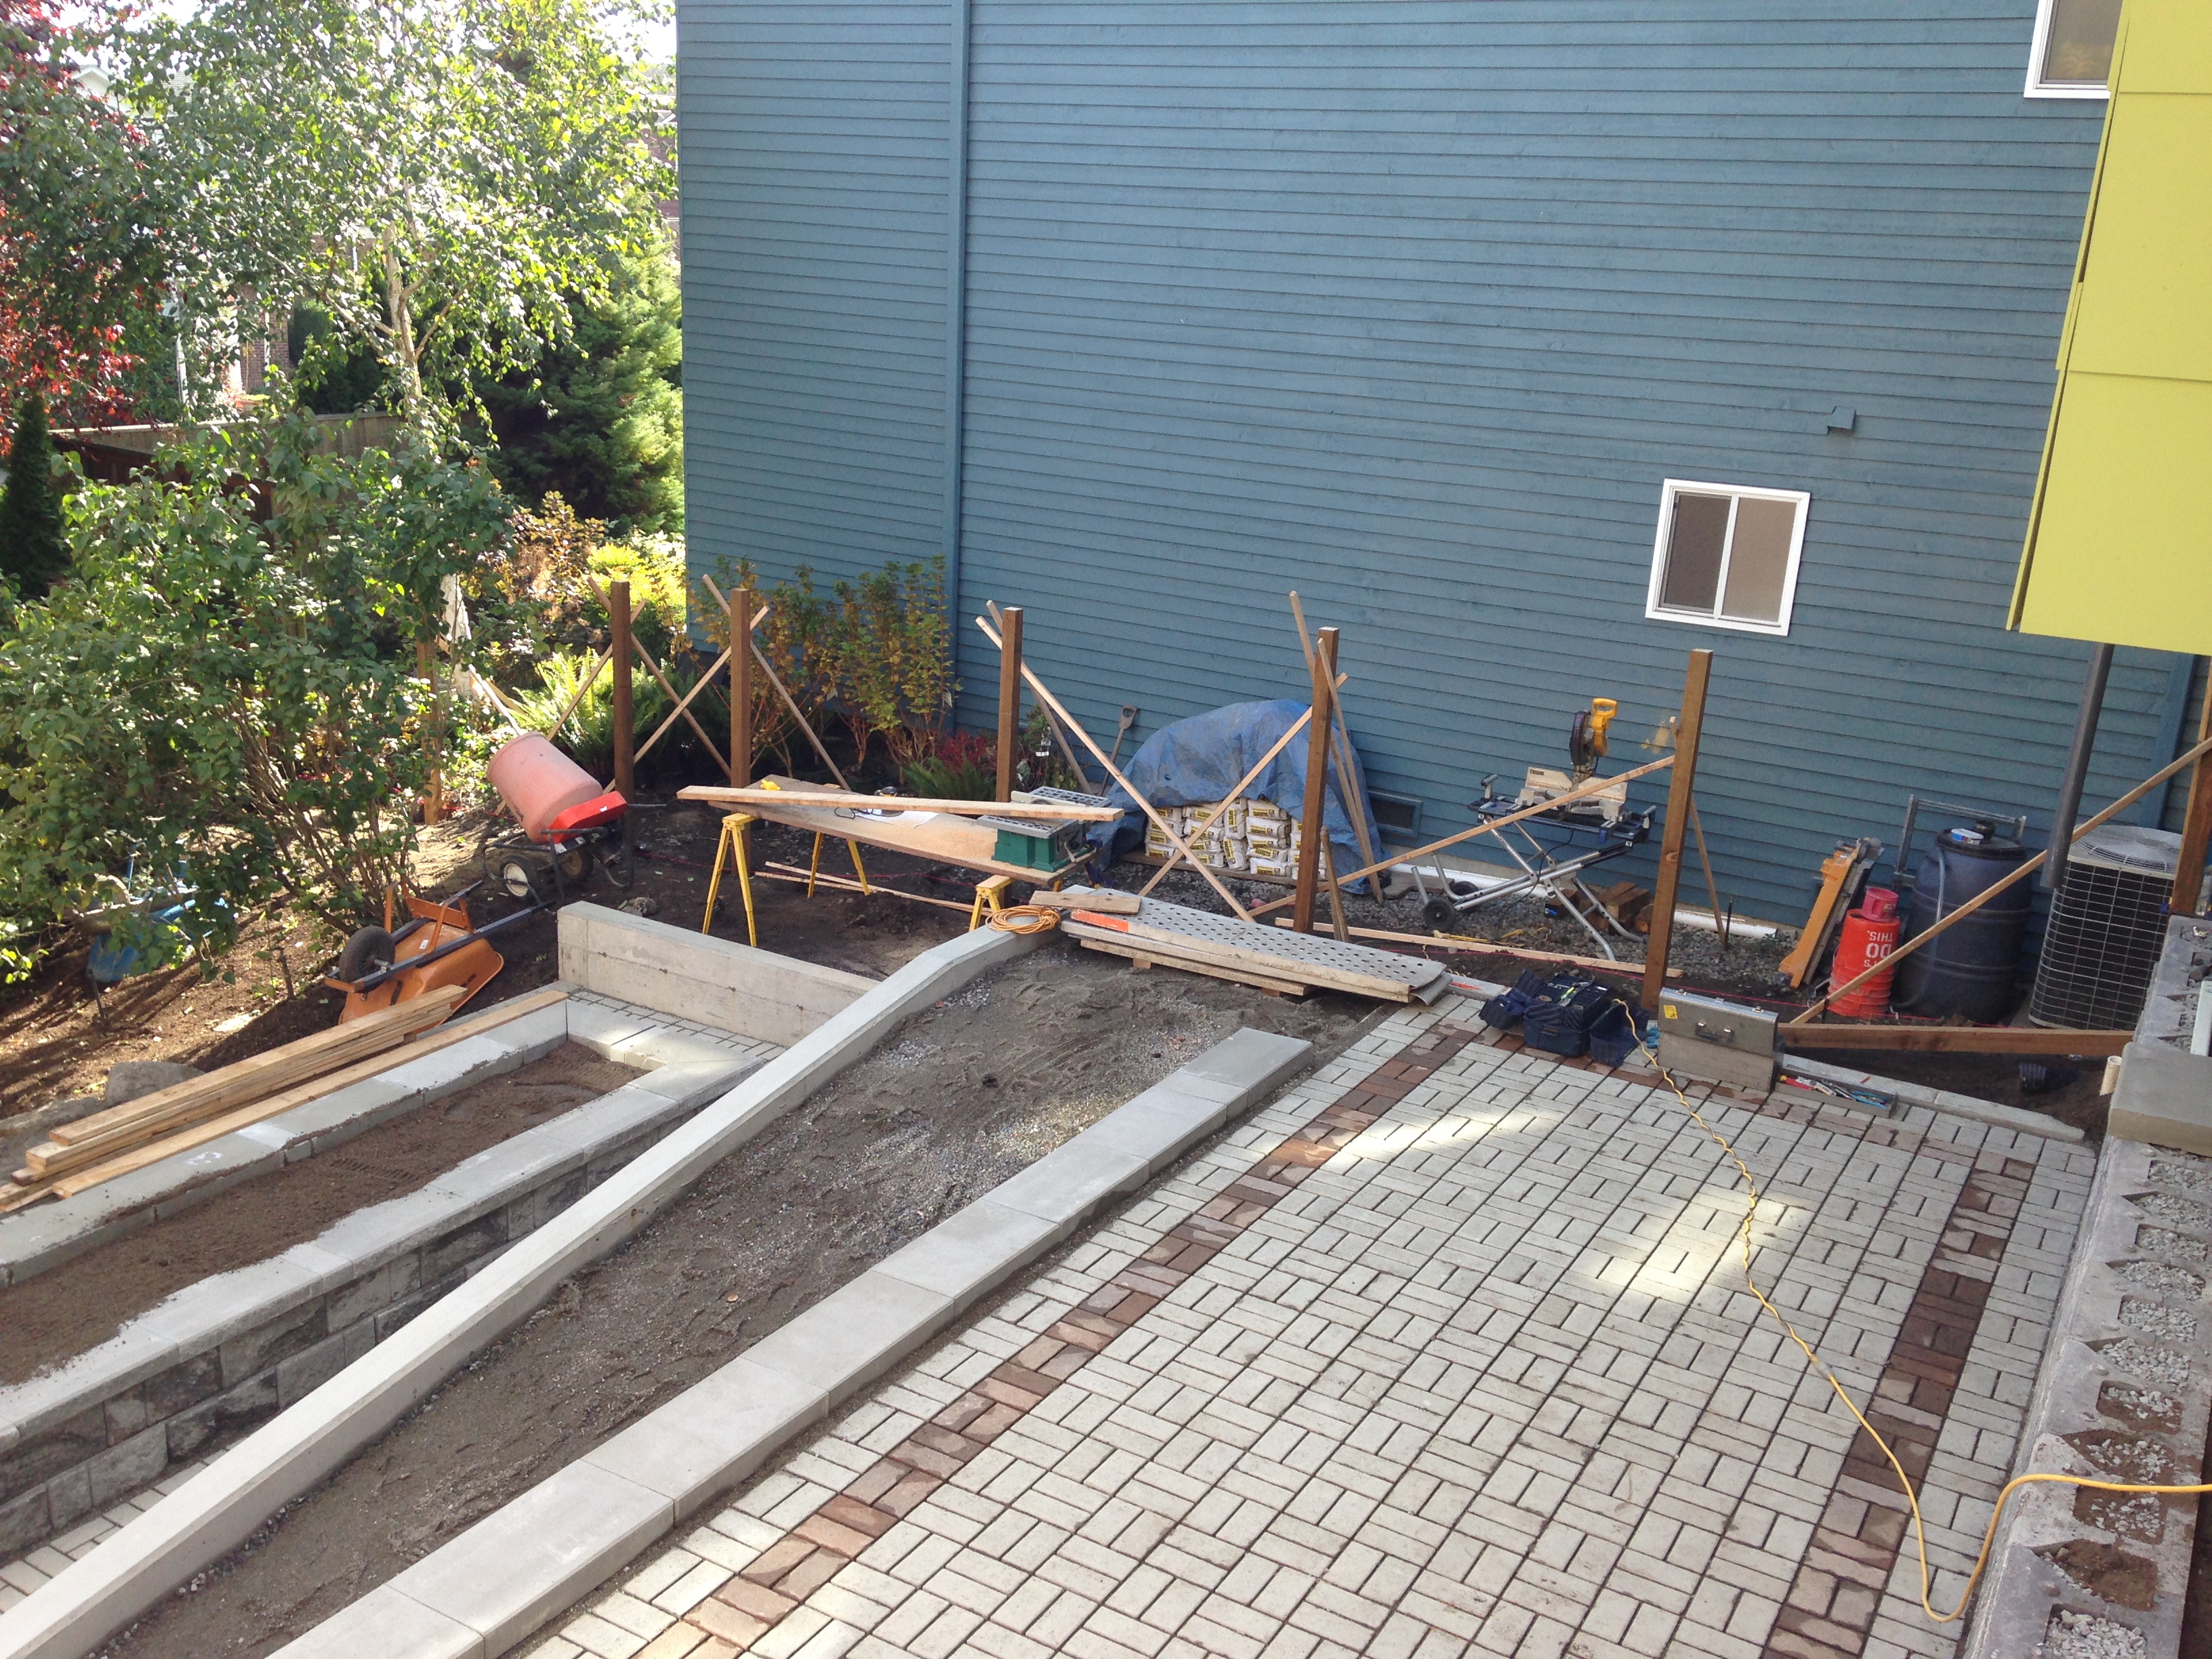
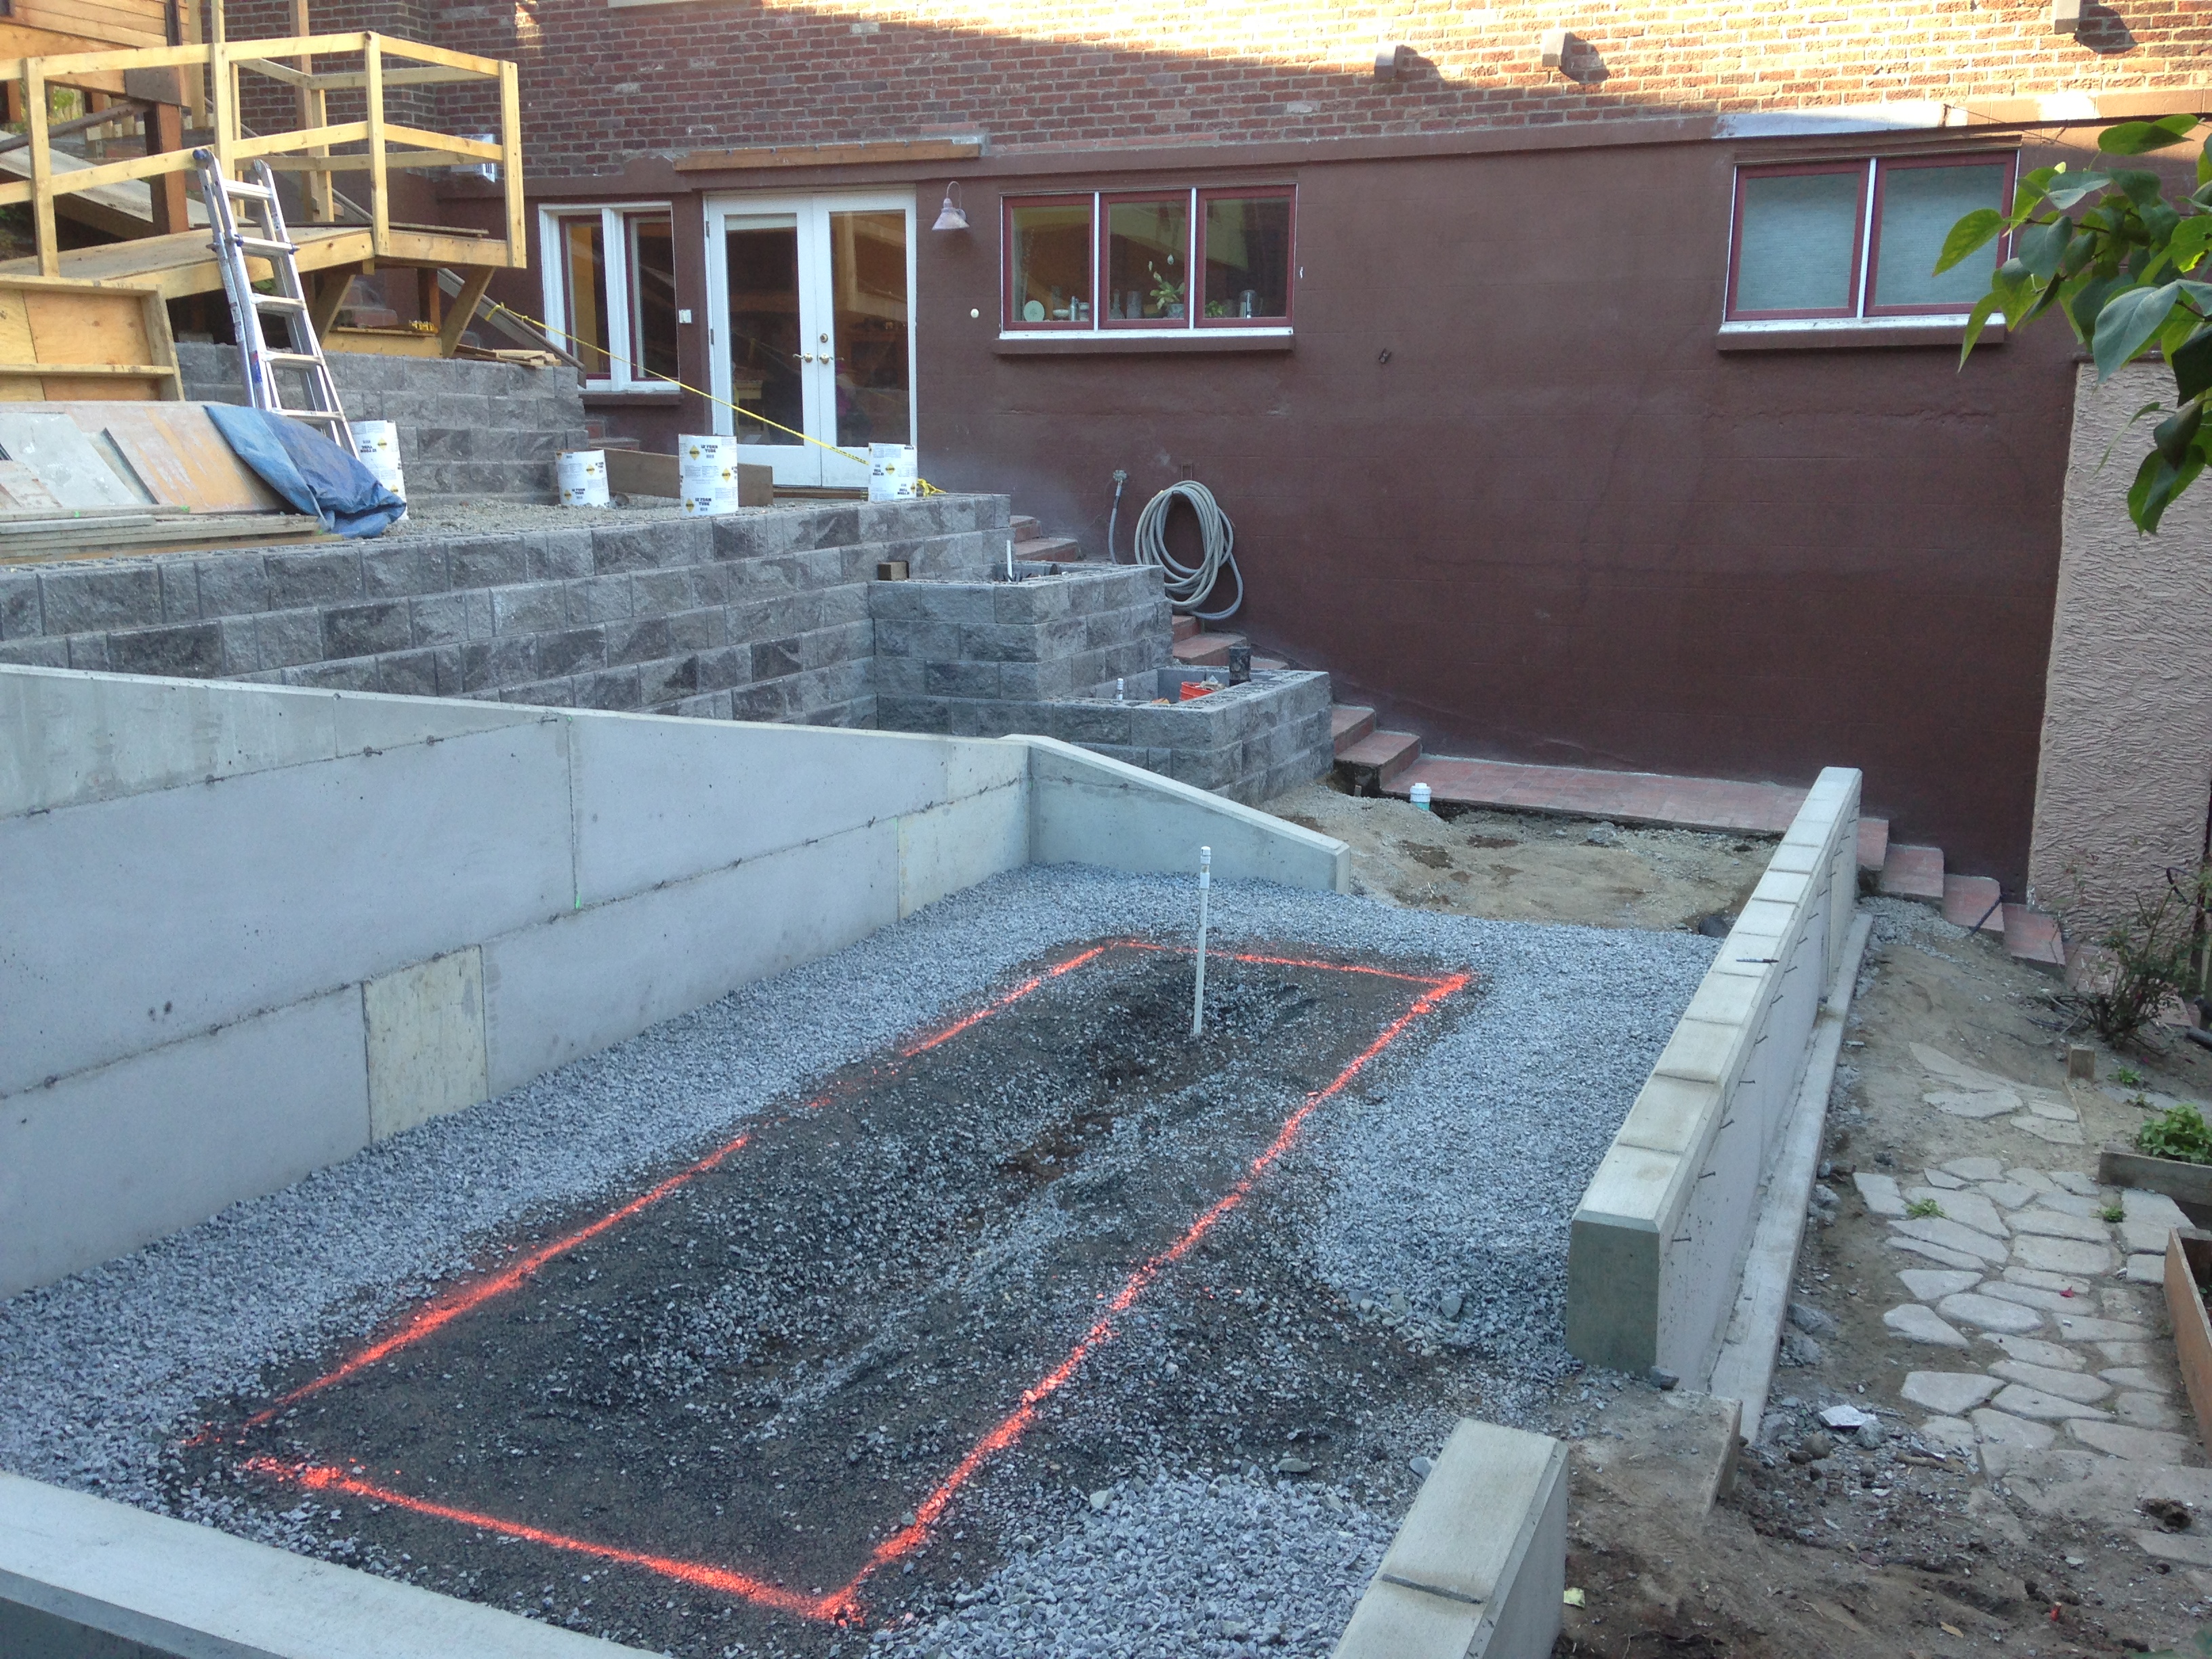
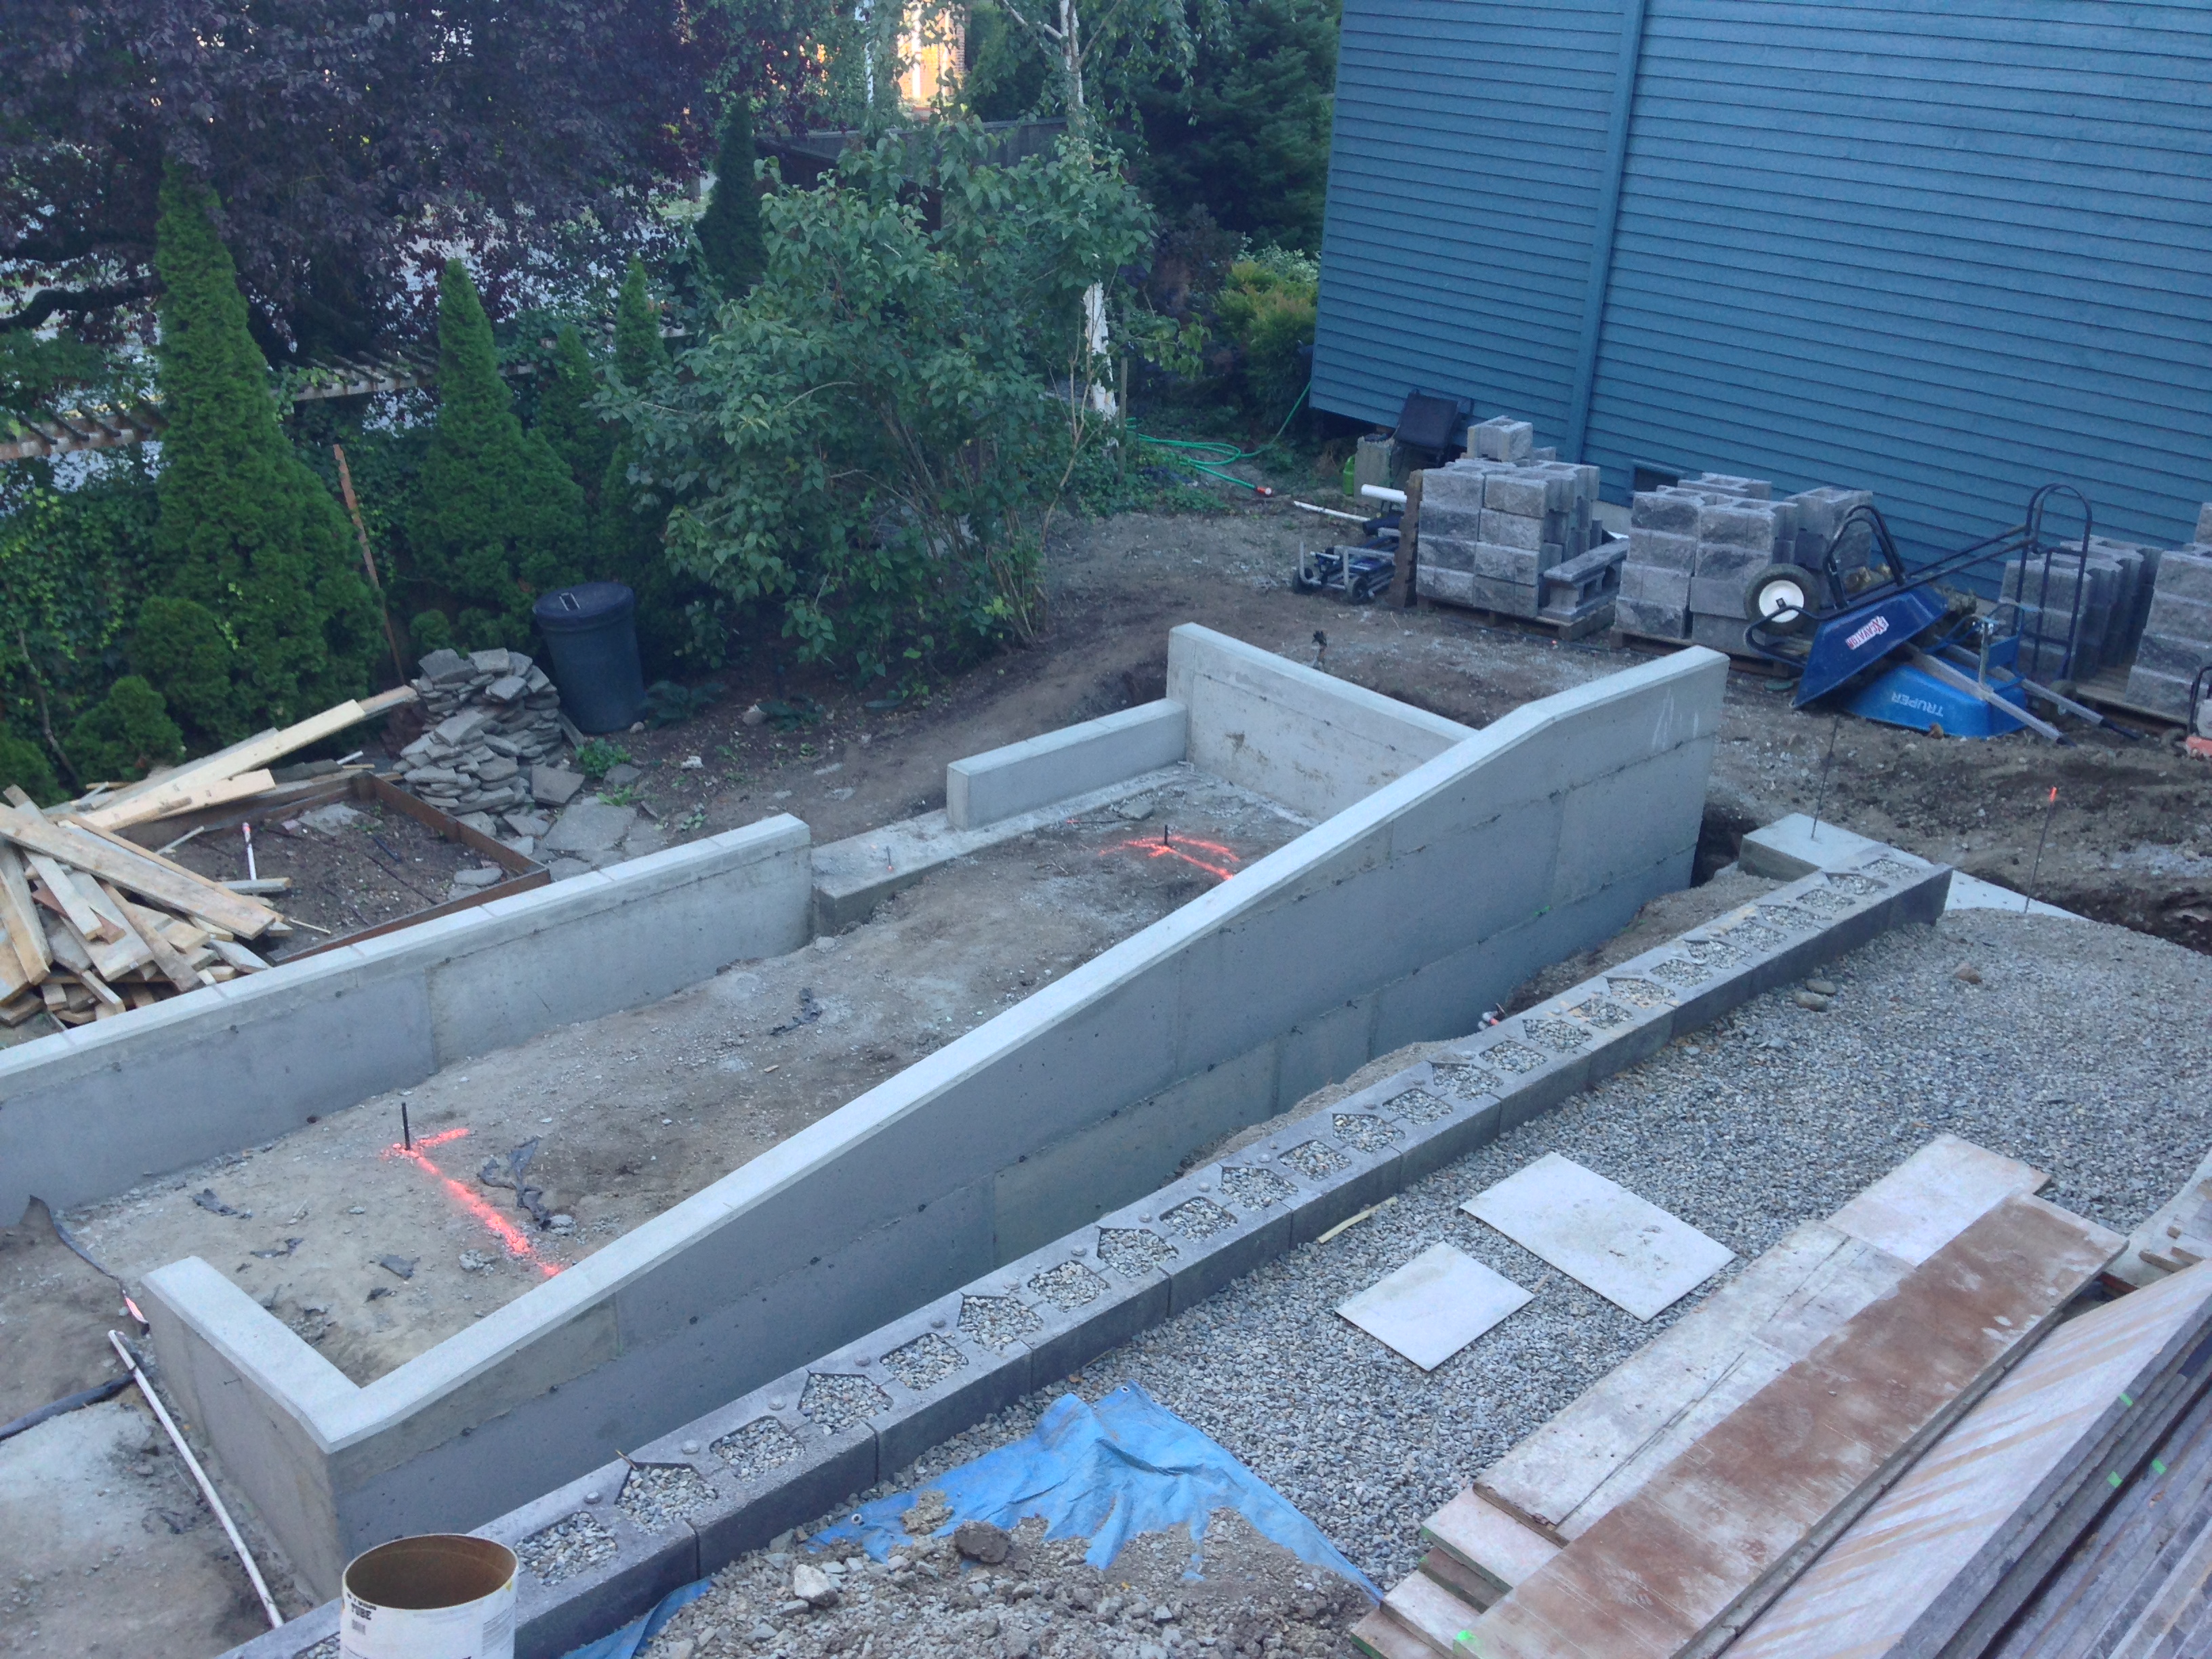
My current installation will require an extensive entry here to do the project justice – but for now I’d like to share a shot of the cement walls formed up and ready for a pour. Some stats:
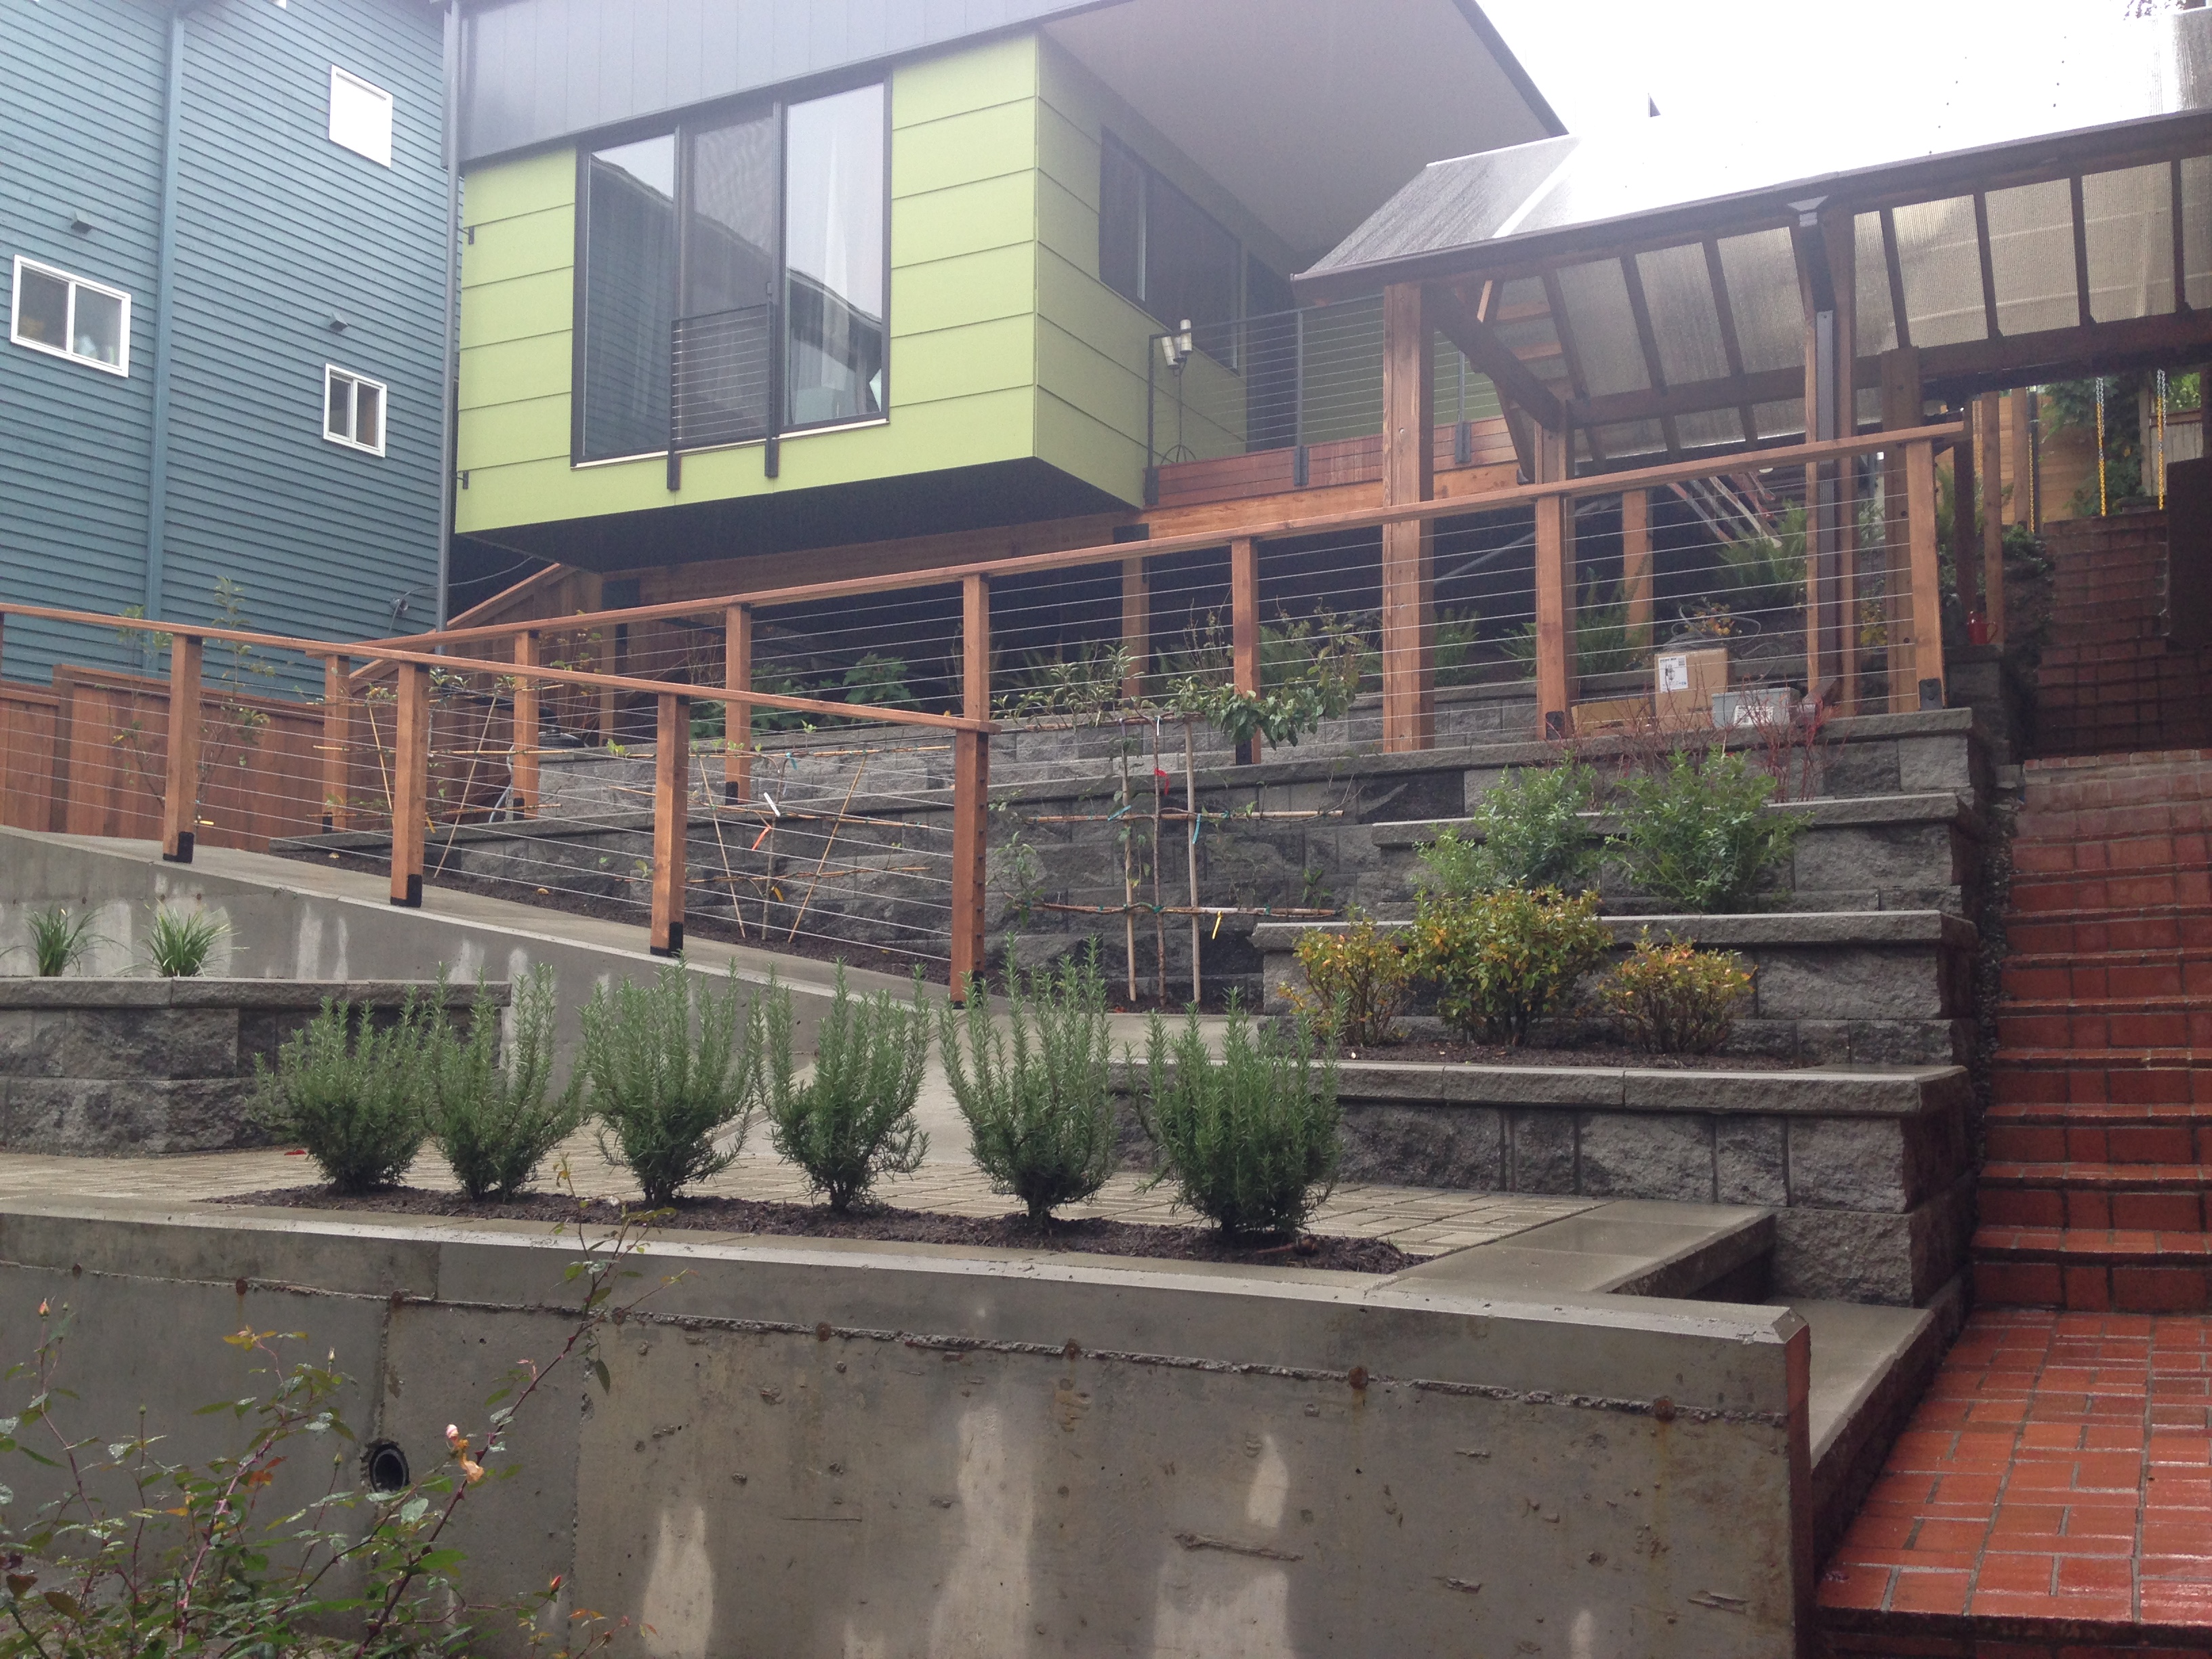
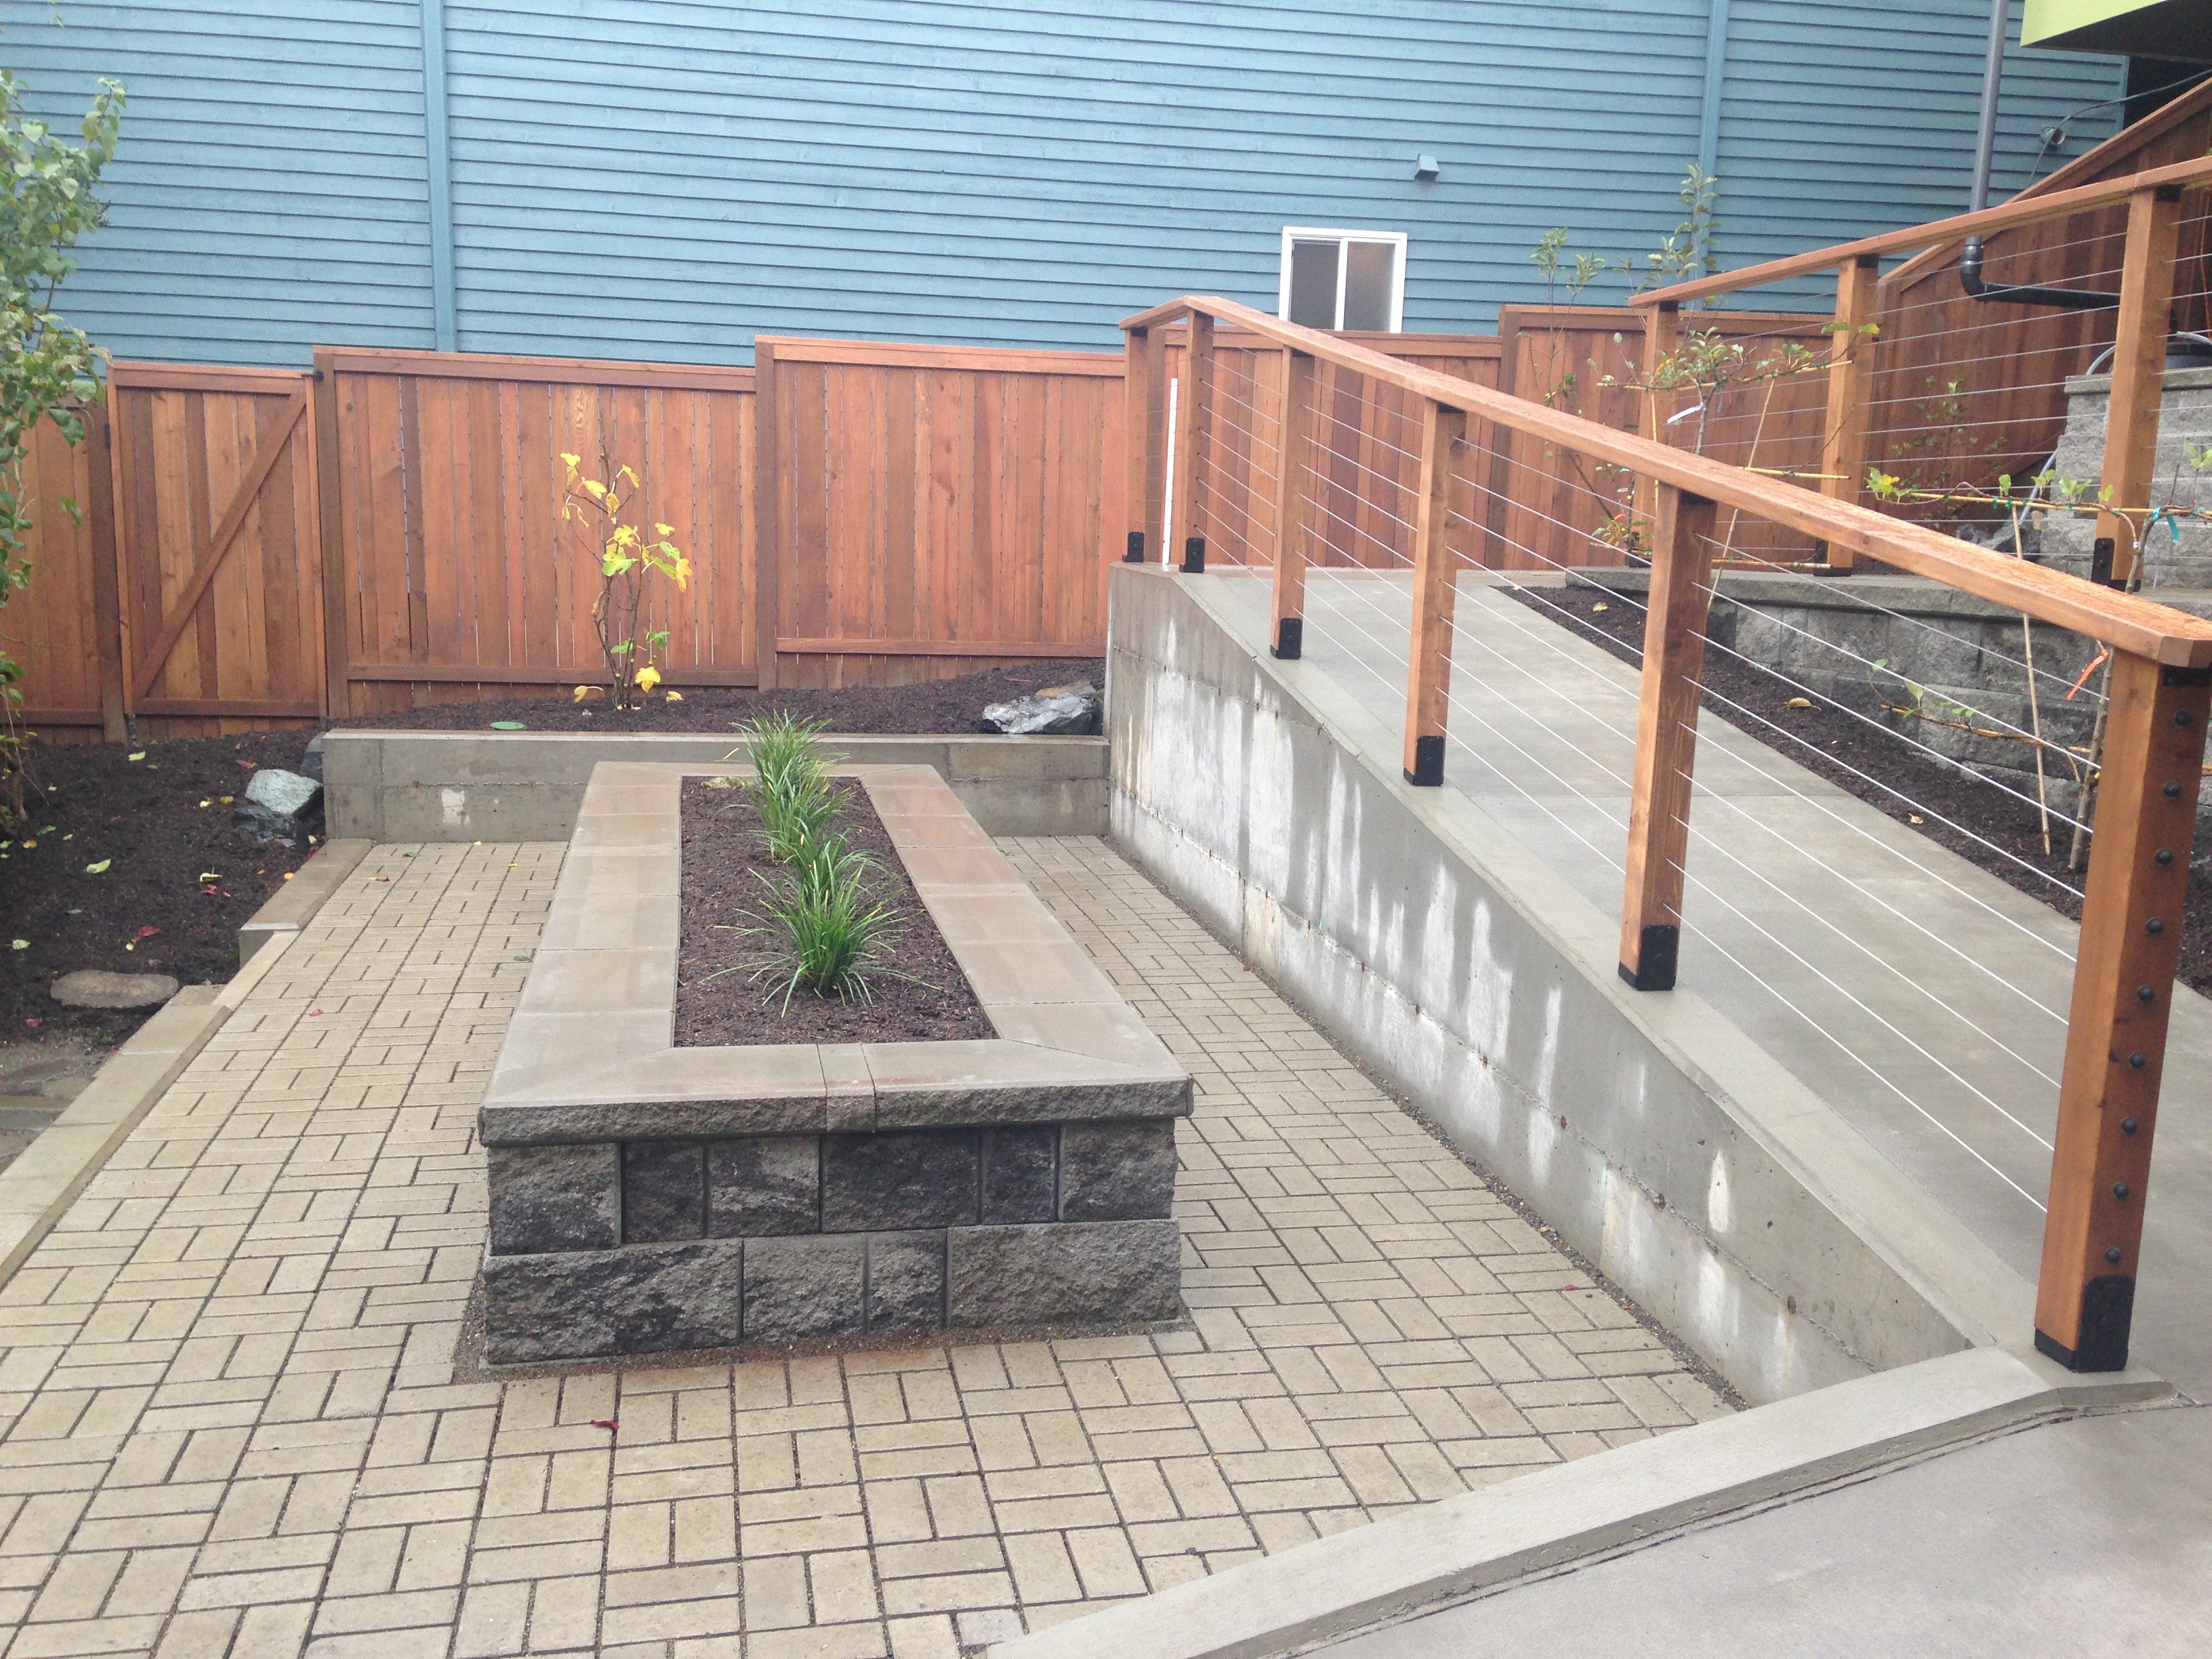
Concrete wall length = 90 ft – variable height. 1/2″ chamfer top. One section is graded to curb against a handicap ramp that will be poured next week. Block wall = 120 ft – variable height.
Exported from site = 40+ yards of soil & debris
Imported to site = 22+ pallets of block wall. 40 +/- yards of aggregate. 20 +/- yards of poured cement. 600 sq/ft of pavers. etc…
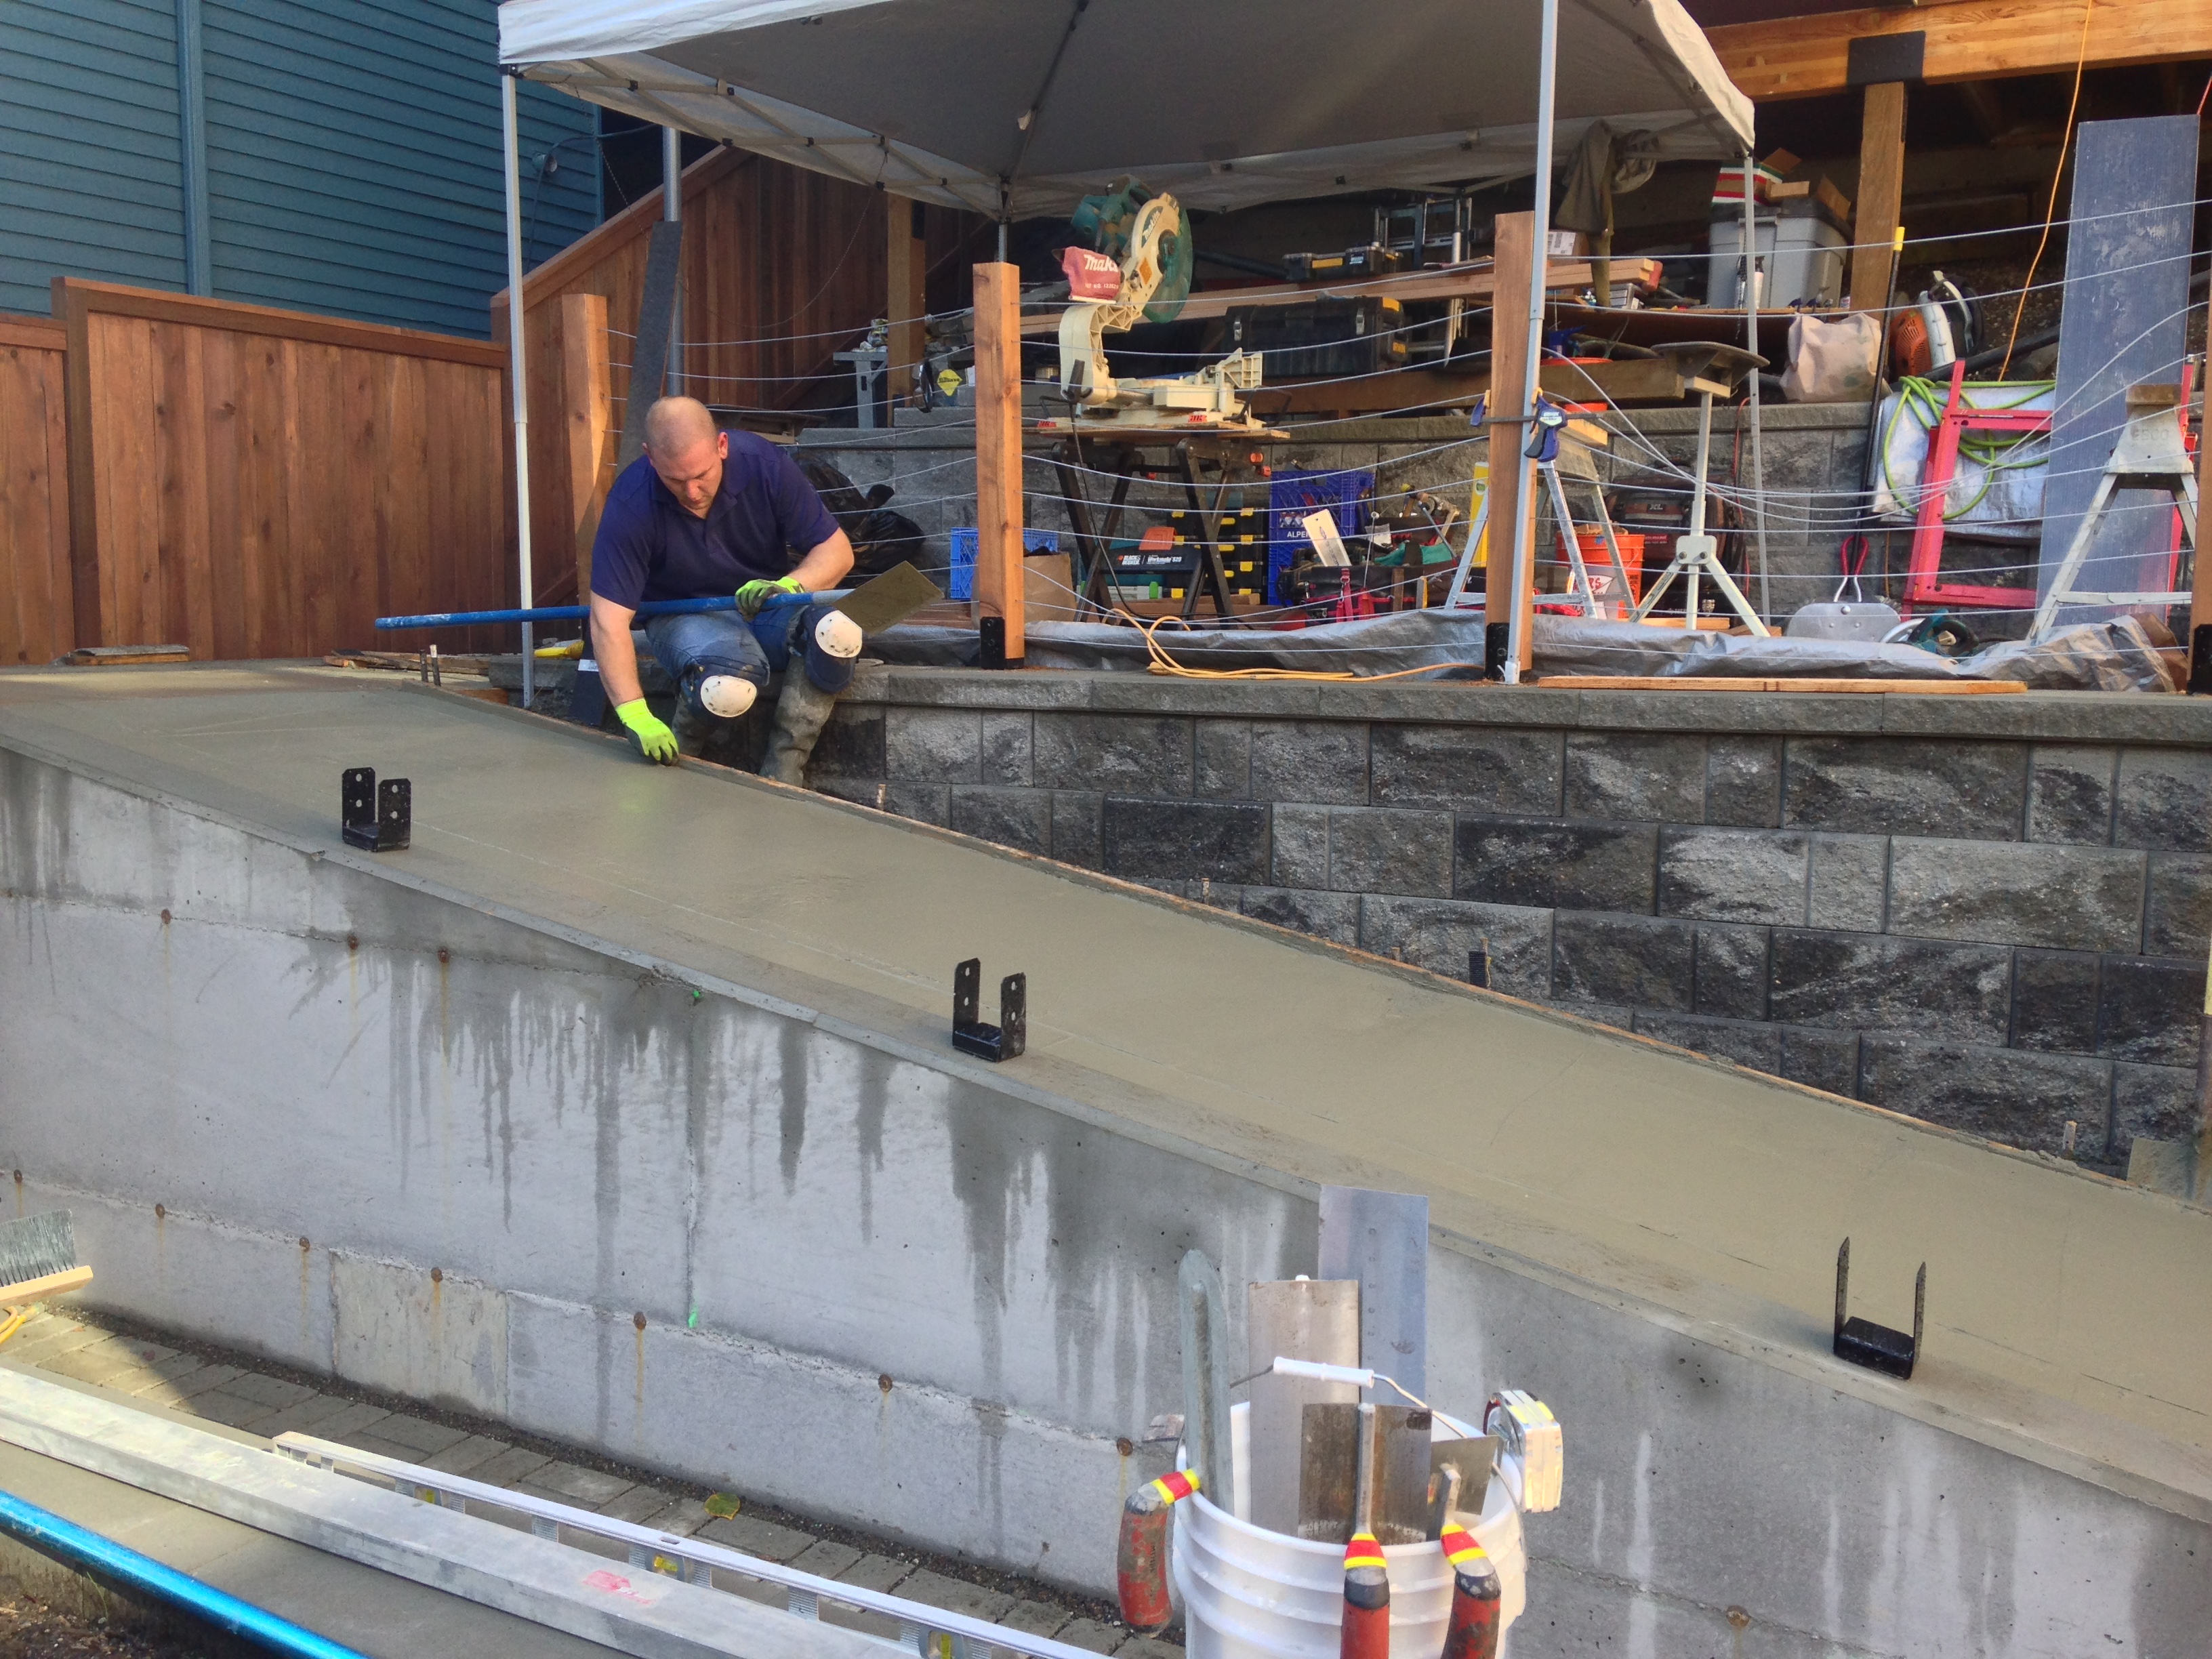
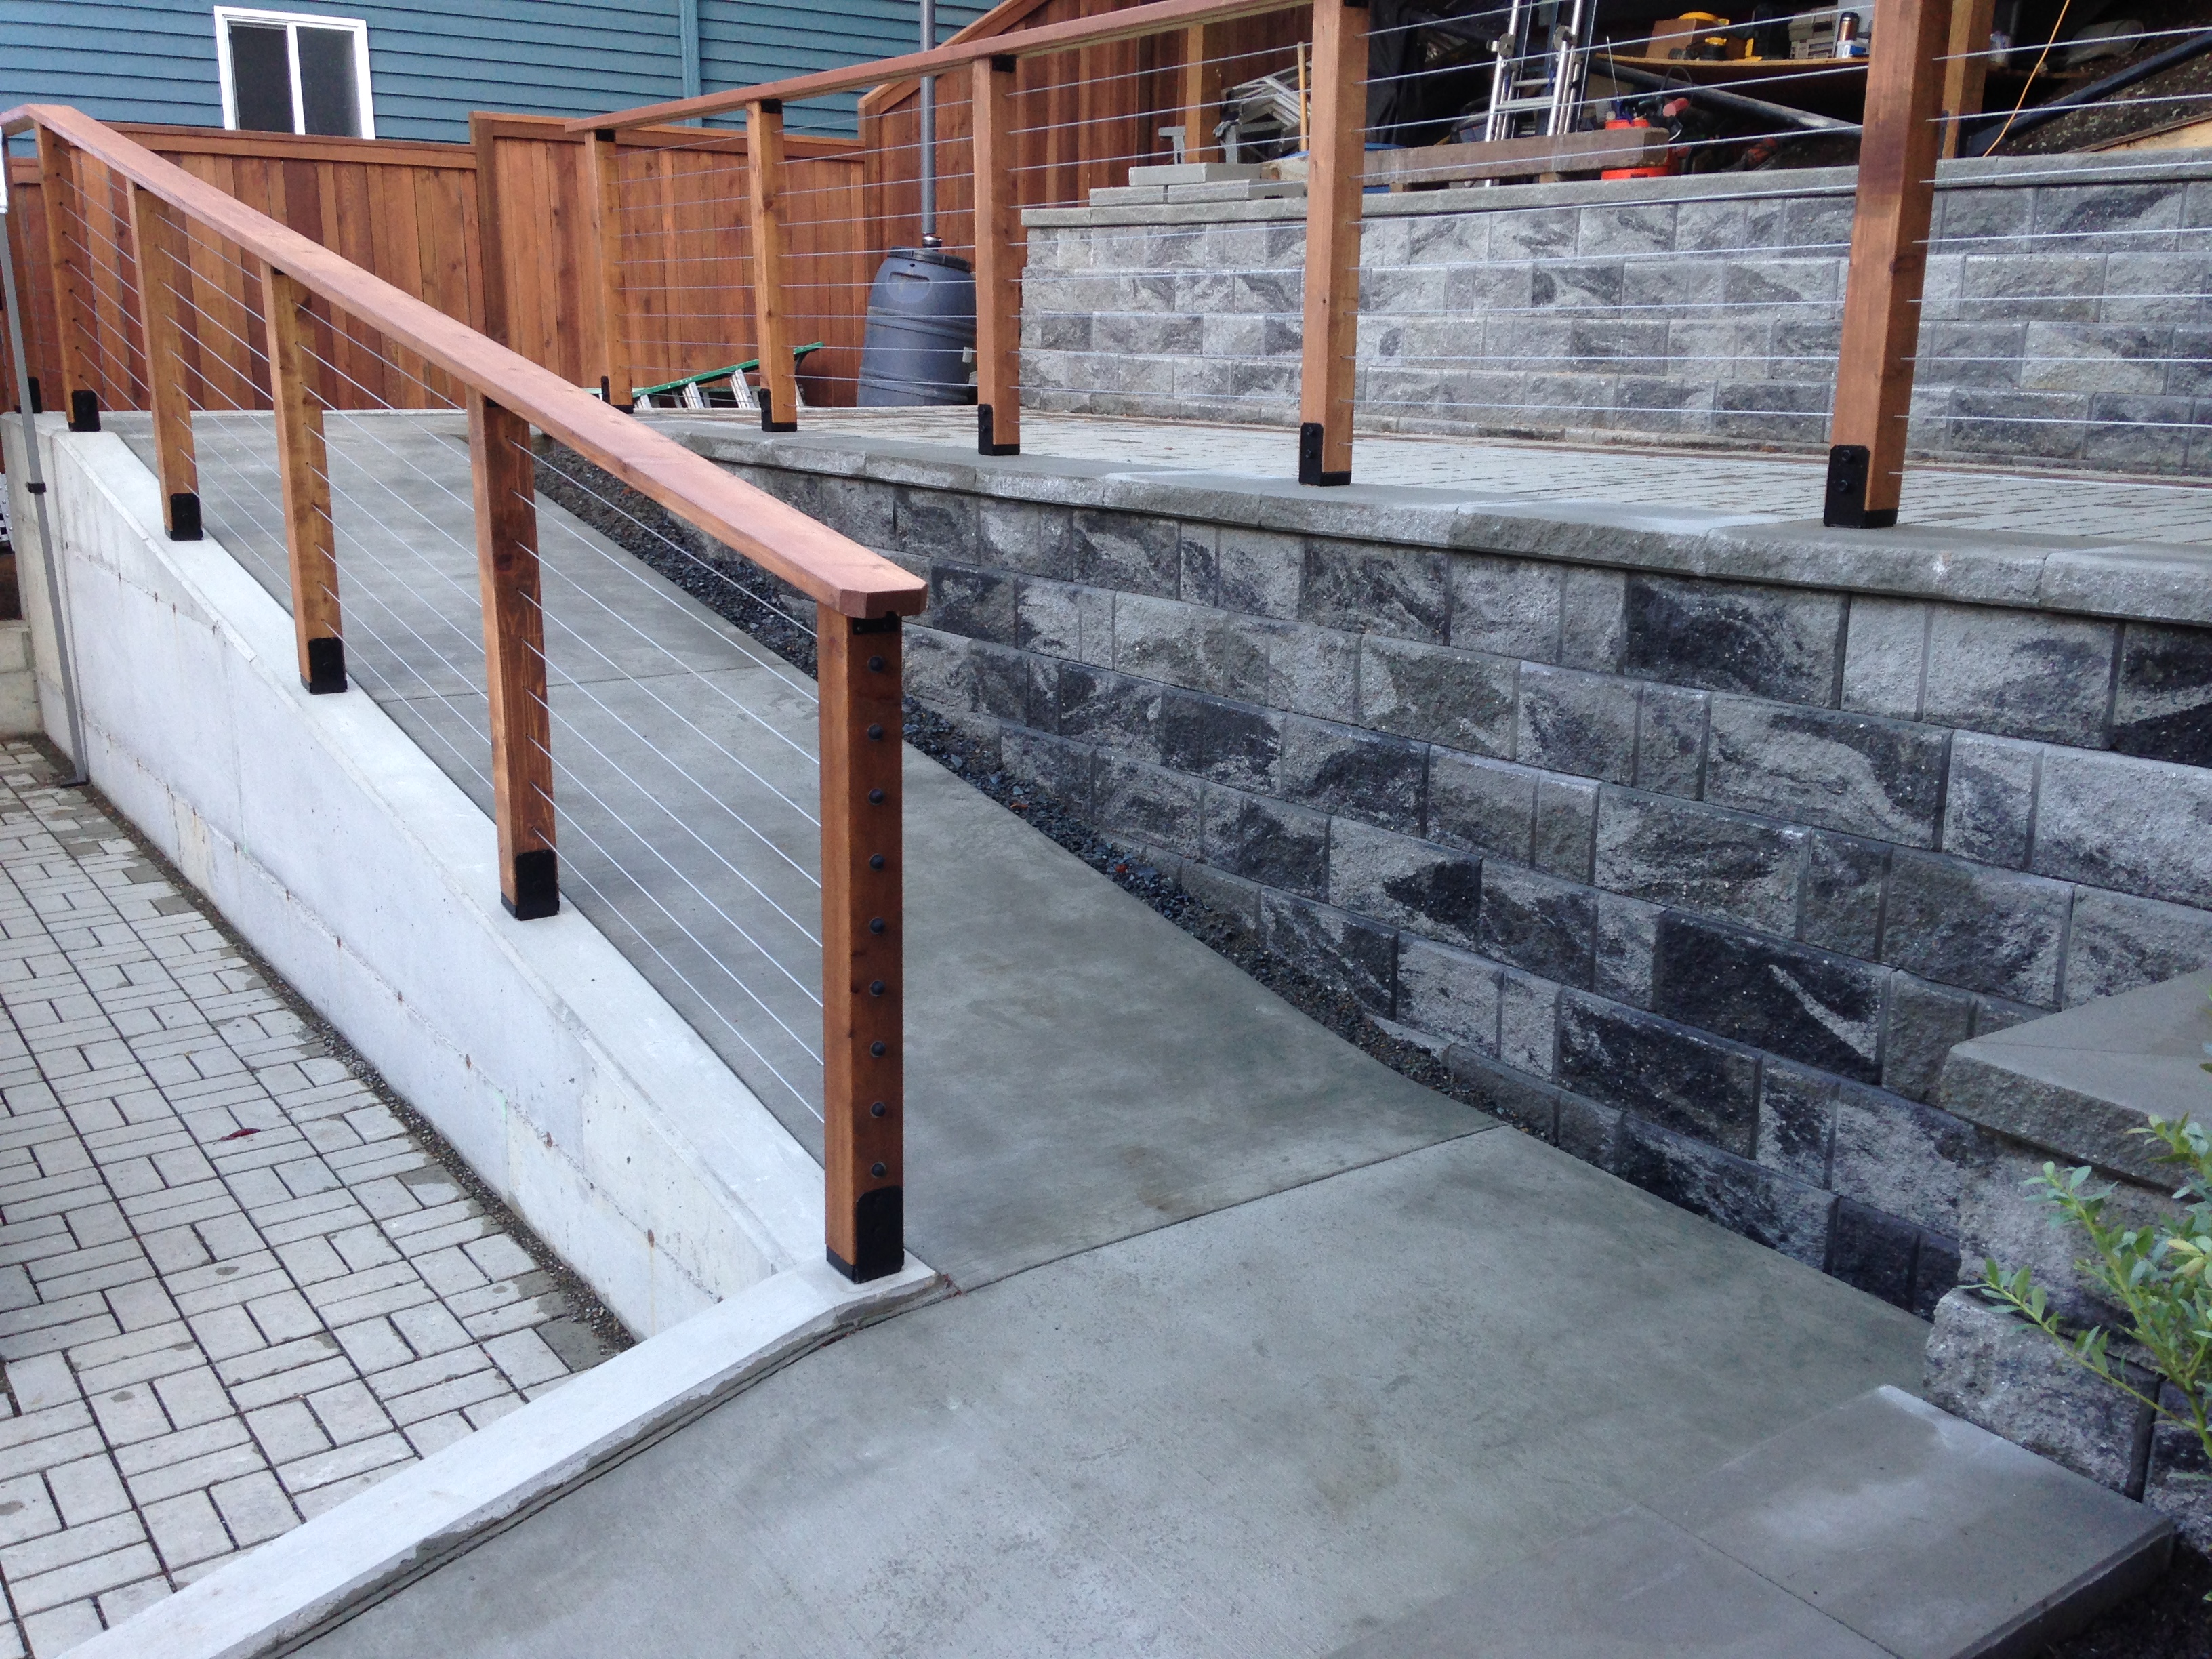
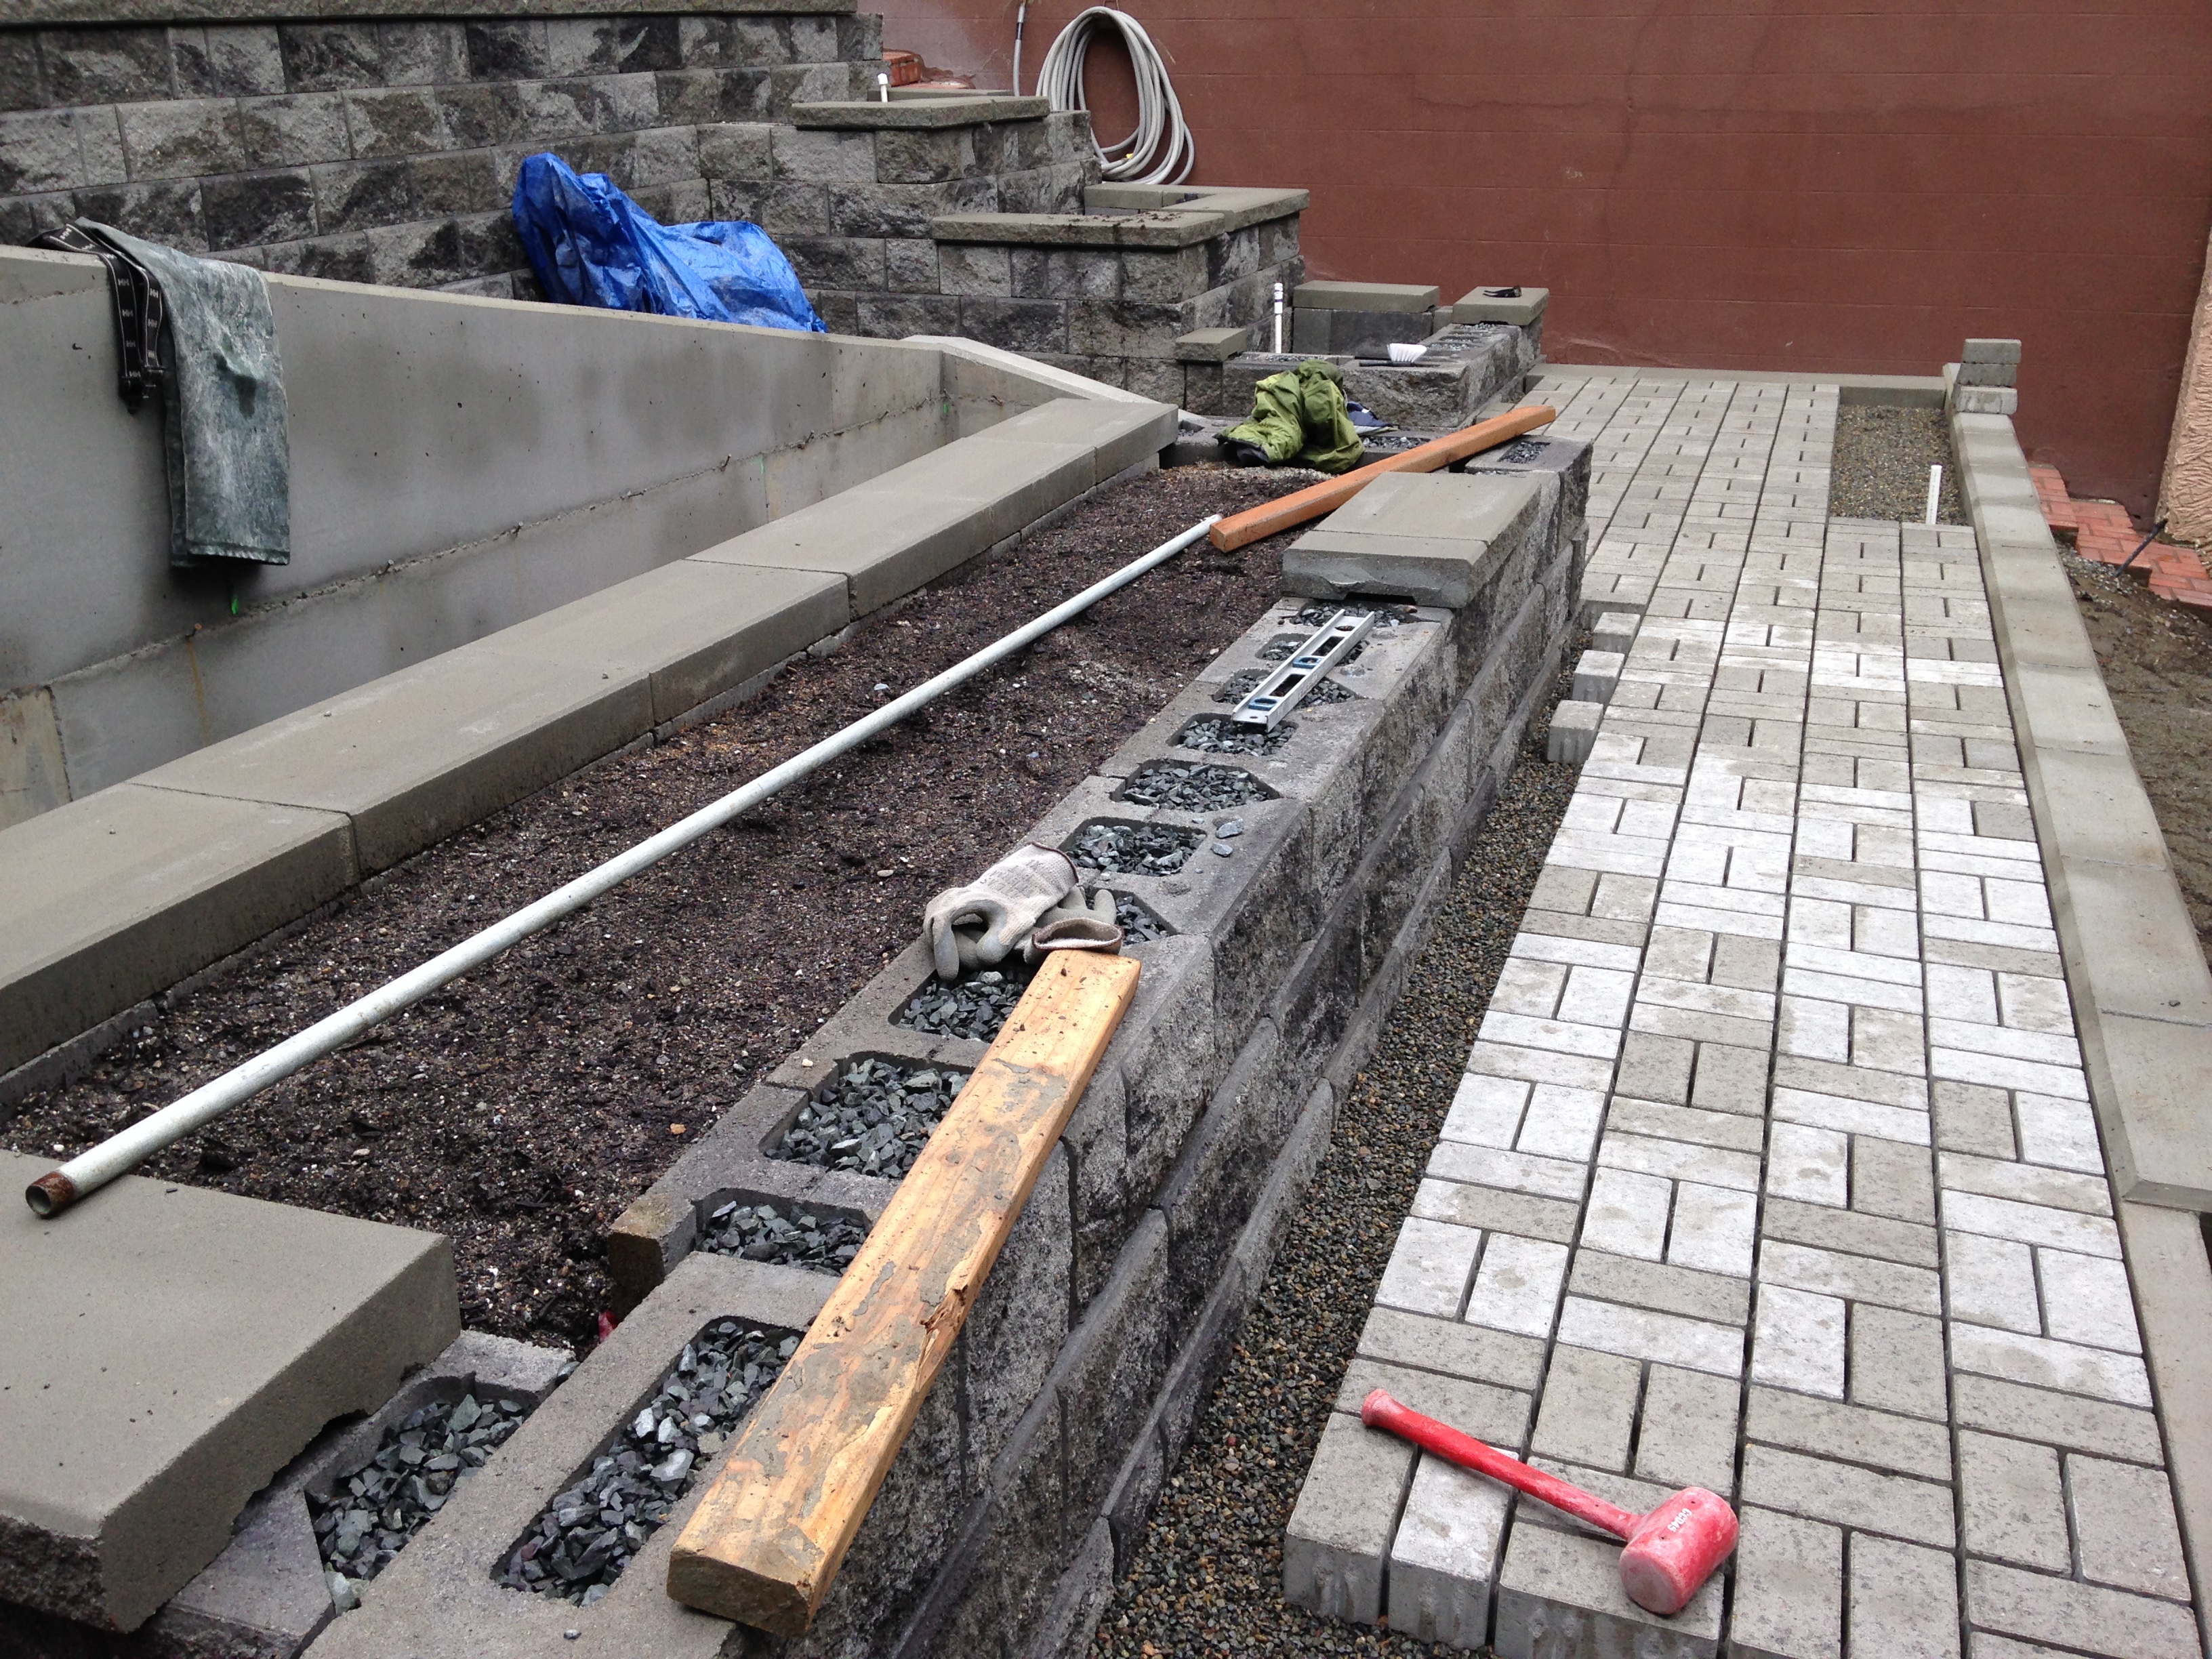
Update: 10/03/14 … I’ve updated with some pictures of the finishing stages of the project. You can see the pavers and finished walls. We still have to pour the cement ramp and install the stainless cable railing. The planting is yet to be done, and we’re mid way into installing the perimeter cedar fencing.
I’ll update as the project coalesces further.

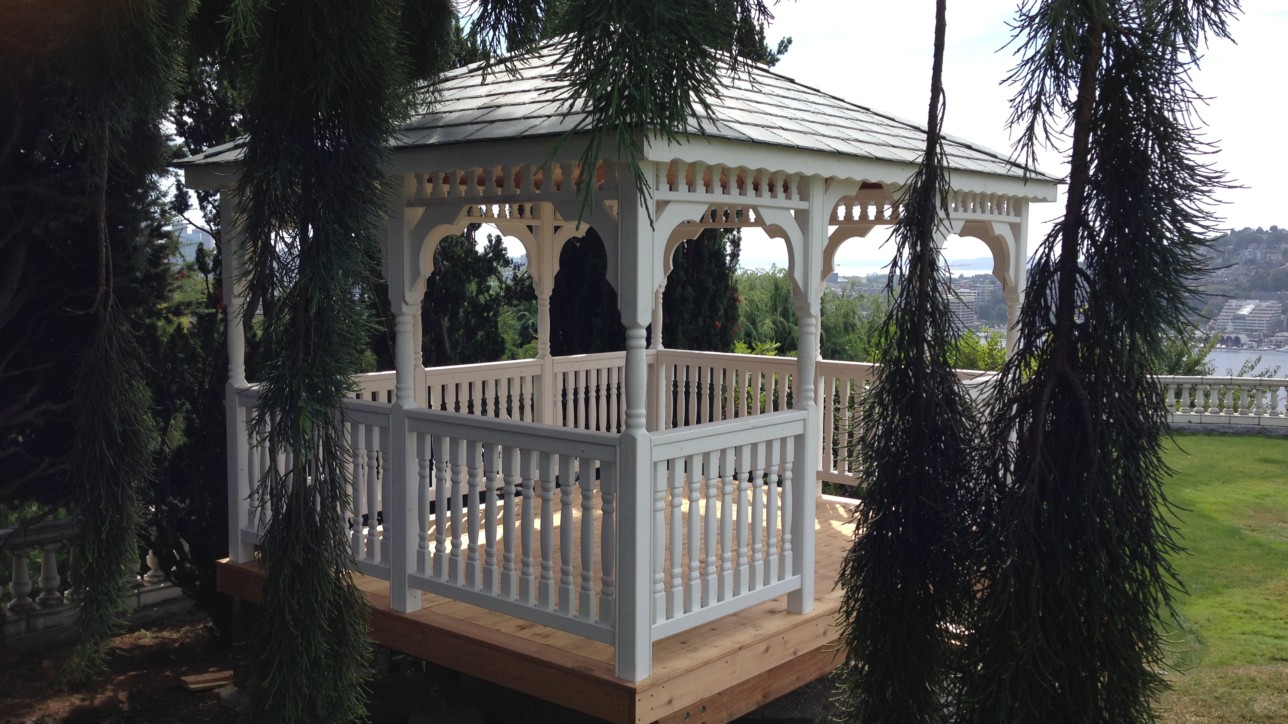
[dropcap type=”circle” color=”#ffffff” background=”#ef7f2c”]P[/dropcap]roject: Construct Gazebo
Location: Capital Hill
Project executed in conjunction with Plumb Landscapes. Simple design and construction of decking, after which we assembled a pre-manufactured gazebo from Gazebo Creations.
There are few things in life that are as satisfying as spending time in a space that was meant for it. I hope our client finds that true in this instance.
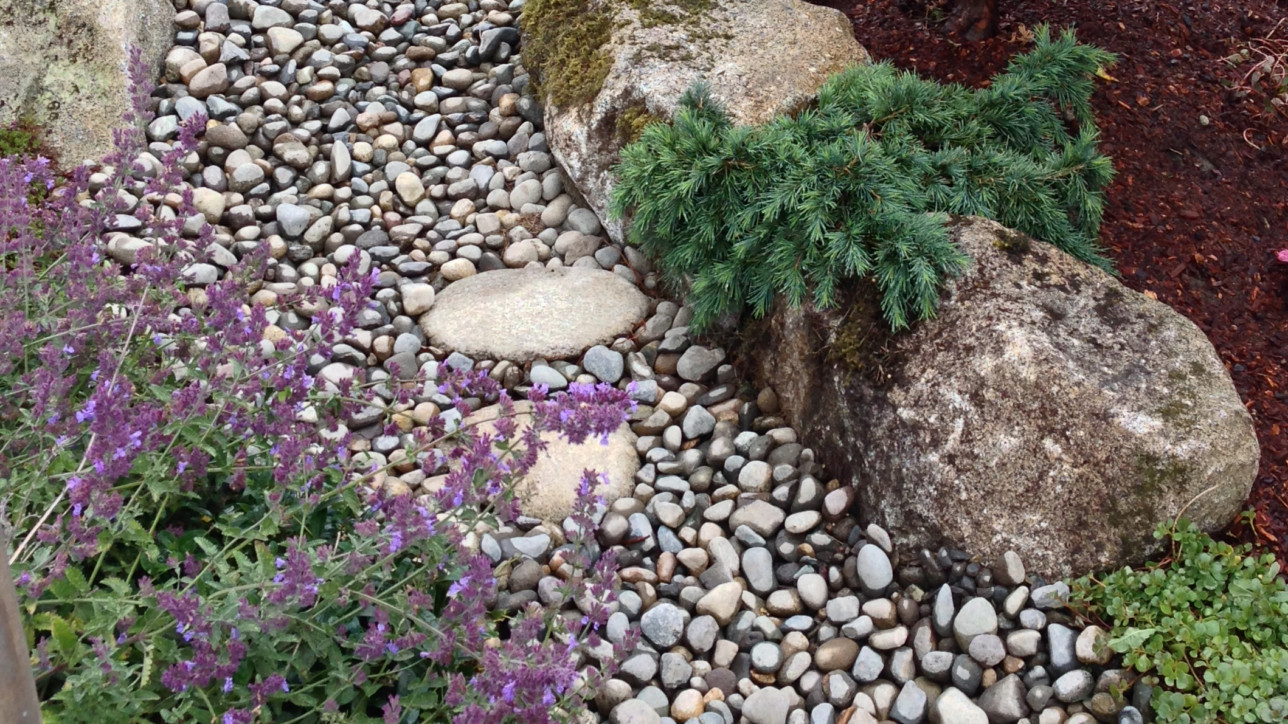
[dropcap type=”circle” color=”#ffffff” background=”#ef7f2c”]P[/dropcap]roject: Convert parking strip to dry river bed.
Location: Phinney Ridge
Simple dry river bed carved into the existing landscaping of a parking strip. The mossy granite boulders flanking the curves were purchased from Marenakos Rock Center in Issaquah and then set into the existing vinca ground cover via a 2′ wide trench that I carved into it. The 2″ minus rubble simulates the river bed, with flat river rocks placed throughout the span to offer the sense of weather erosion. This rubble was placed on a 20+ year landscaping fabric so as to dissuade weeds and to combat the aggressive vinca.
I’m really please with this small bed – with minimal disruption of the existing landscaping we were able to achieve a completely renewed style and feel of this small space.
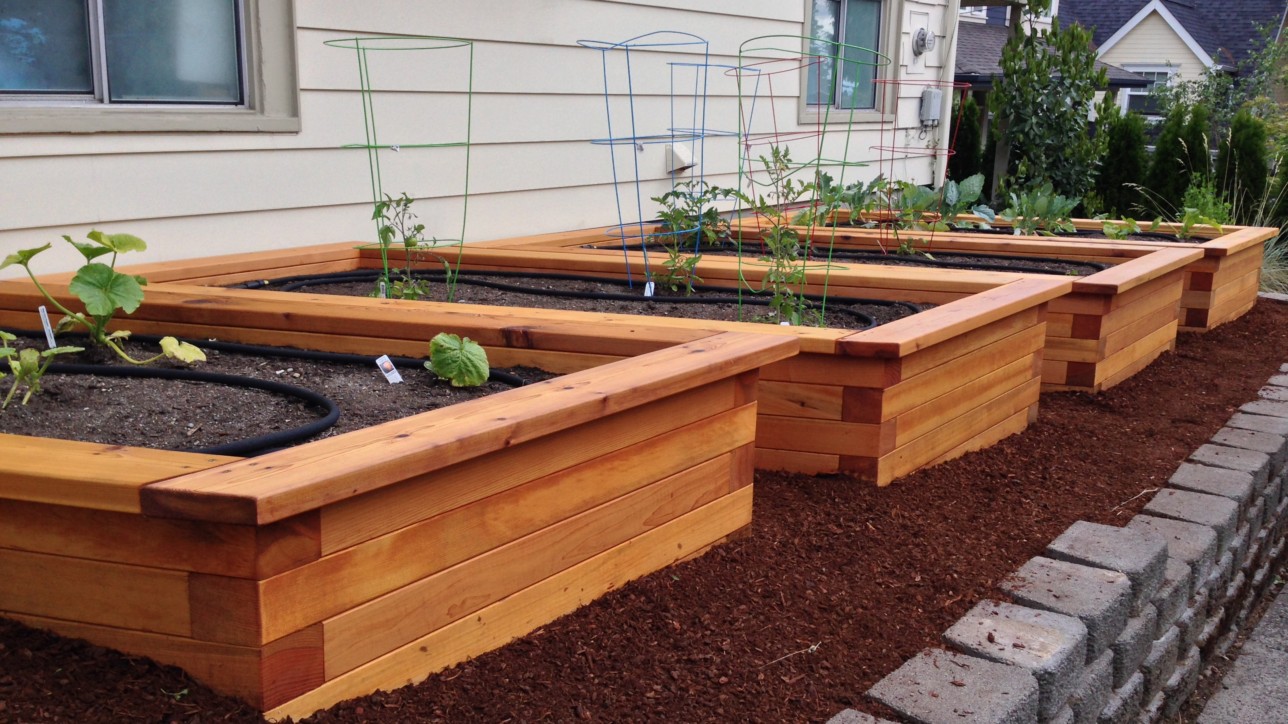
[dropcap type=”circle” color=”#ffffff” background=”#ef7f2c”]P[/dropcap]roject: Build 4 Raised Cedar Planters
Location: Phinney Ridge
The design for this raised planter project grew out of seeing so many rotting planters around Seattle. The rain weathers even the most well designed exterior structures, and what this one has that many lack is both a 2X6 rain drip edge that is designed to push rain water off of the underlying 4×4 stock, and the thickness of the stock itself. The beds are rated to last 20 – 30 years, and maybe longer with adequate and consistent staining of the top and exterior.
I designed the beds to be parallelograms, instead of rectangles. This gained both more direct sunlight to the root-zone and offered a slightly different take on the more typical rectangular design. I used 65 4x4x8 clear cedar posts – and 12 tight-knot 2x6x10 cedar plates. The cost of this project, using clear cedar at retail cost, would be a deterrent to implementing this design. I was able to find a pallet of green clear posts at a fraction of retail price, thus making it affordable for this project. One could always replicate this design using tight-knot cedar stock.
The lap joint used at each corner offers a stable structure, with each successive layer bolted and nailed to the layer beneath it. 60d nails and 5″ screws were used as fasteners. Stainless screws were used to adhere the top plates.
Project: Full scale remodel of back yard.
Location: Phinney Ridge
Fencing – Flagstone – Planters – Decking & Stairs
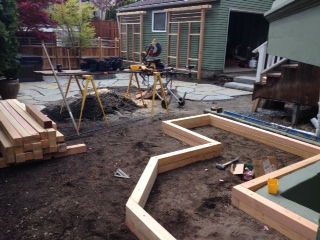
This installation was extensive and offered numerous challenges and opportunities. I’d like to take the reader through the project in a series of pictures, so that the you’ll get a sense of my creative process and how I approach and manage a project like this. Building anything is puzzling – meaning, it presents riddles at every turn. Where does the landscape flow from? Where do the softer points intersect with the sharp angles? How is a space built to have its own character and life? It seems like any space has a preferred state of rest – finding that is my challenge.
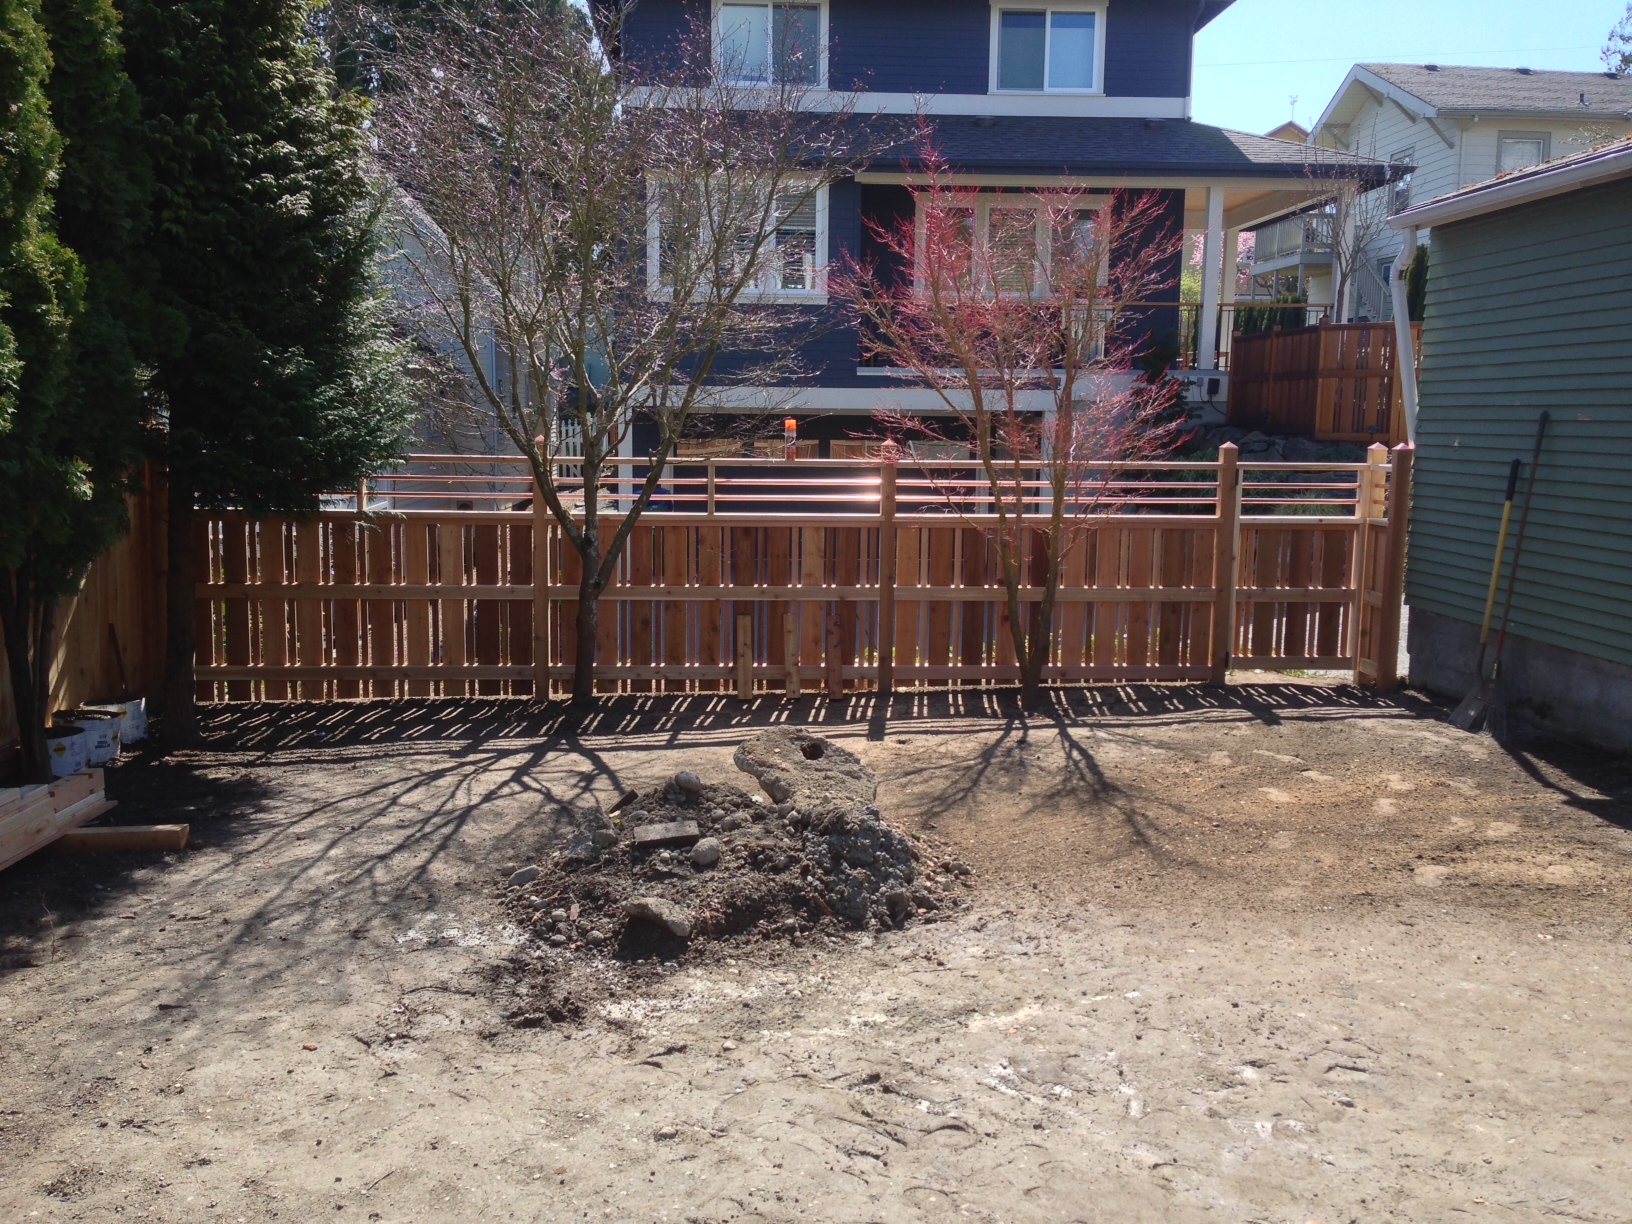
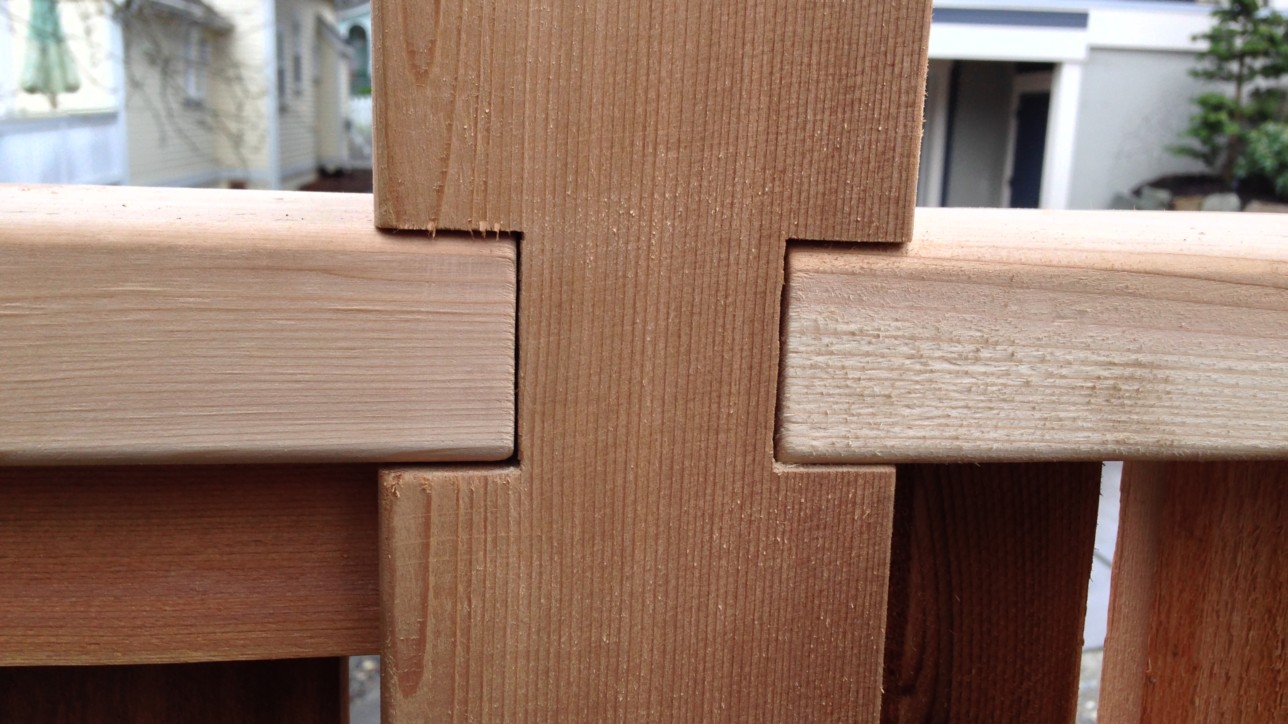
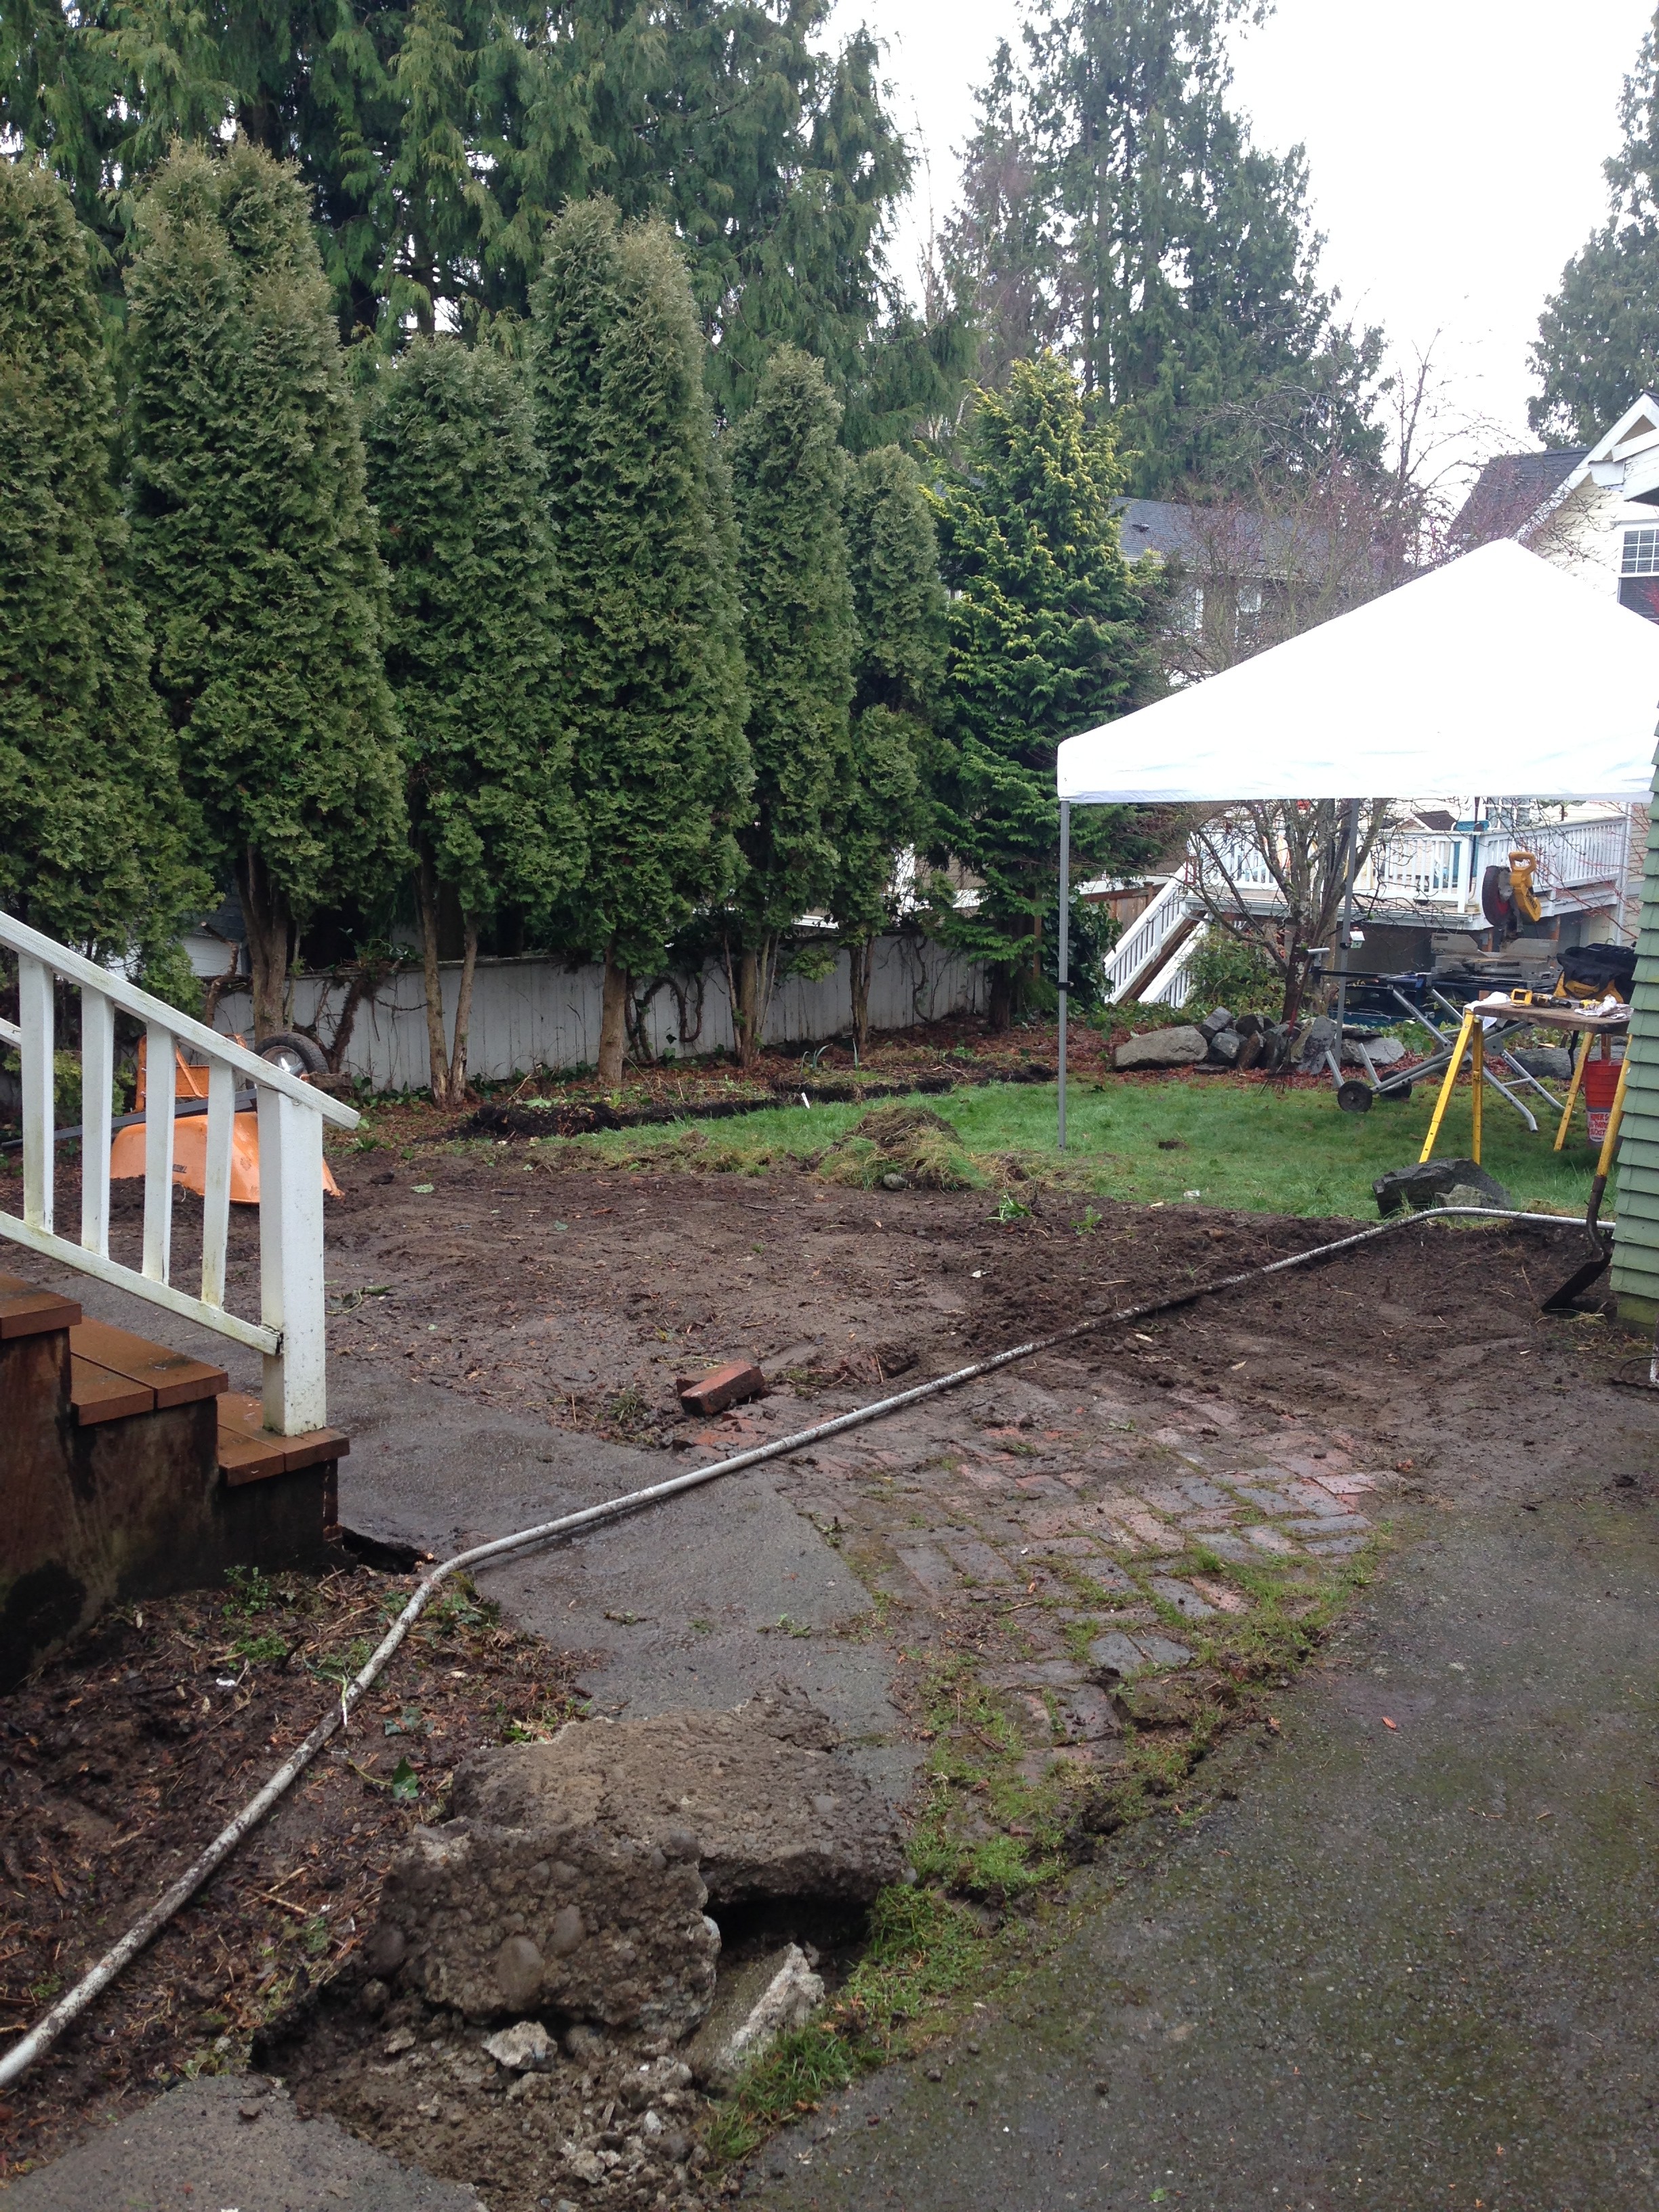
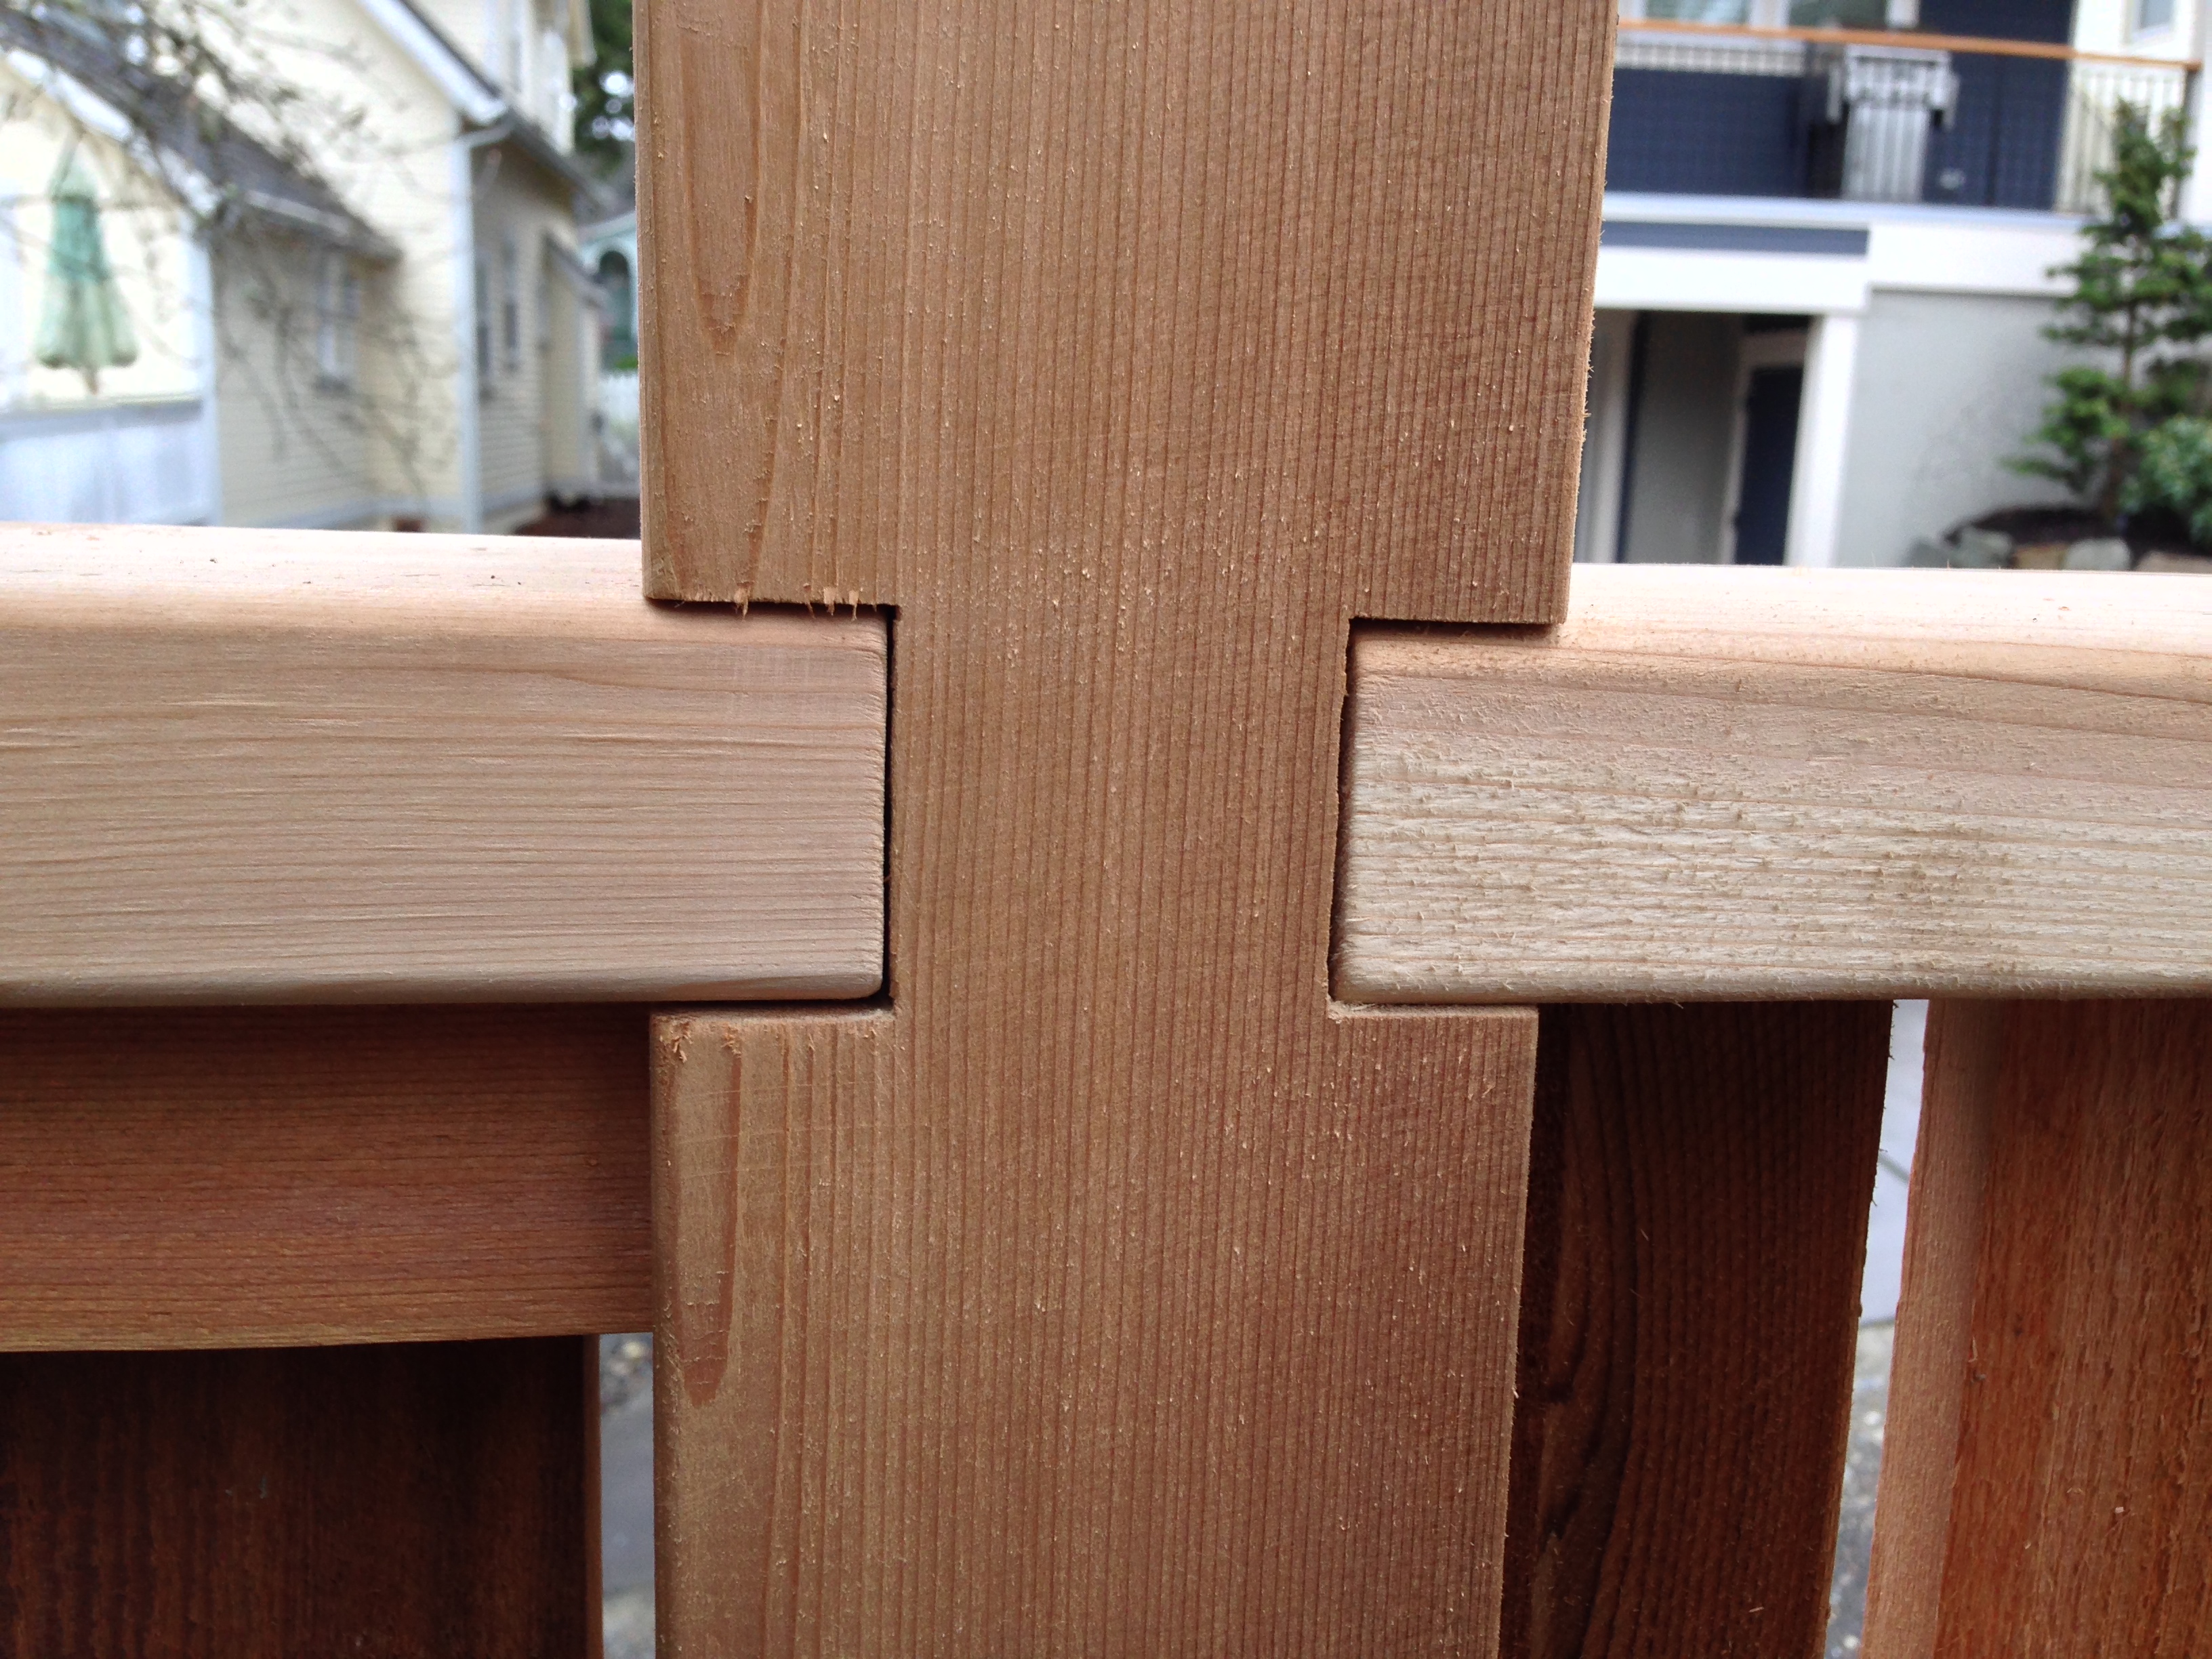 I started this project by demoing the fences, which included a number of buried posts from the previous ones. The fence stringers were mortised into each post and two 1 1/2″copper pipes were set between the top and middle plates. Each post had to be attached to its tenon prior to cementing. Pulling the fence post onto the pipes and stringers required a ratchet tie down. It surprisingly worked like a charm. After finishing the fences, I concluded the removal 15 cubic yards of soil from the site. Many truck loads exported by hand in the wet and cold Seattle winter. It becomes its own meditation after a time. This is the state of the yard when the grading is nearly completed.
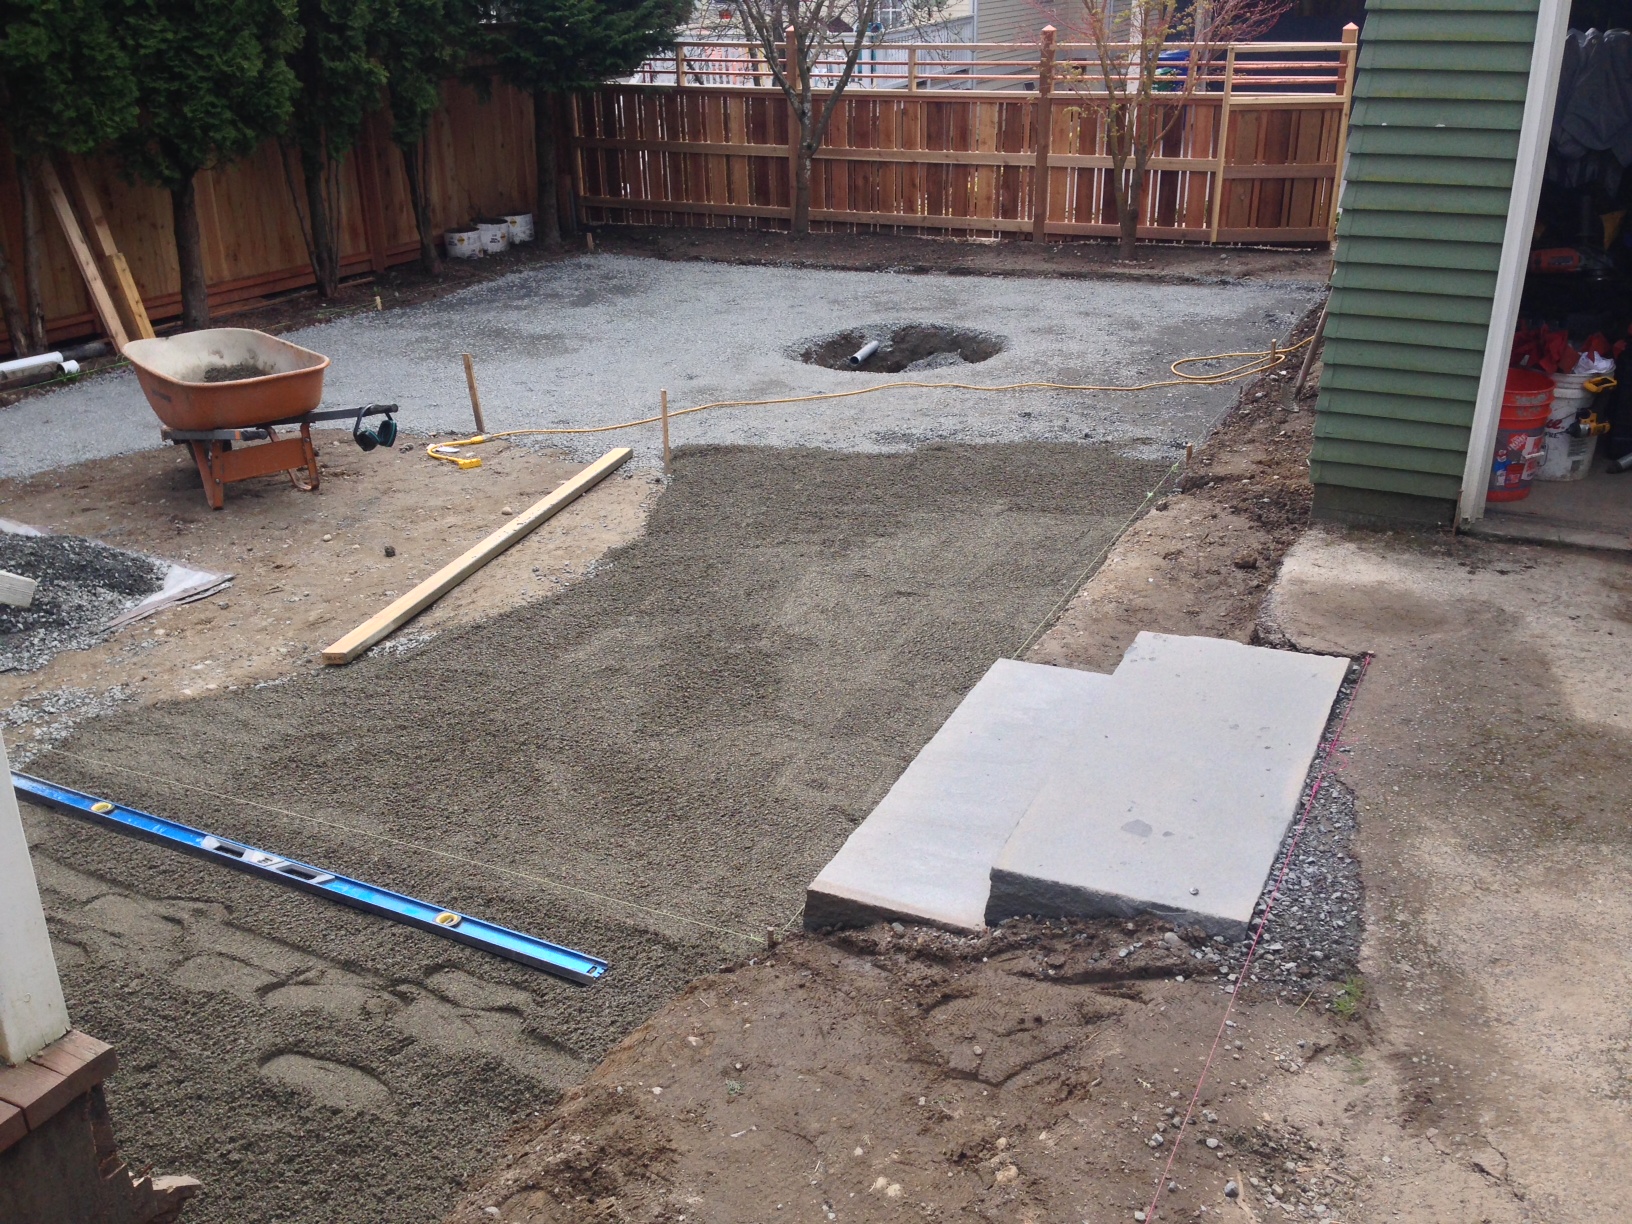
This picture shows the finished grading prior to the construction of the patio or the fire pit. It shows the 5/8 minus covered with a 1″ layer of 1/4 minus graded for a screed layer. All aggregate was purchased from Dirt Exchange in Ballard – the guys there are more than helpful for the DIY’ers out there, as they can deliver any product directly to you.
The two steps are from Marenakos – they’re Pennsylvania blue to match the patio flagstone. I installed the risers first so that the entrance grade to the back yard would be set. You’ll notice the initial cutout for the fire pit and the circle where the future lawn is going to go.
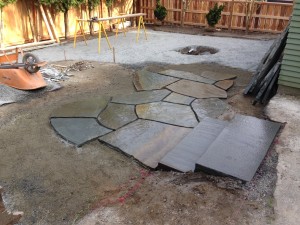
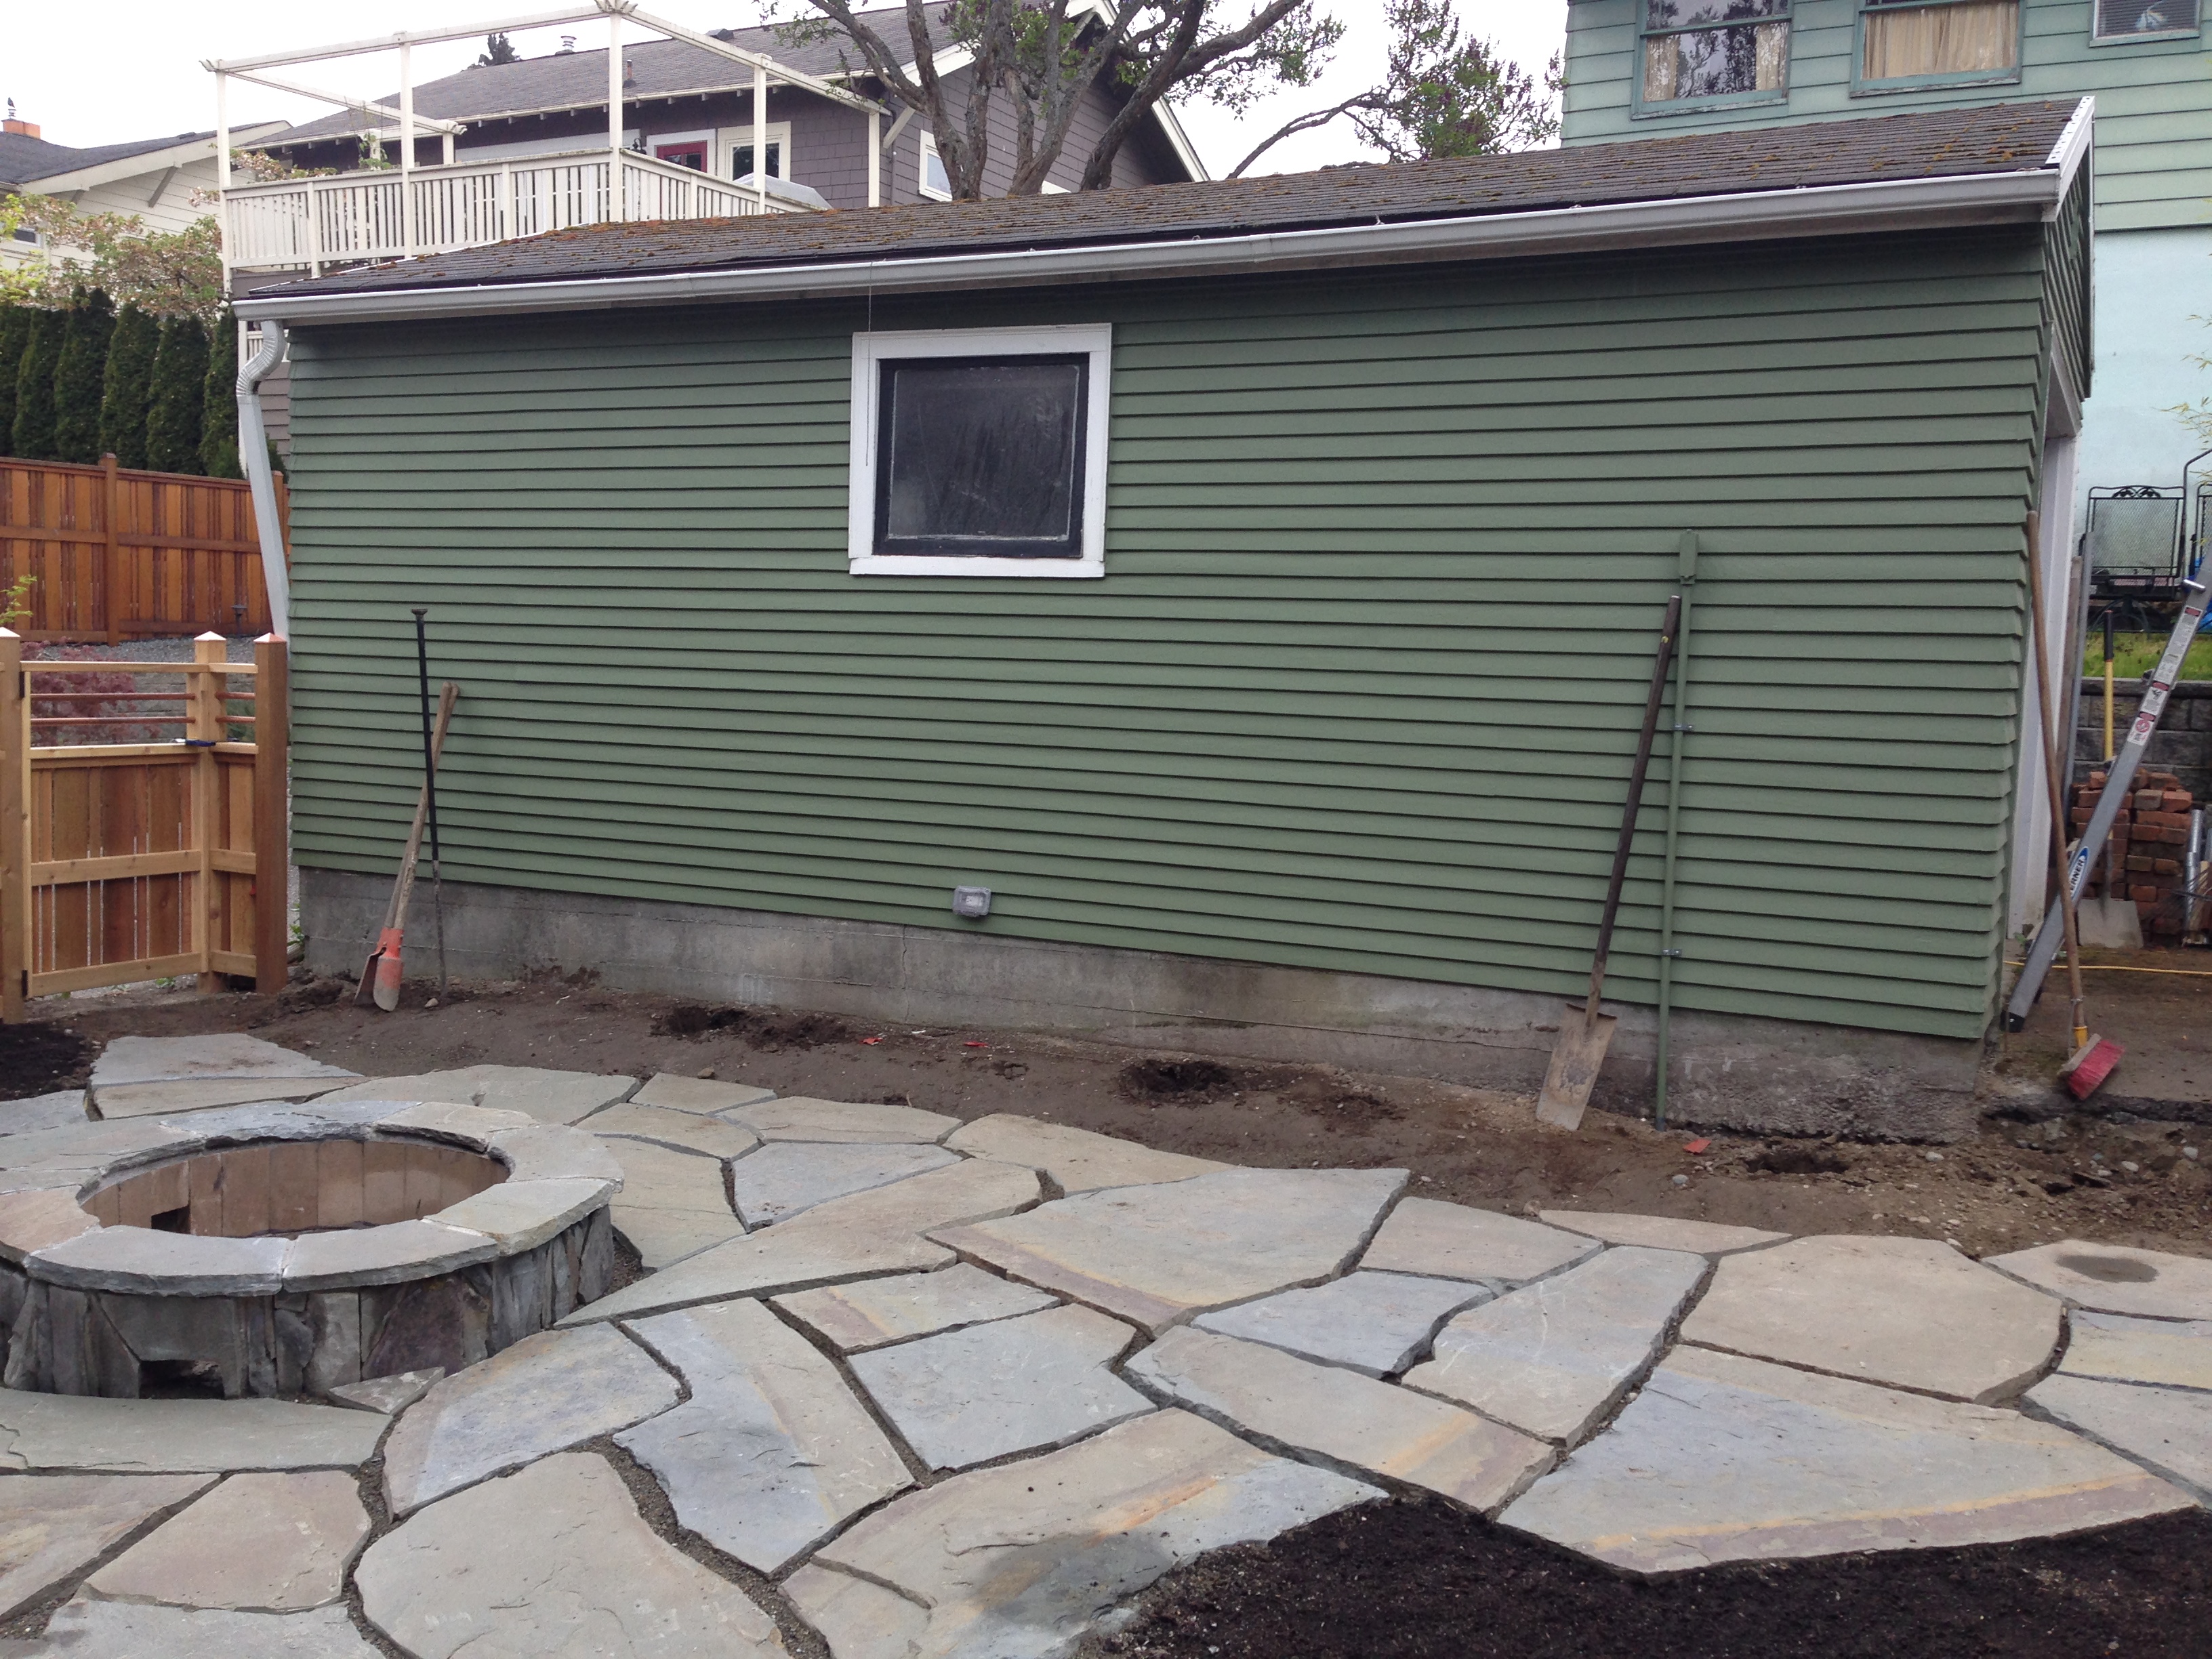 The flagstone was purchased from Pavingstone Supply Co. in Ballard. I cut each piece as I laid it – 3 diamond blades were used during installation. I installed half of the patio and then set the fire pit grades and finished that prior to continuing.
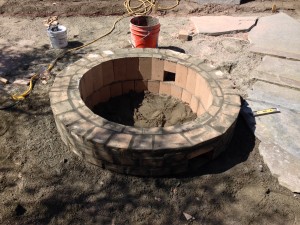
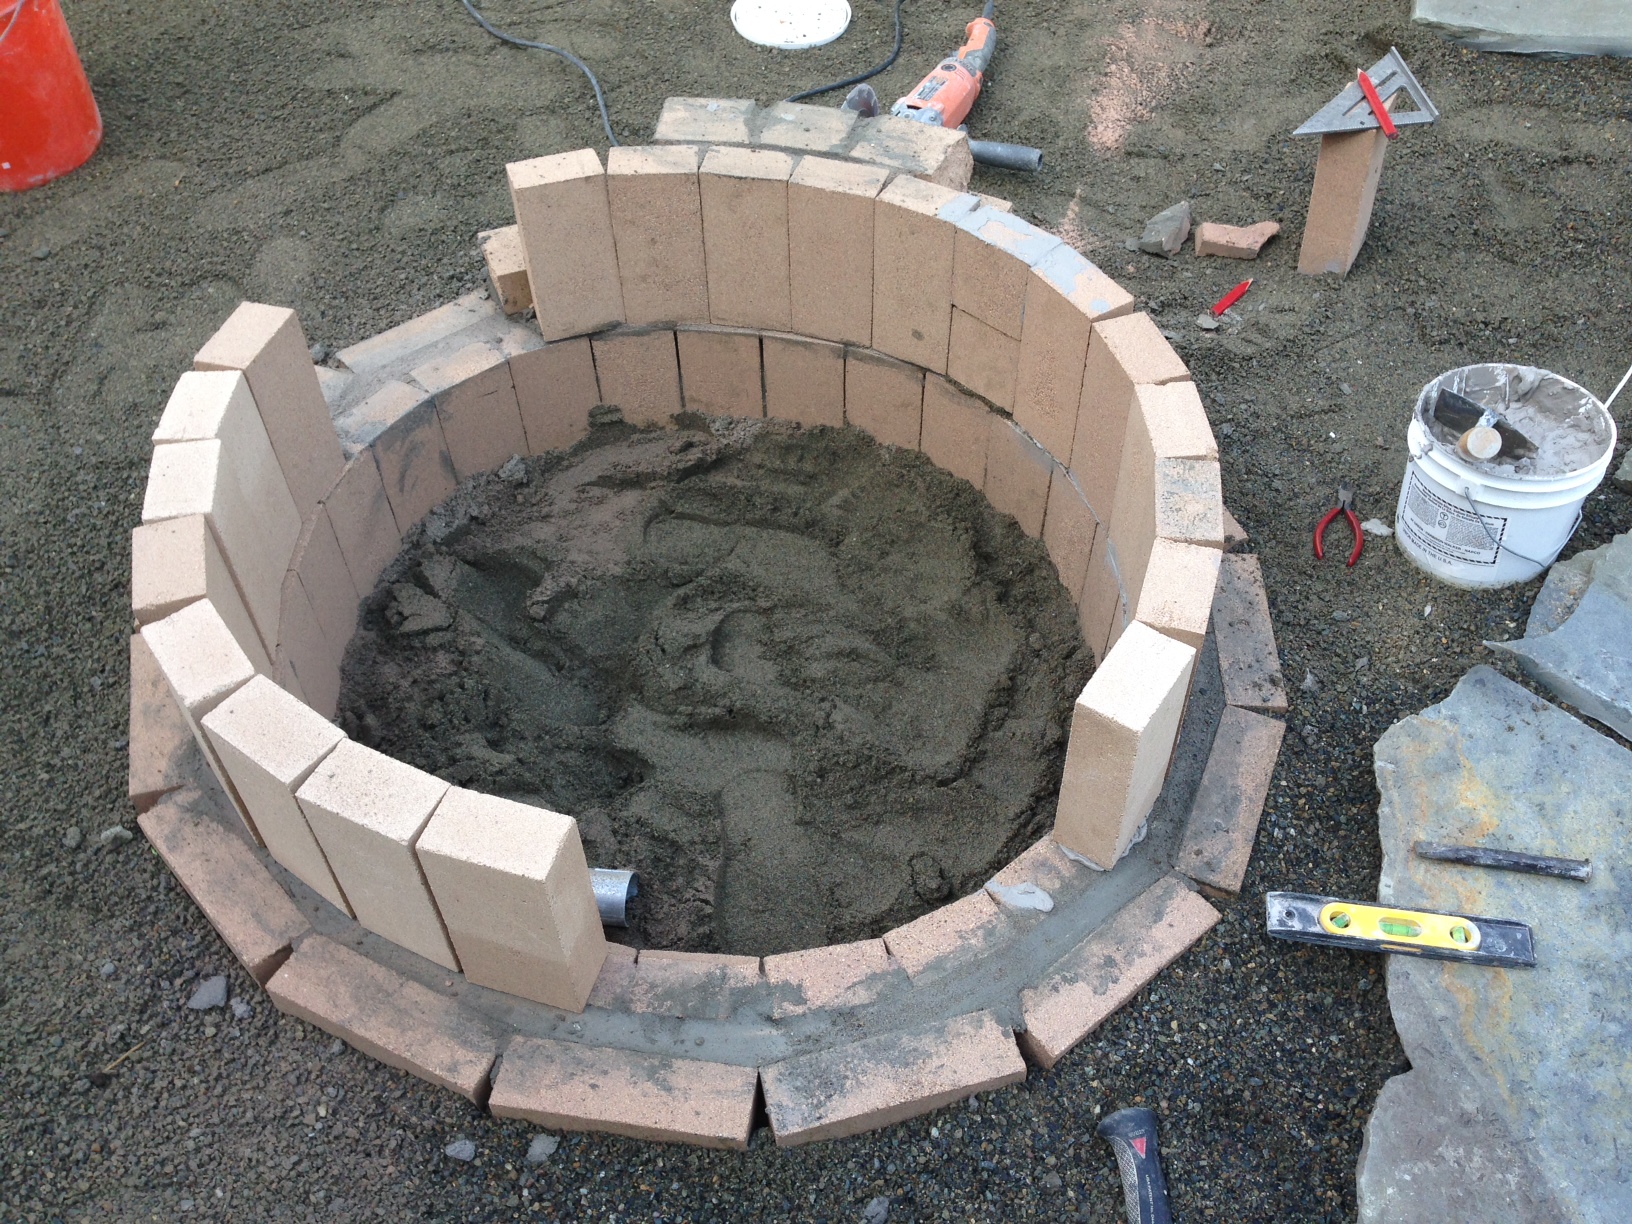
The fire pit was first set by installing a deep footer for the firebrick. Two levels of brick were used to get the height right, and the outside was faced with flagstone ends from the patio construction.
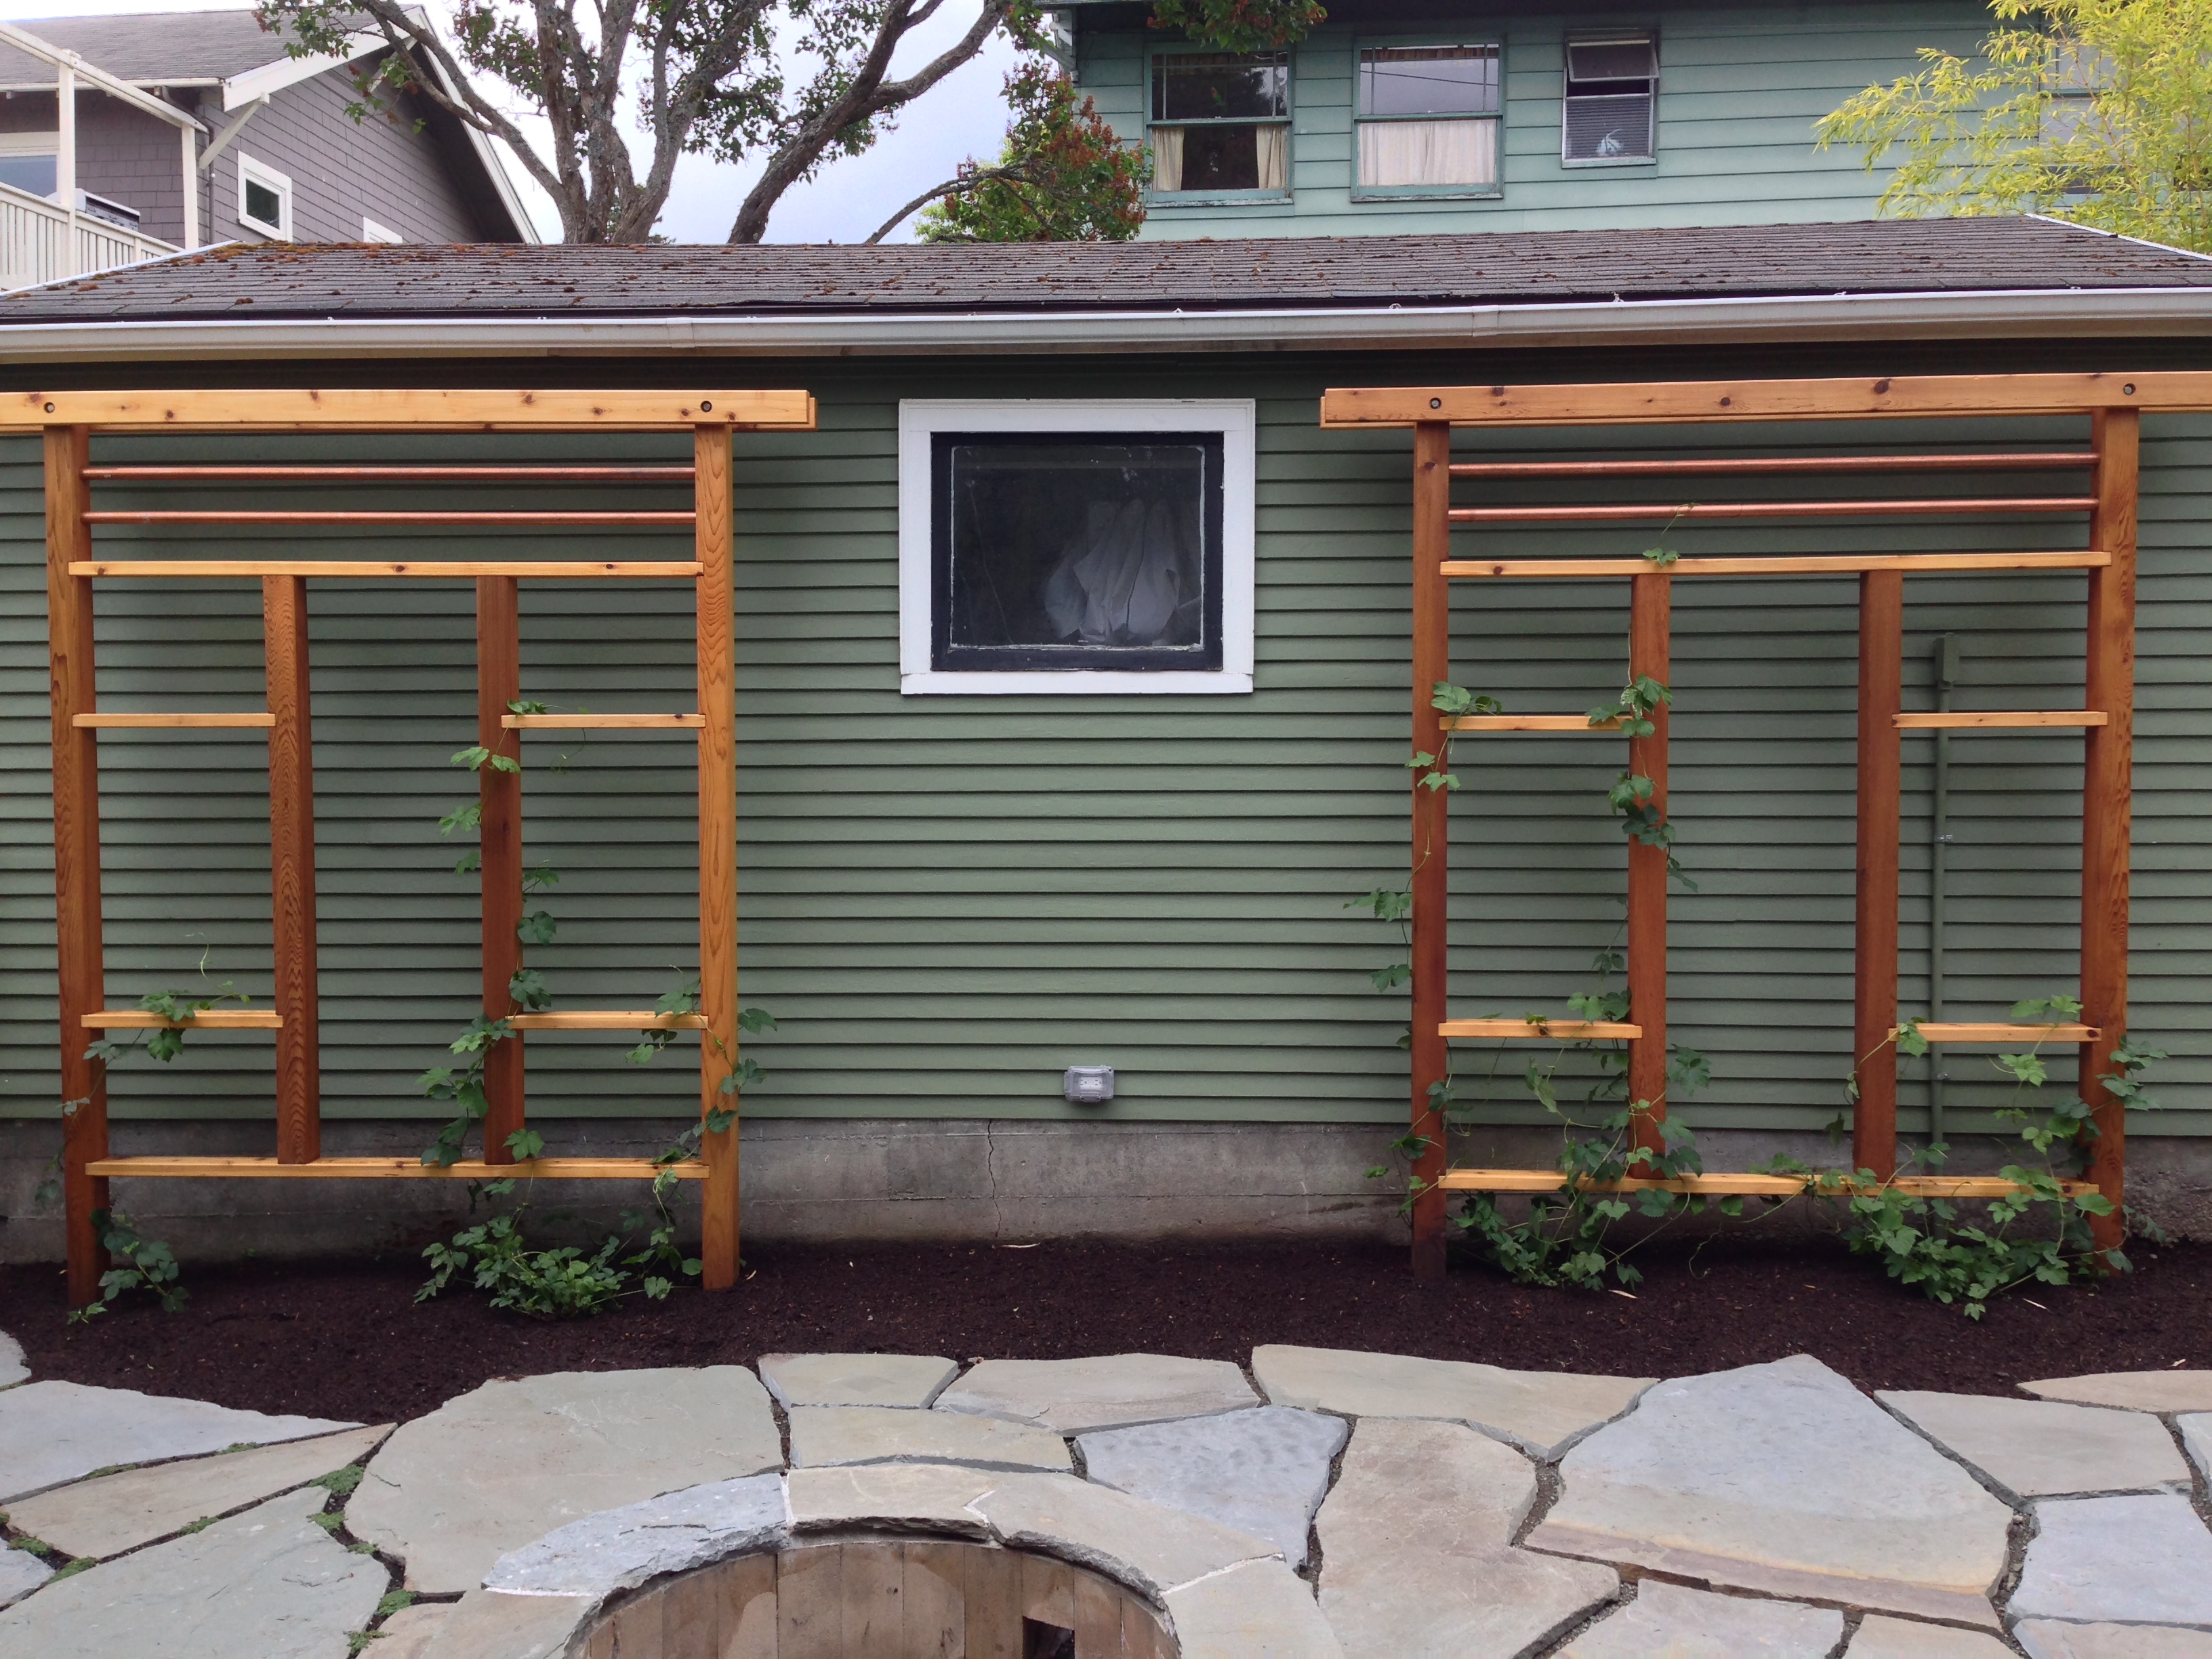 Once the patio was finished, I constructed two identical trellises. These trellises were built around 4 12′ cedar posts, with two 2×4 cedar and two 1 3/8″ copper pipe stingers, with a double plate of 2×4’s at the top. The design was the customers and fit really well the design of the fence.
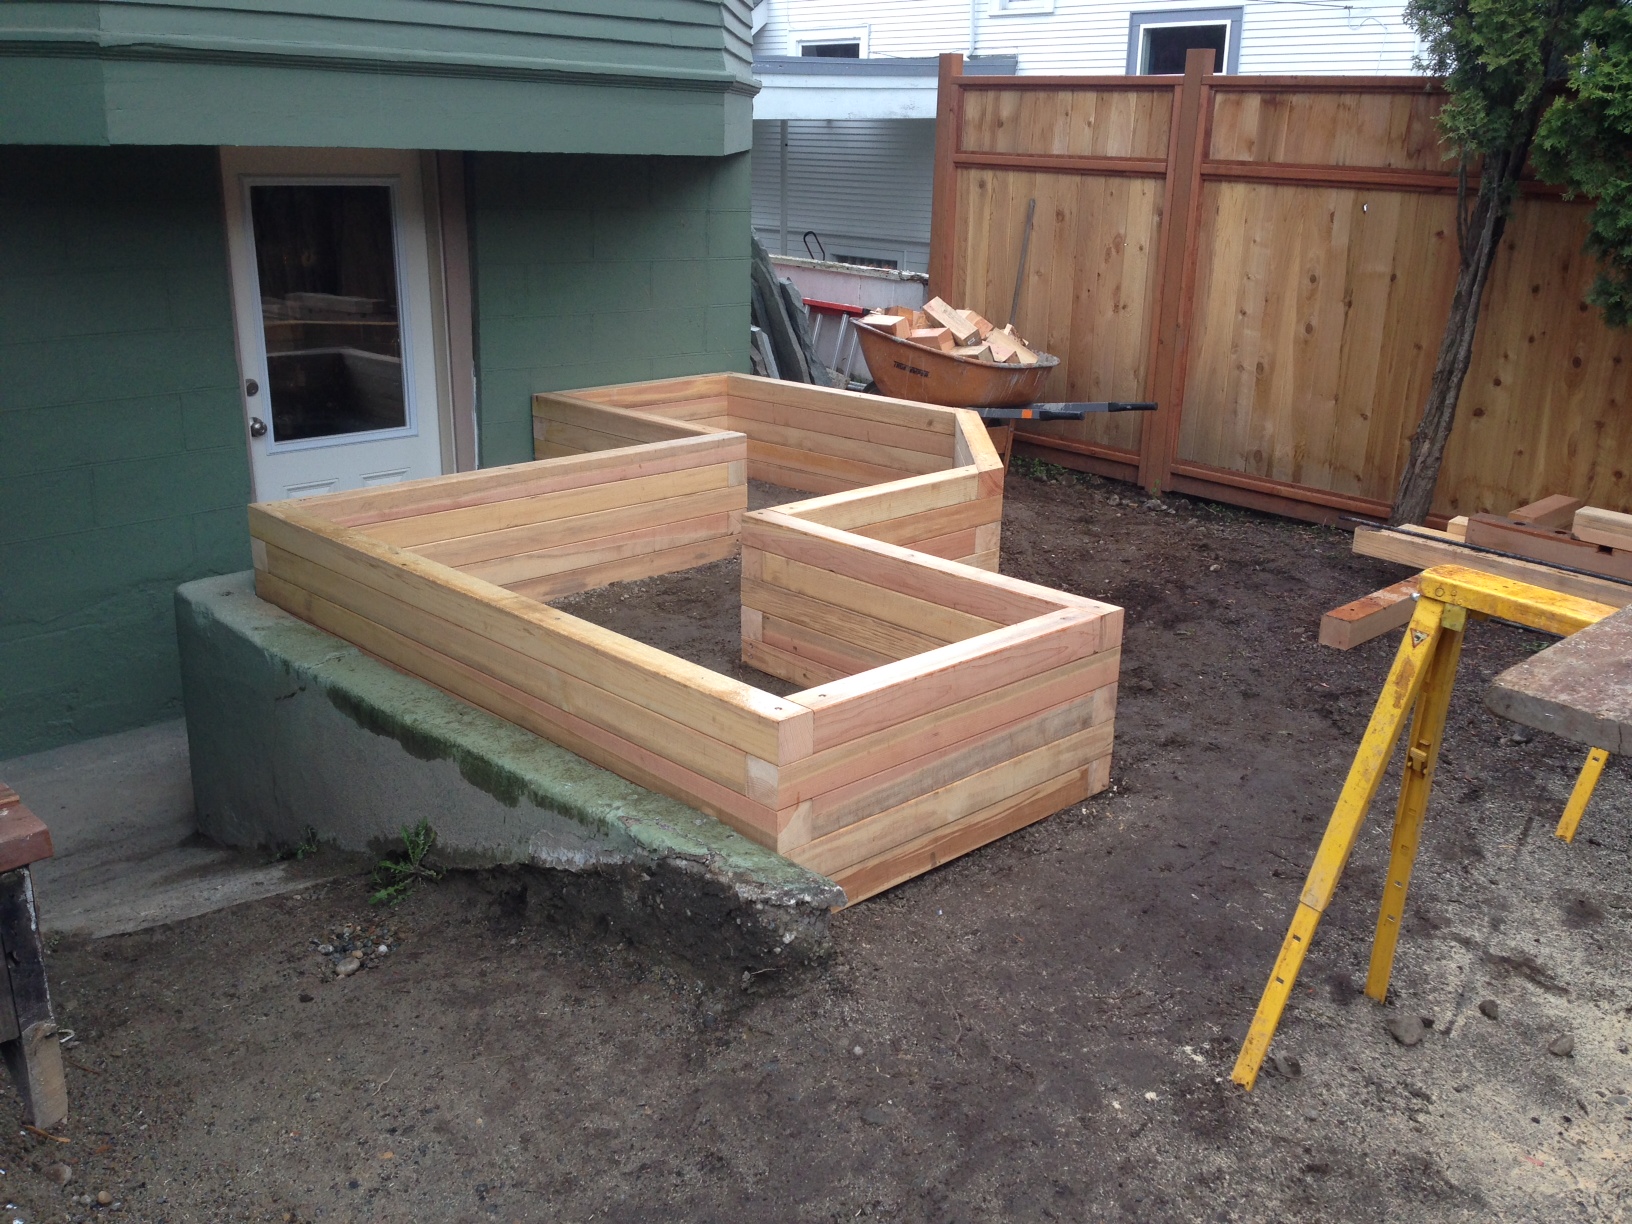
The two cedar planters were designed to be immovable; they’re landmarks at this point. Constructed out of 4×4 stock, they’re each capped with a 2×6 mitered cap to offer the expanded sitting edge.
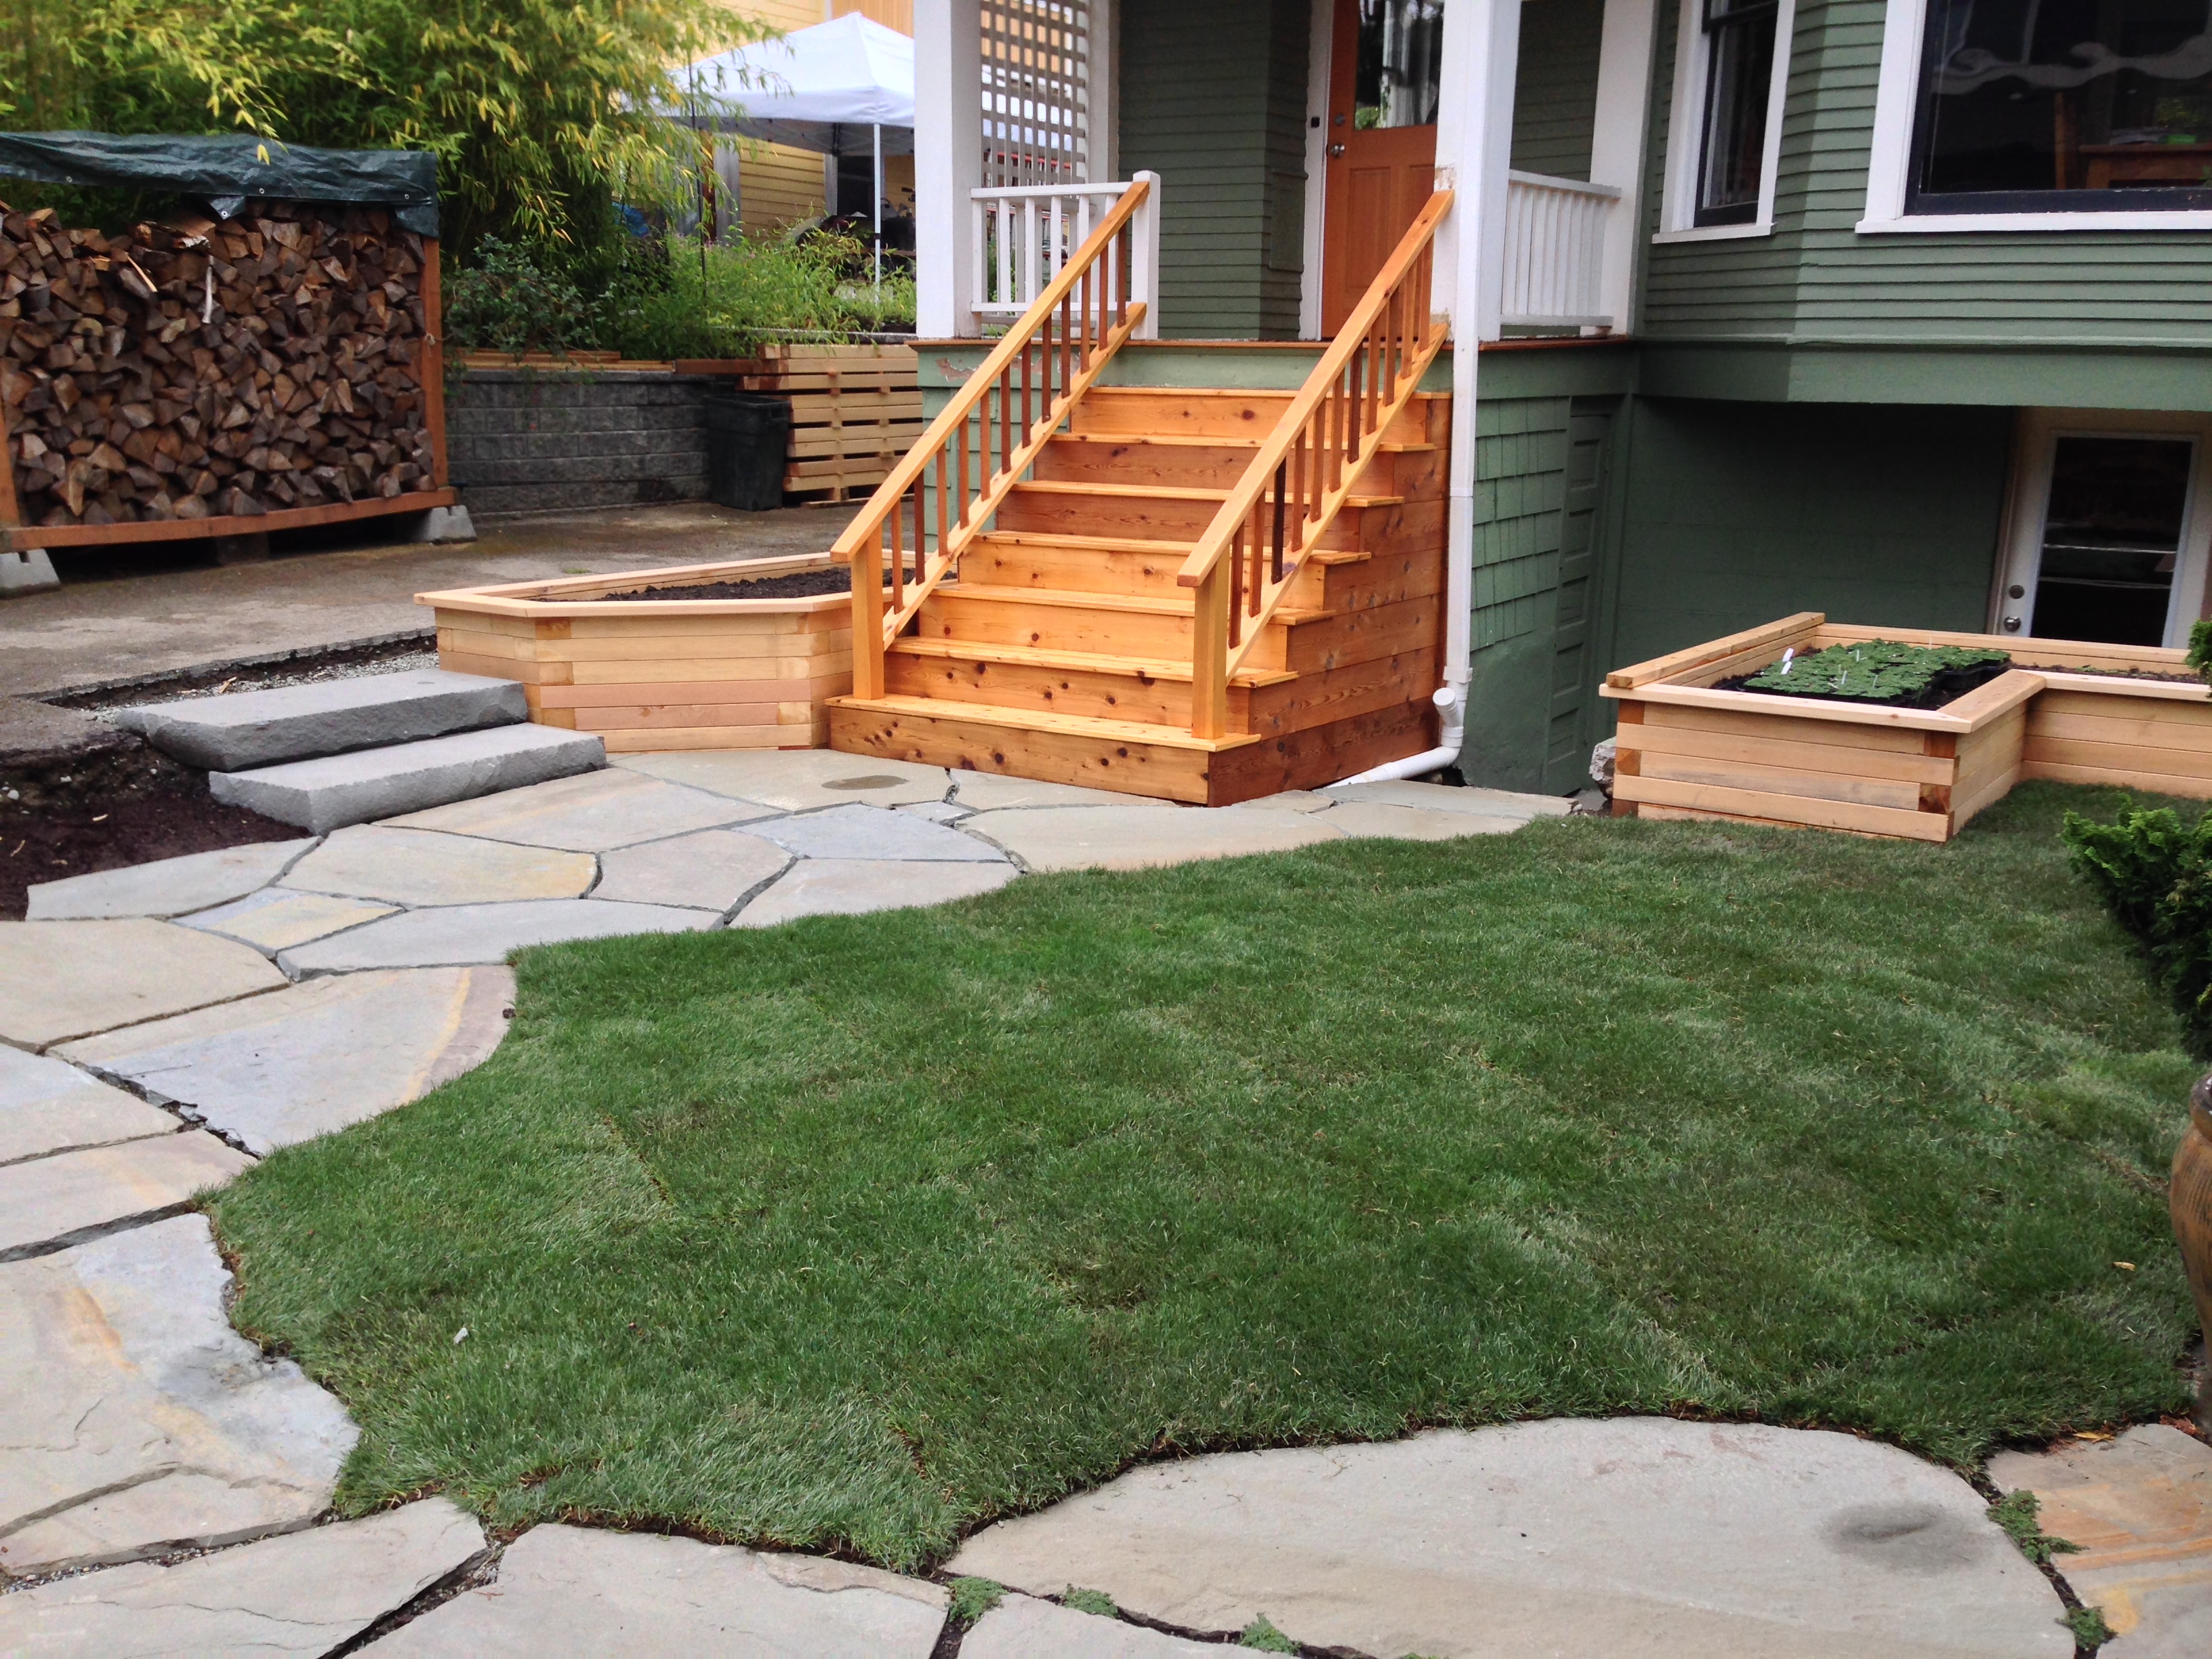
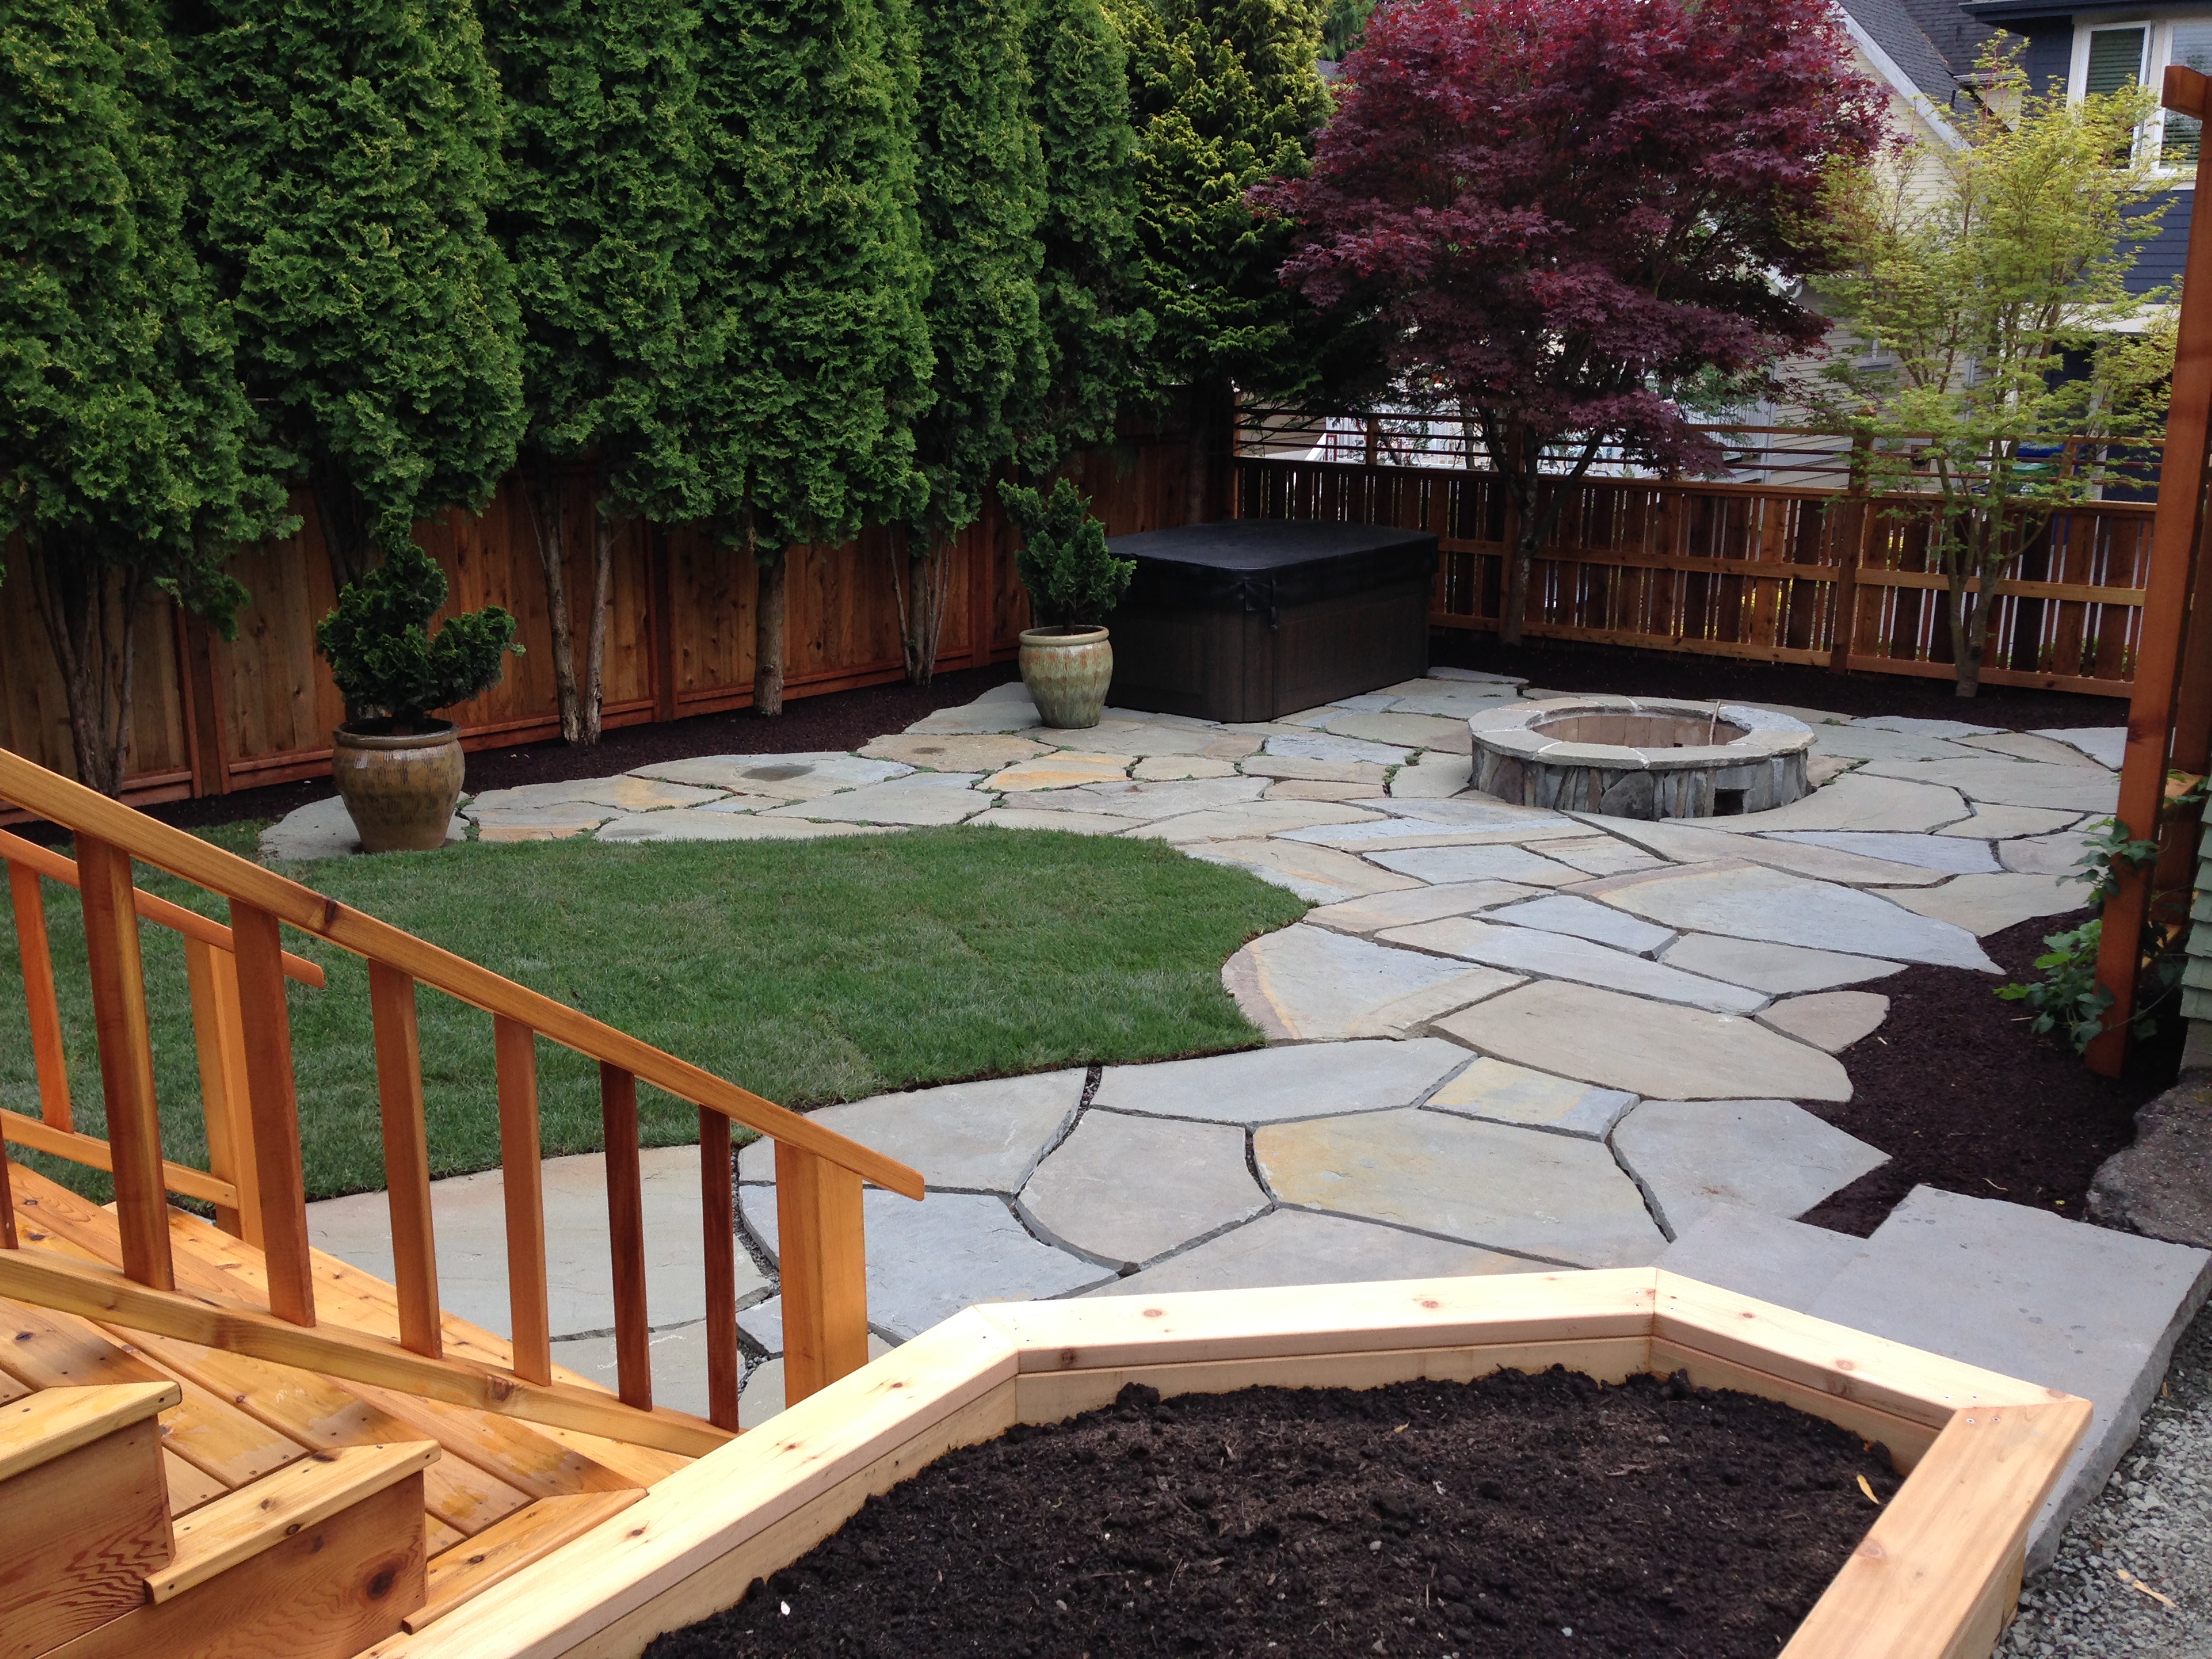
I like the two pics from opposite ends of the yard showing the extent of the remodel.
Just one more image showing the before and after.
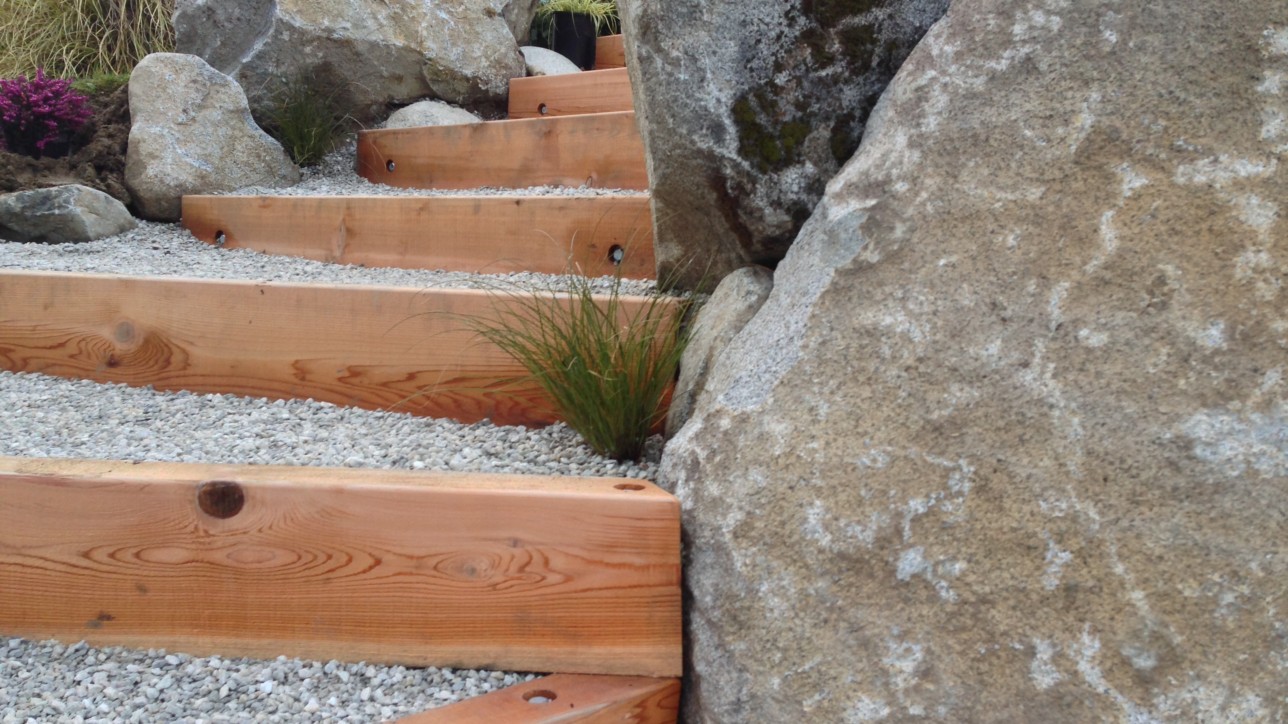
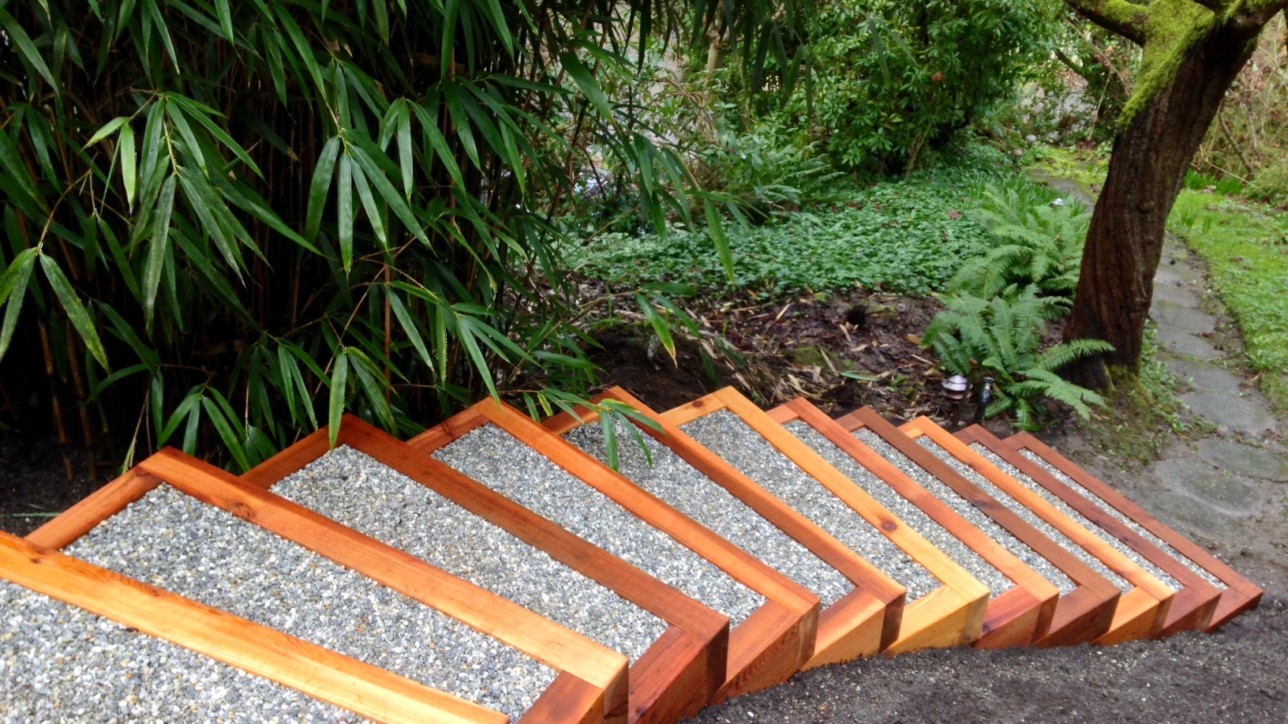
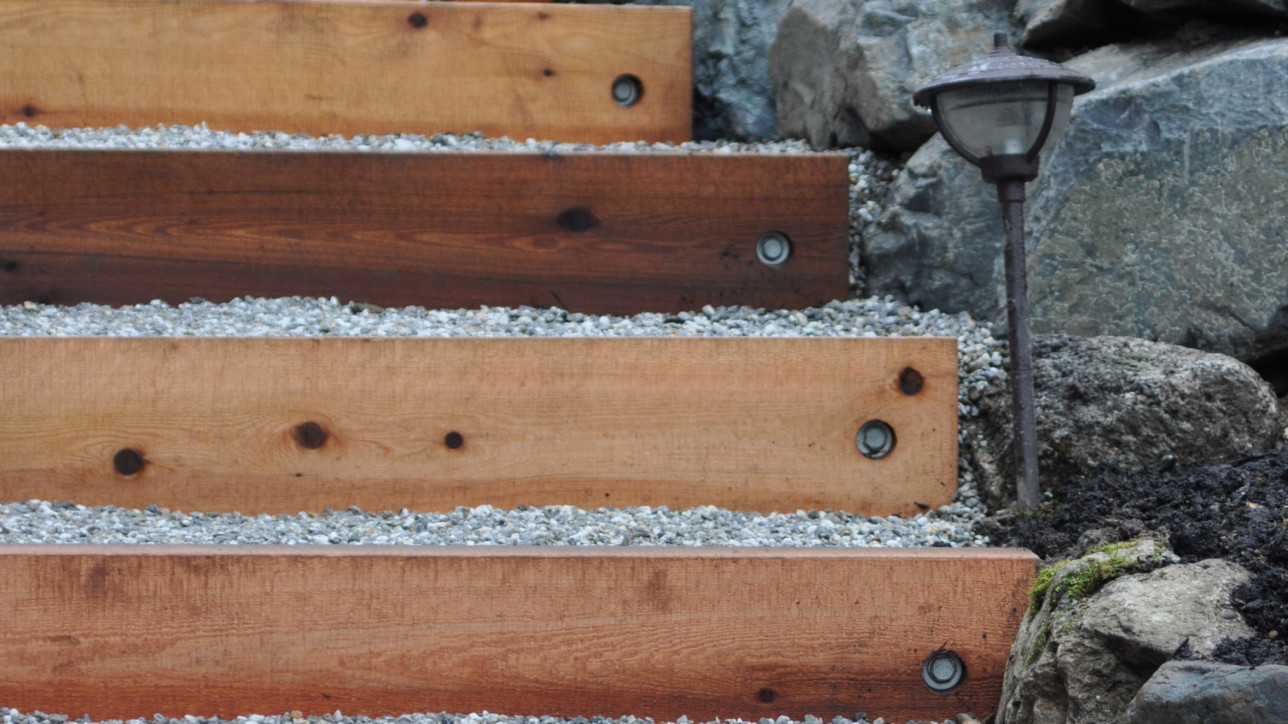
[dropcap type=”circle” color=”#ffffff” background=”#ef7f2c”]P[/dropcap]roject: Steps Remodel
Location: Mt. Baker
What we envisioned at the outset was to create a set of steps that walked like a mountain trail.
Project entailed demoing a set of crumbling concrete steps and replacing them with eight tons or granite boulders, shaped with 11 – 4″x8″ cedar risers from Issaquah Cedar. Decomposed granite was used as the surface tread, and was purchased at Terrazzo Stone & Supply in Bellevue. Each step was set upon 6 – 12 inches of crushed and packed 5/8″ minus. Because of the weather we compacted the course of steps beyond code, making an almost cement of gravel and mud around the bottom boulders.
Cedar risers were installed to be modular, meaning they can be unbolted from their posts and replaced after 15 years of use.
Plumb Landscapes, owned and operated by my brother Rodney Zollinger, was used in overall design and plant layout, and played a big role in getting the whole project installed on time.
Finished up with a mortised copper-pipe railing, landscape lighting, irrigation and mulching.
I’ll update in a month or so as the landscape becomes more settled.
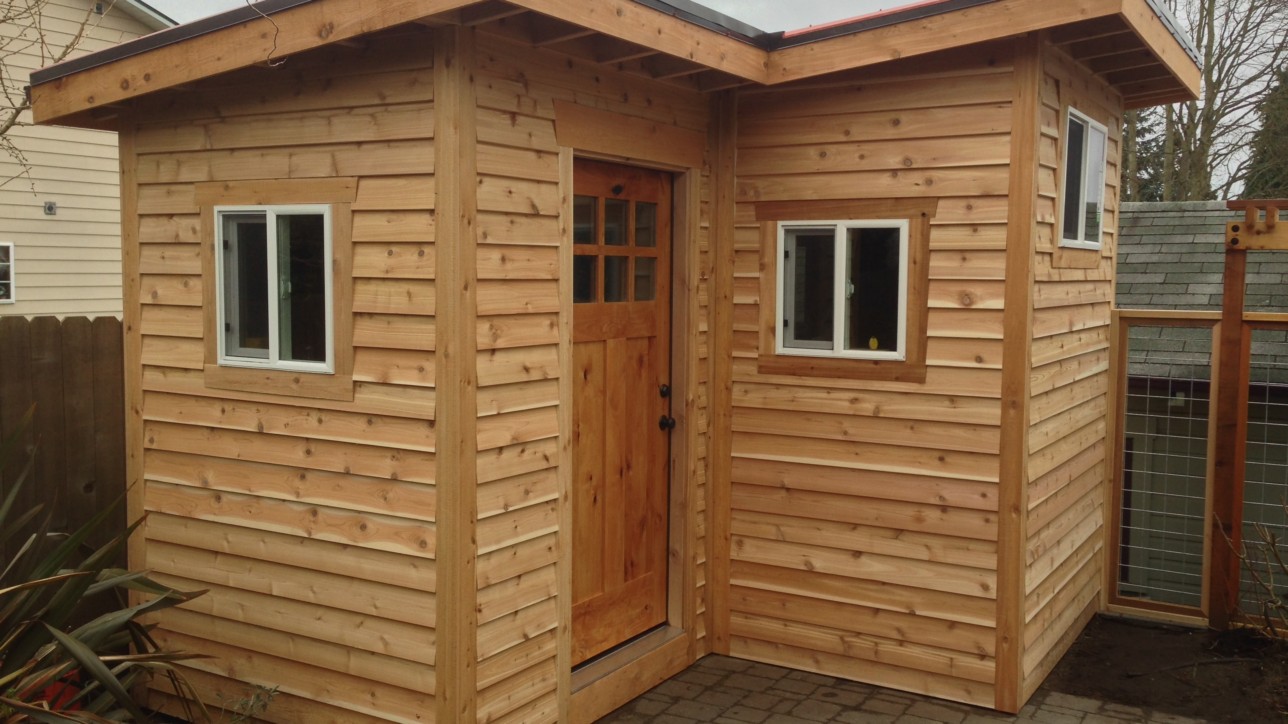
[dropcap type=”circle” color=”#ffffff” background=”#ef7f2c”]P[/dropcap]roject: Artist’s Storage Shed
Location: Ballard
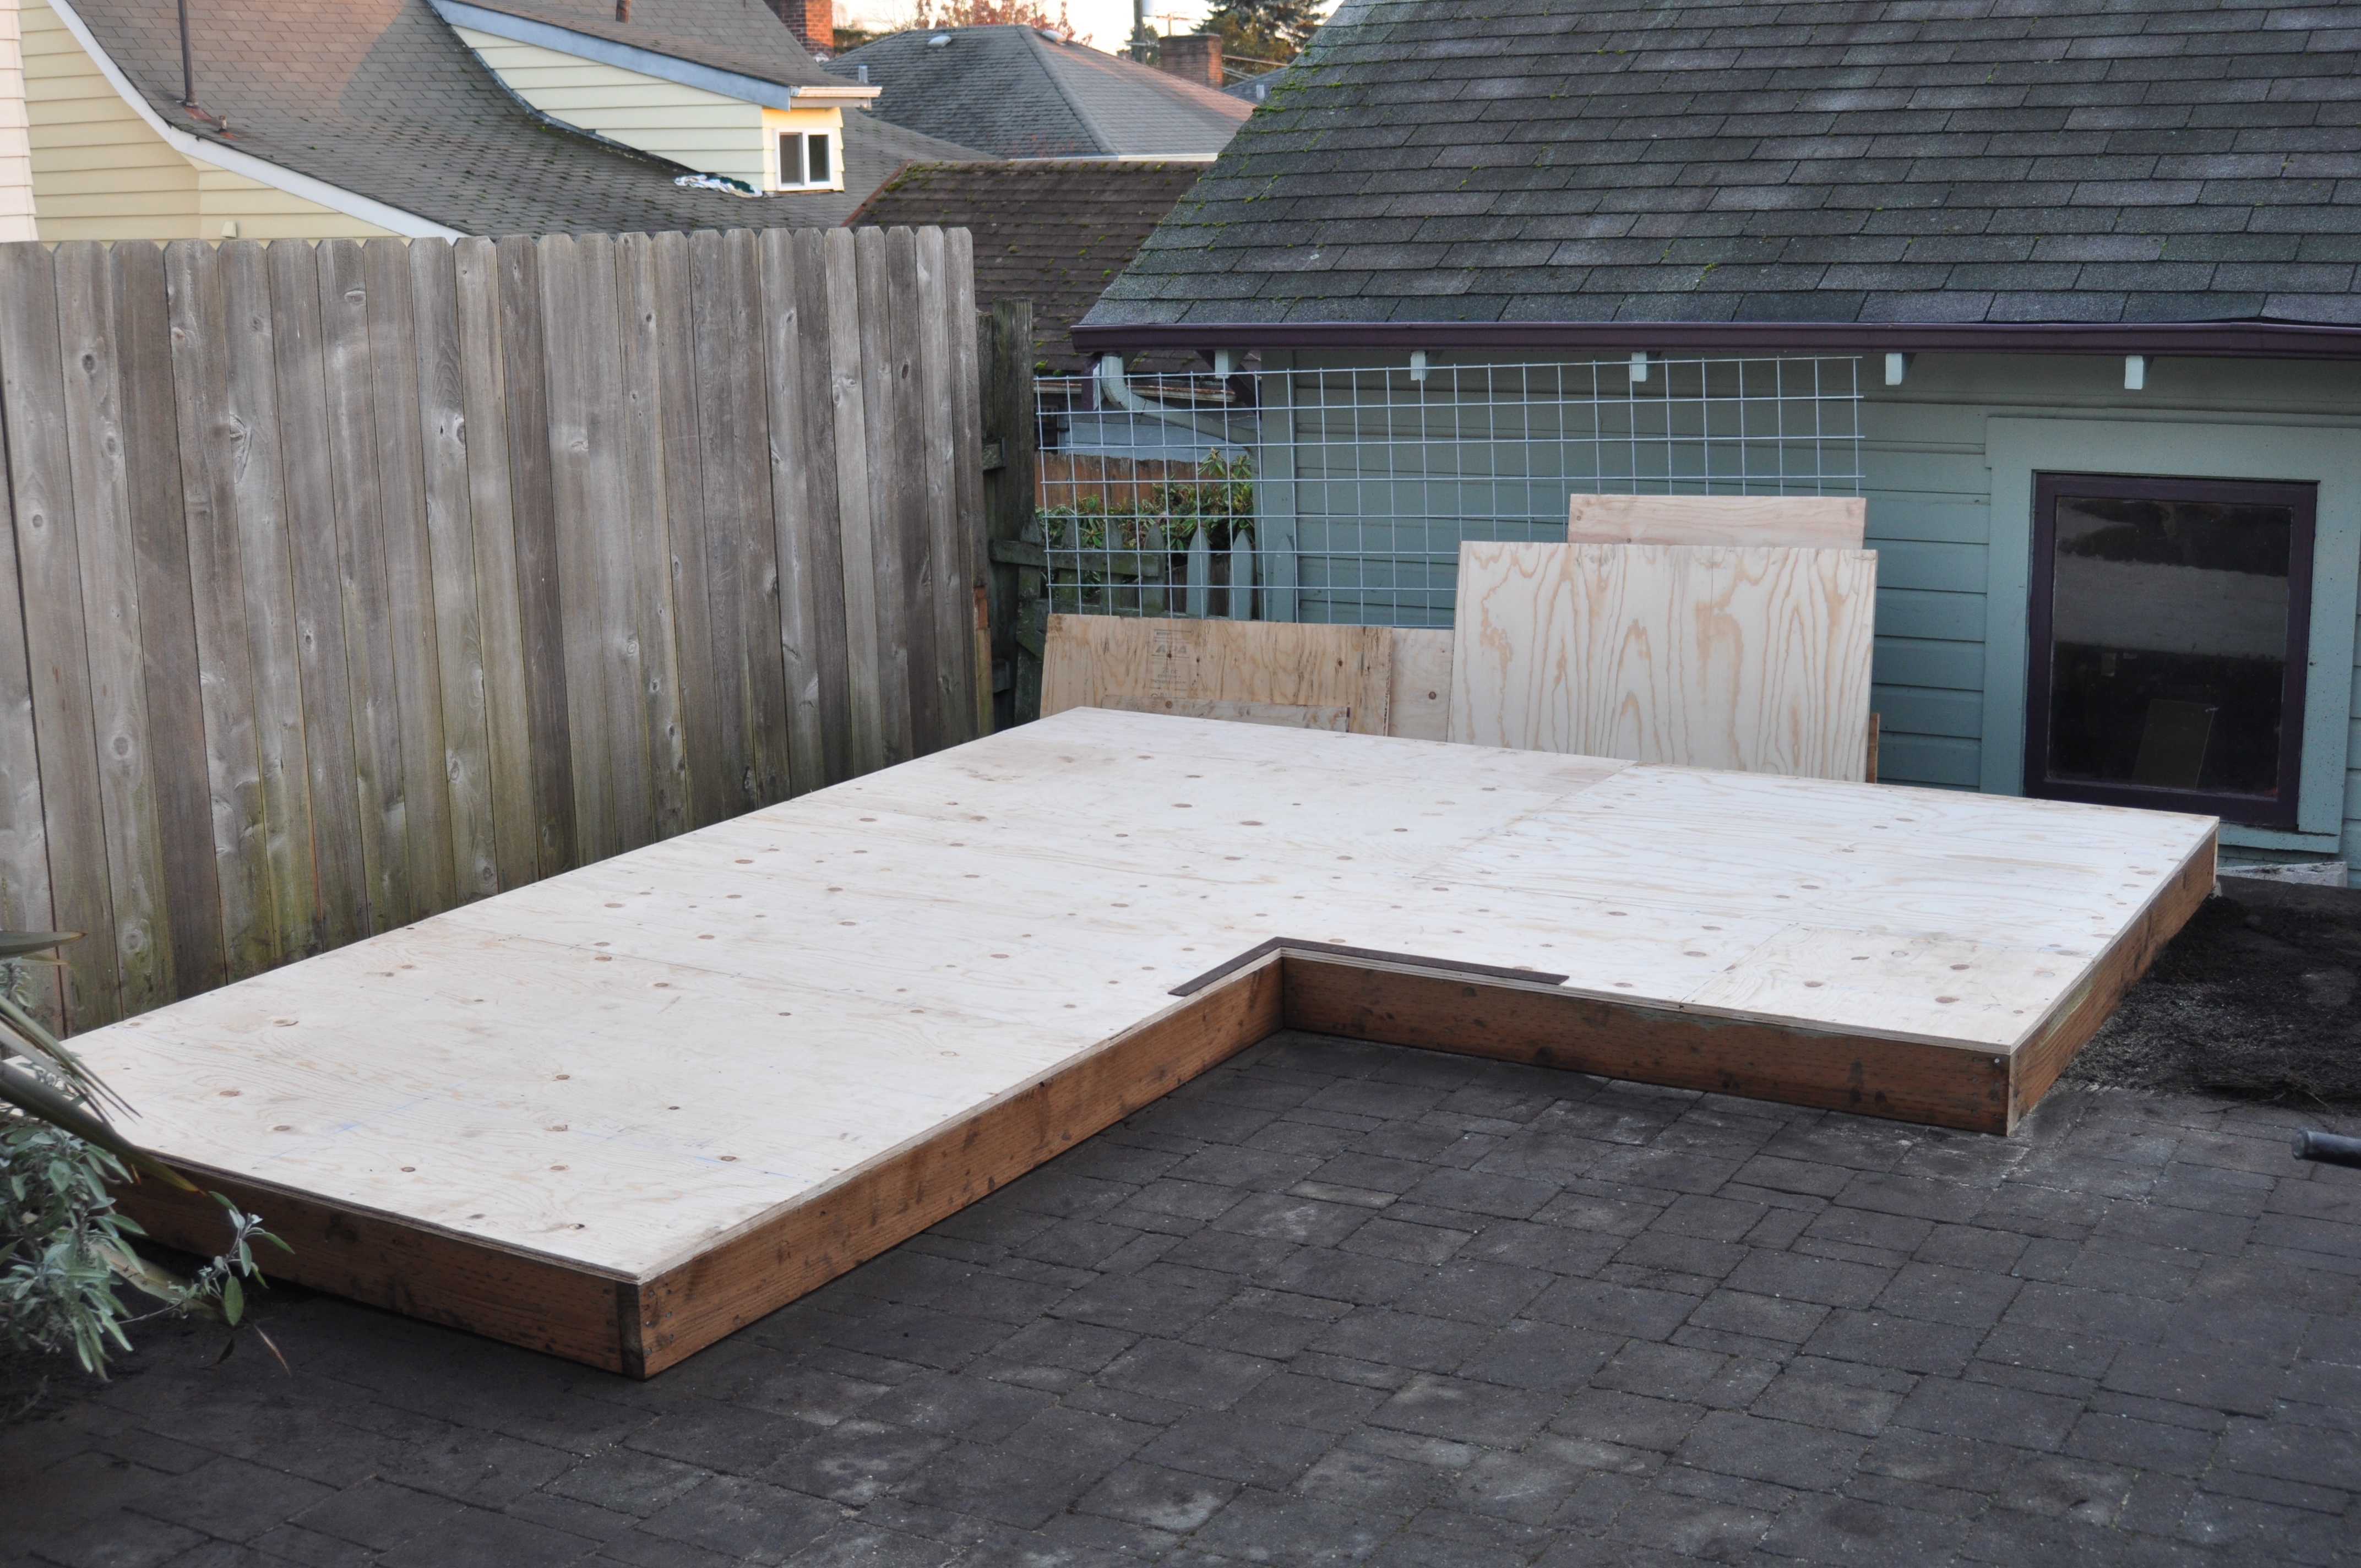
Original design was to construct a small shed, whose function would be to primarily offer storage of boxes and misc overflow items, the likes of which we all have. What the project organically became was something a little more than that, as you’ll see by the pictures.
I started with a site that was at the terminal point of the new fence detailed in my previous post “Cedar Fence w/Attached Pergola”.
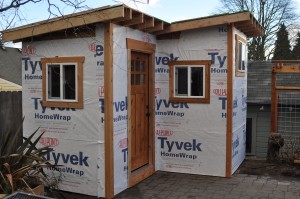
The site was at the far corner of the client’s back yard, adjacent their paver patio and at parts overlapping. I designed the building to be an el shape, with two windows and a door. We upgraded to four windows and a knotty alder door, an exquisite thing in itself.
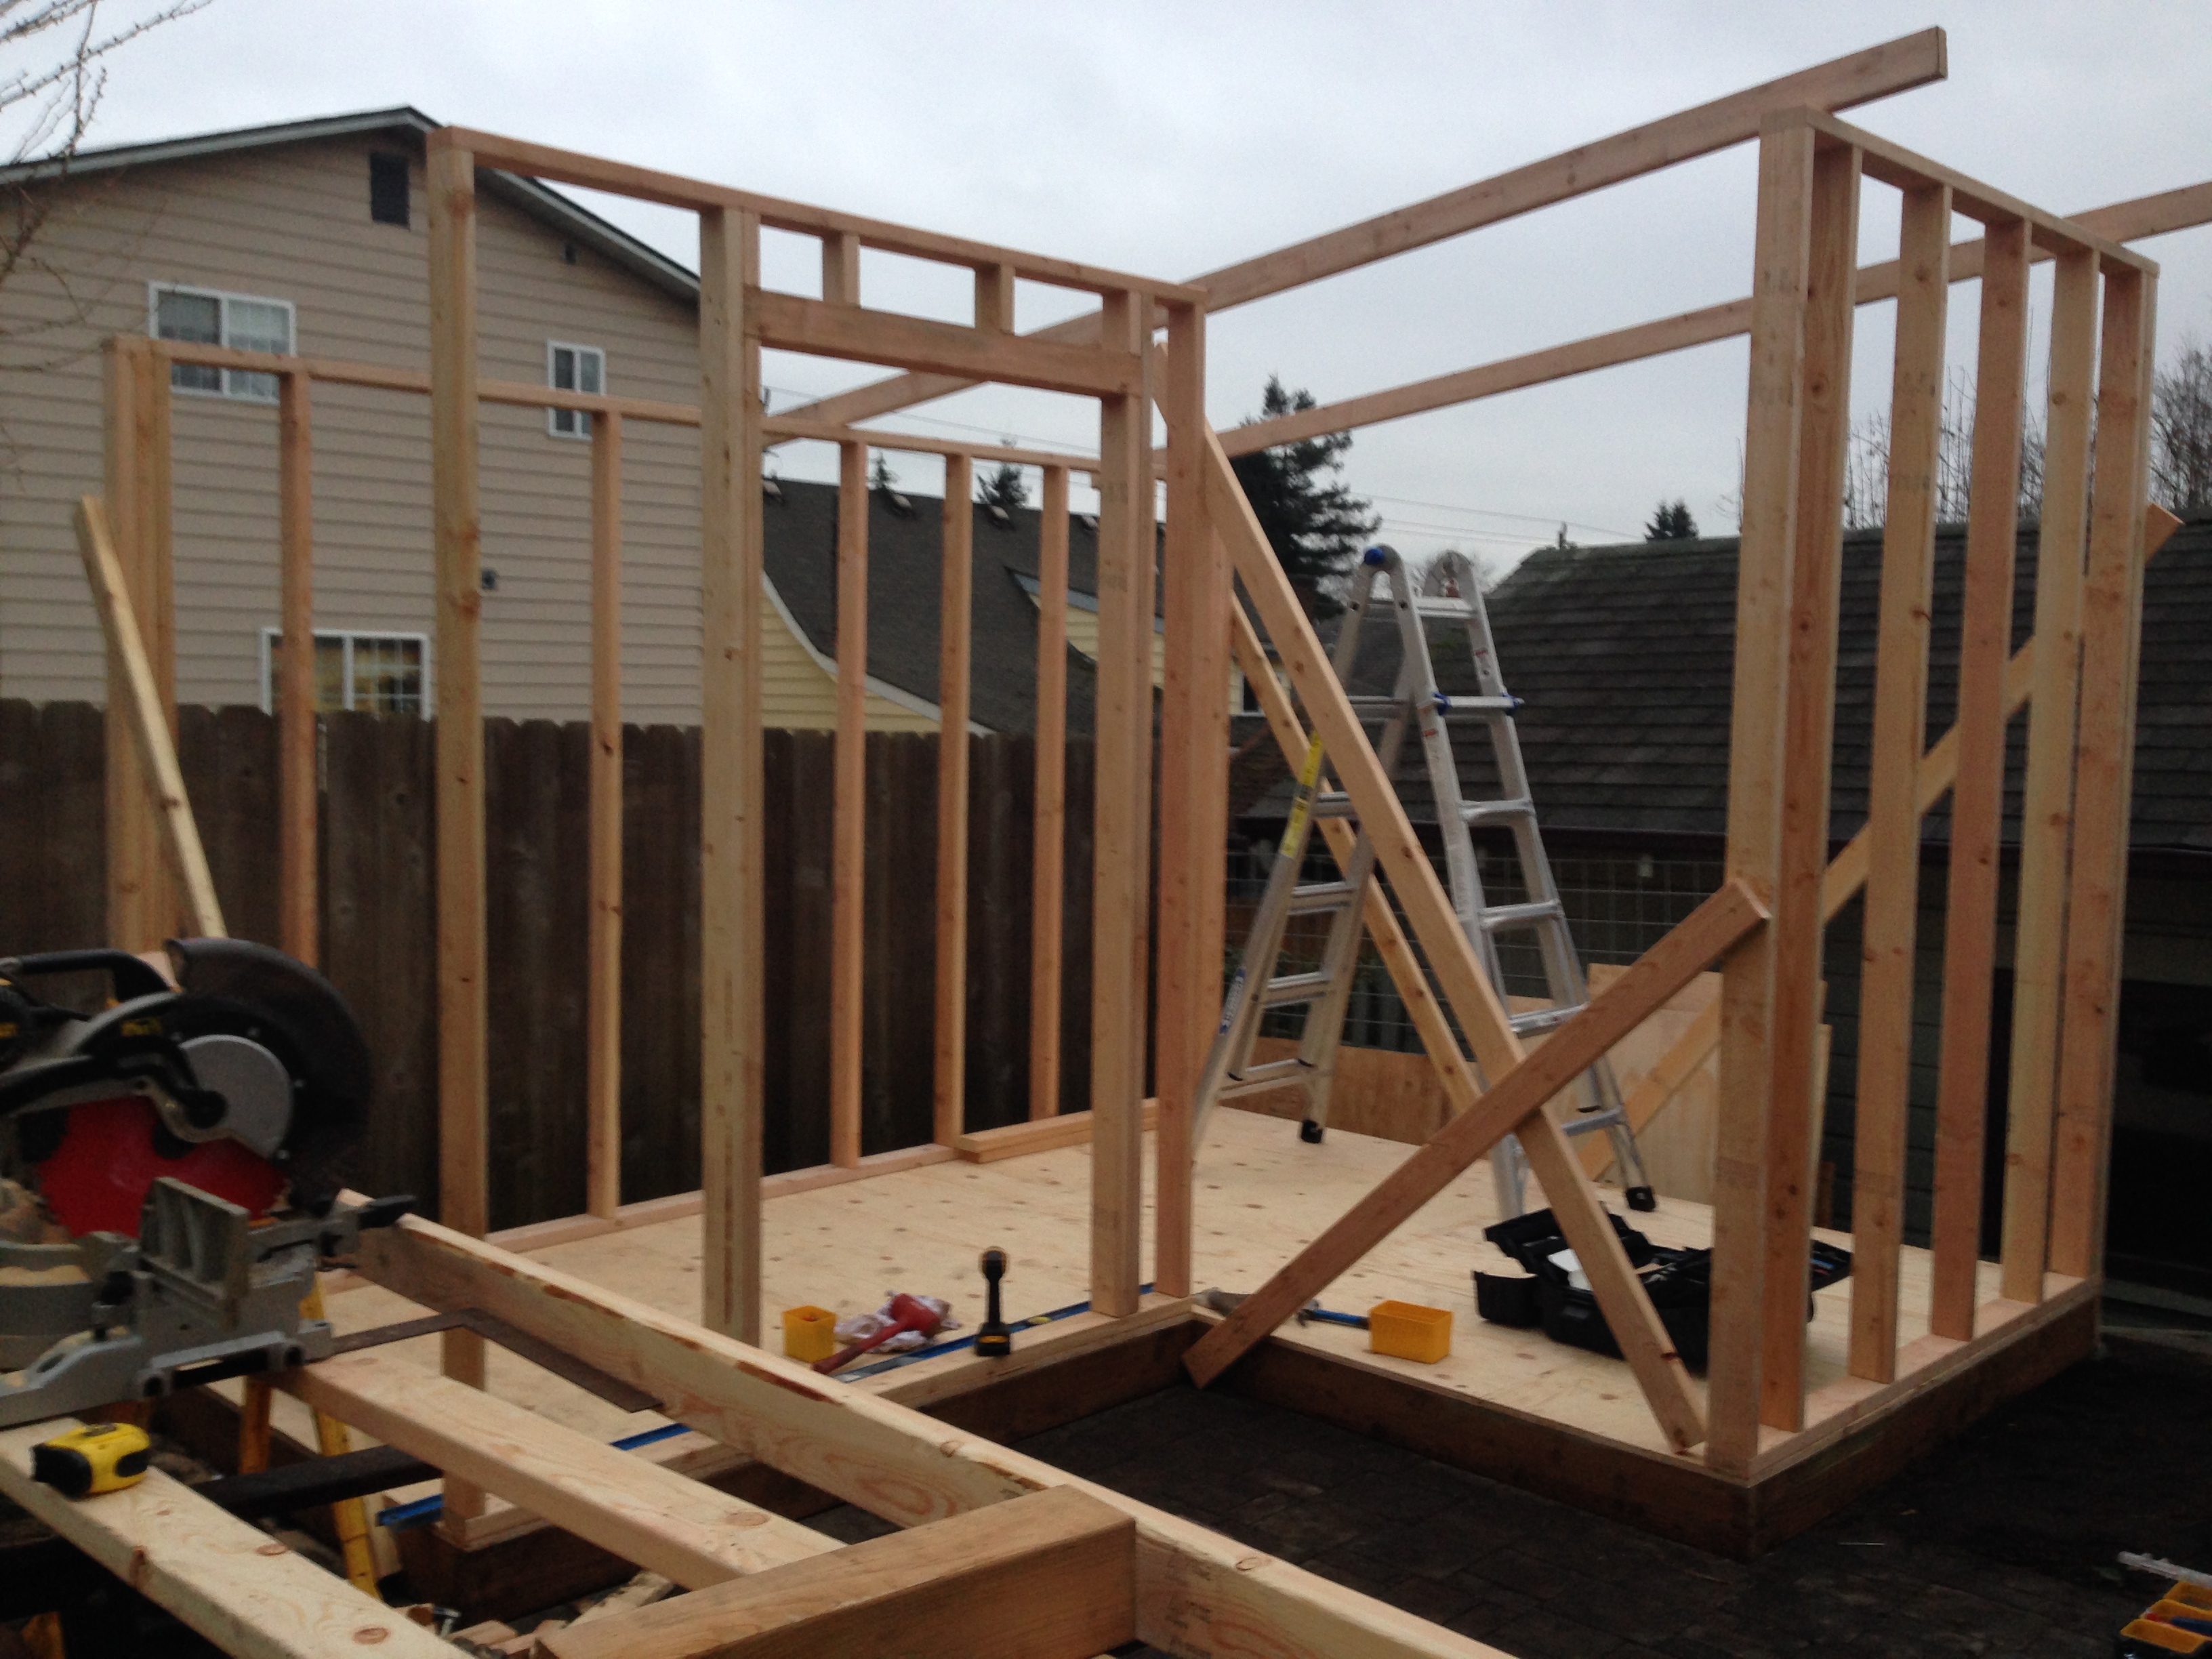
The walls were built w/ 2X4 construction, 16″ on center stud layout. The roof was designed to be slanted toward the east, with the west end being the highest at 9′. The 6% grade on the roof took the east end to 8′.
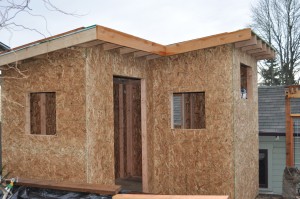
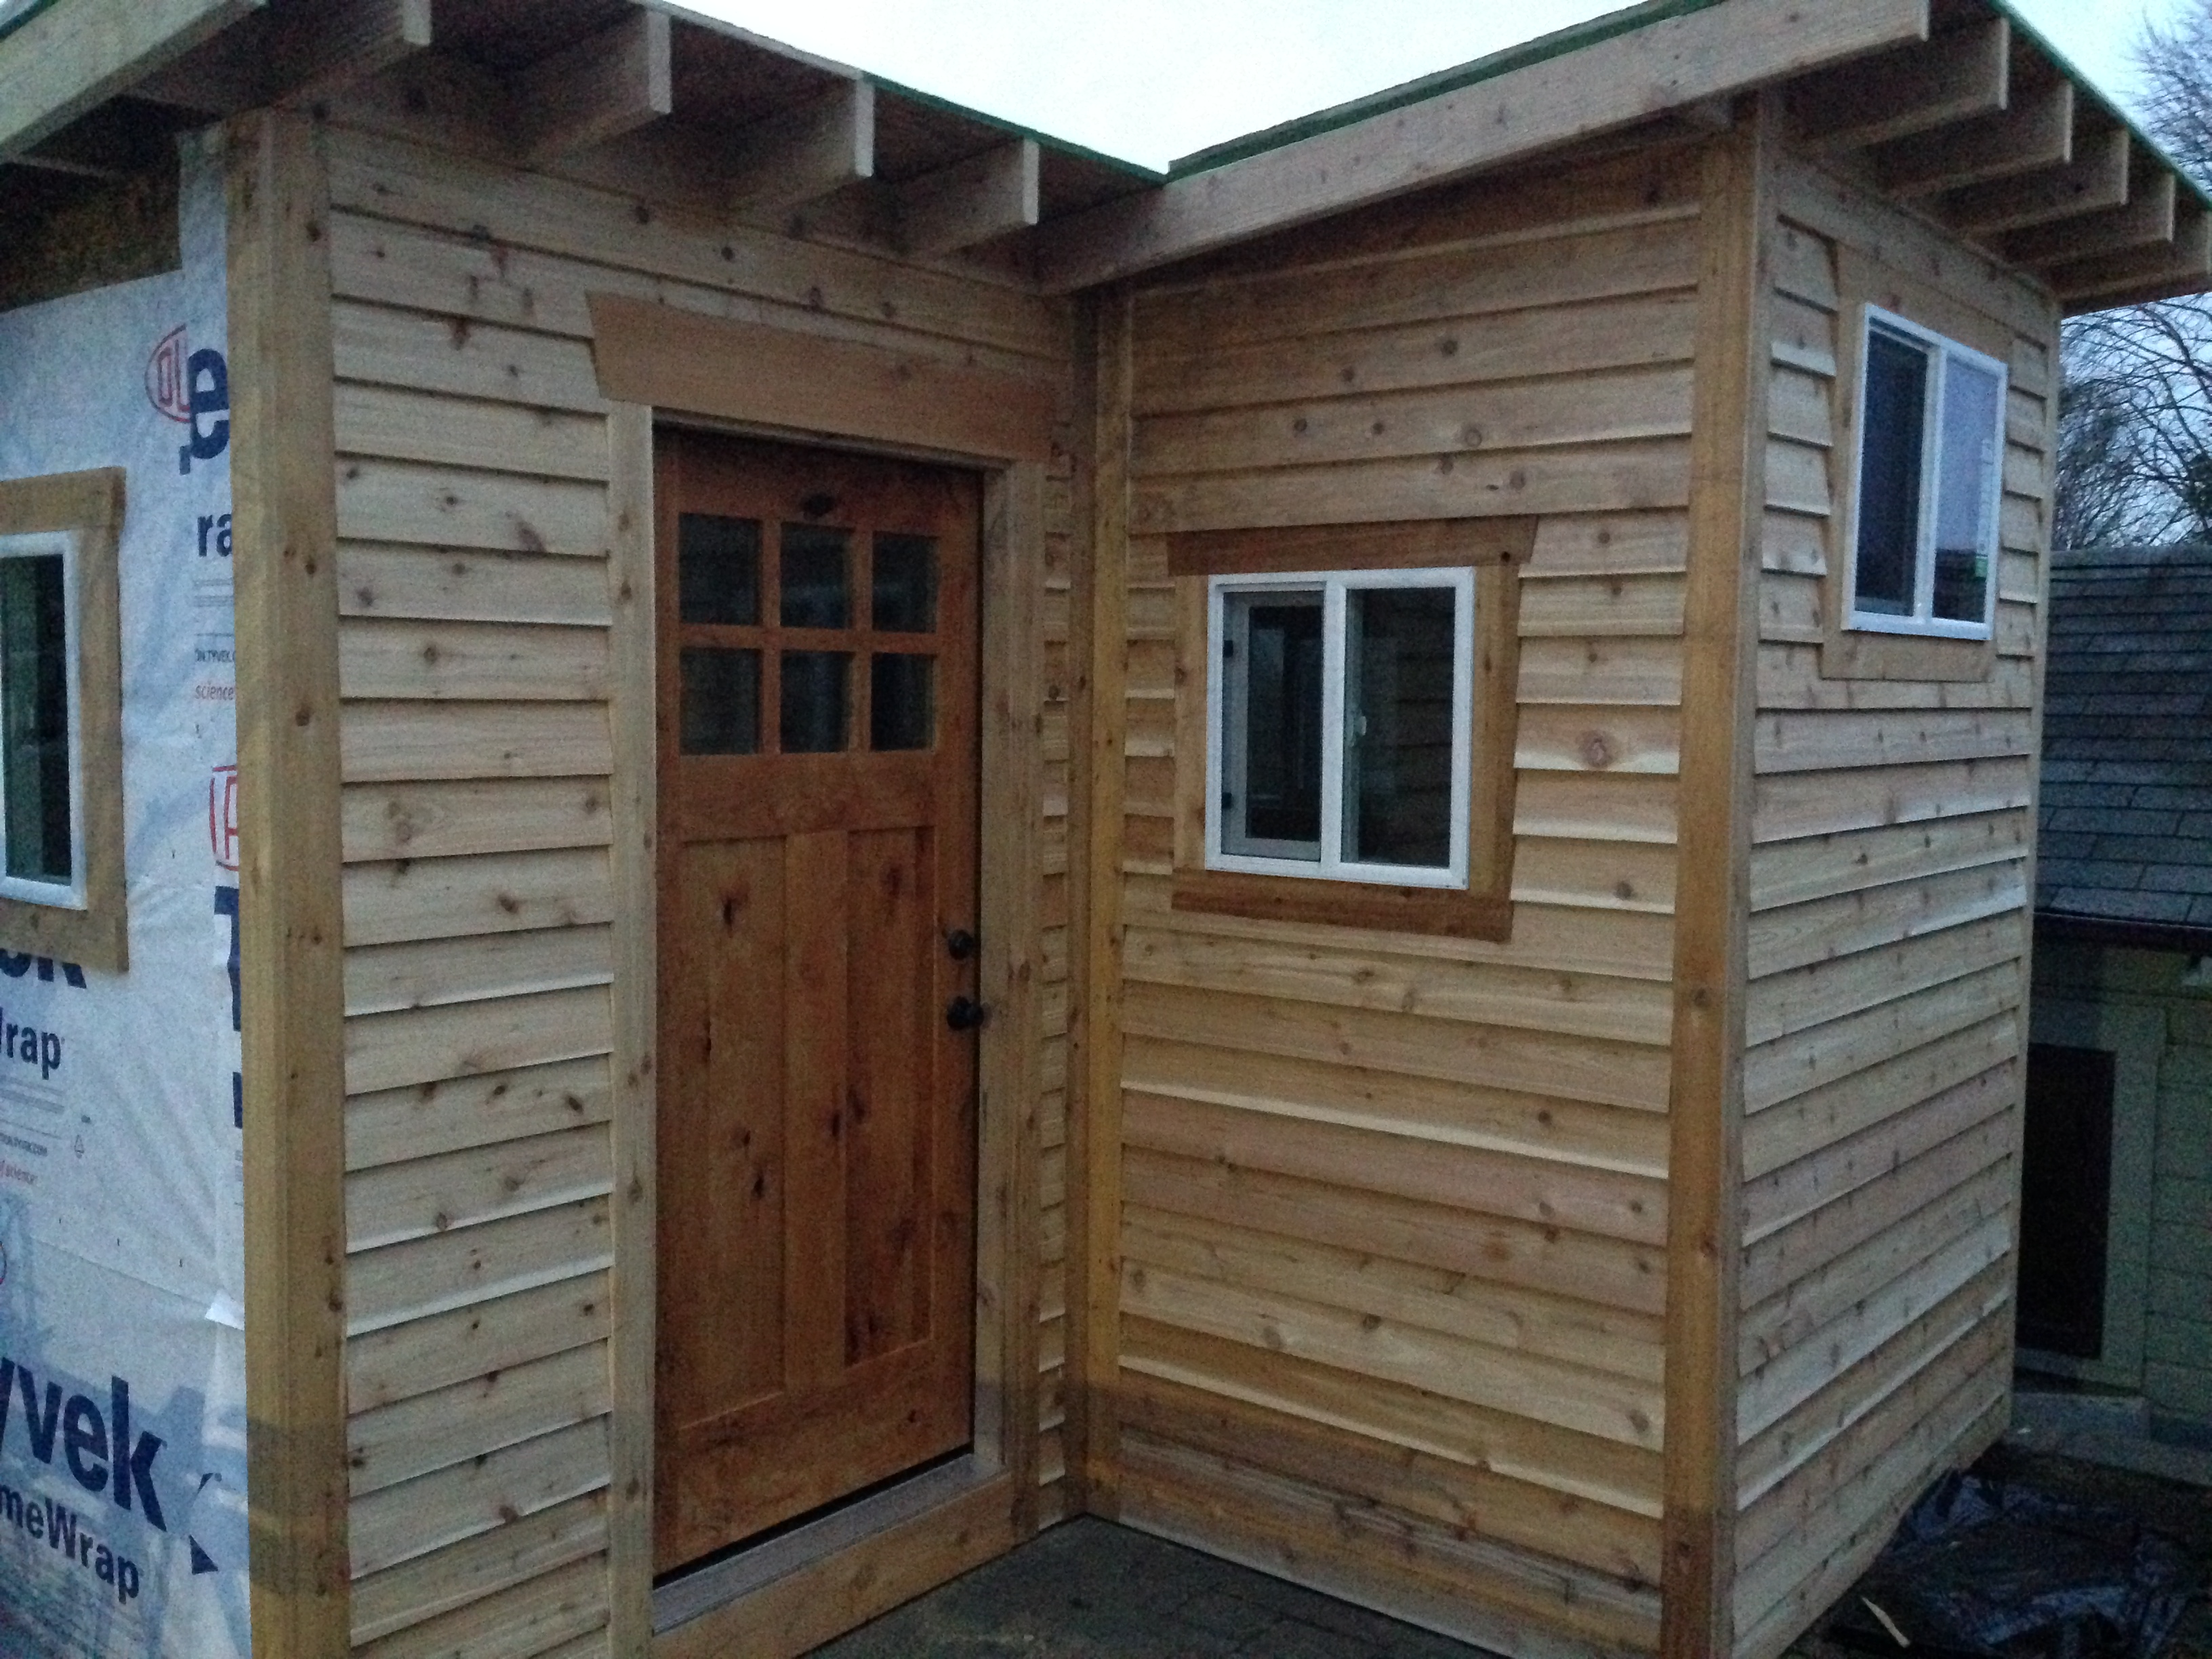 After the initial framing construction, I set the rafters with 2″x6″s. They were extended along the perimeter of the building so as to offer an expanded drip edge that protects the 11″/16″ beveled cedar siding from the brunt of the Seattle winters. A red metal roof will be installed later this week.
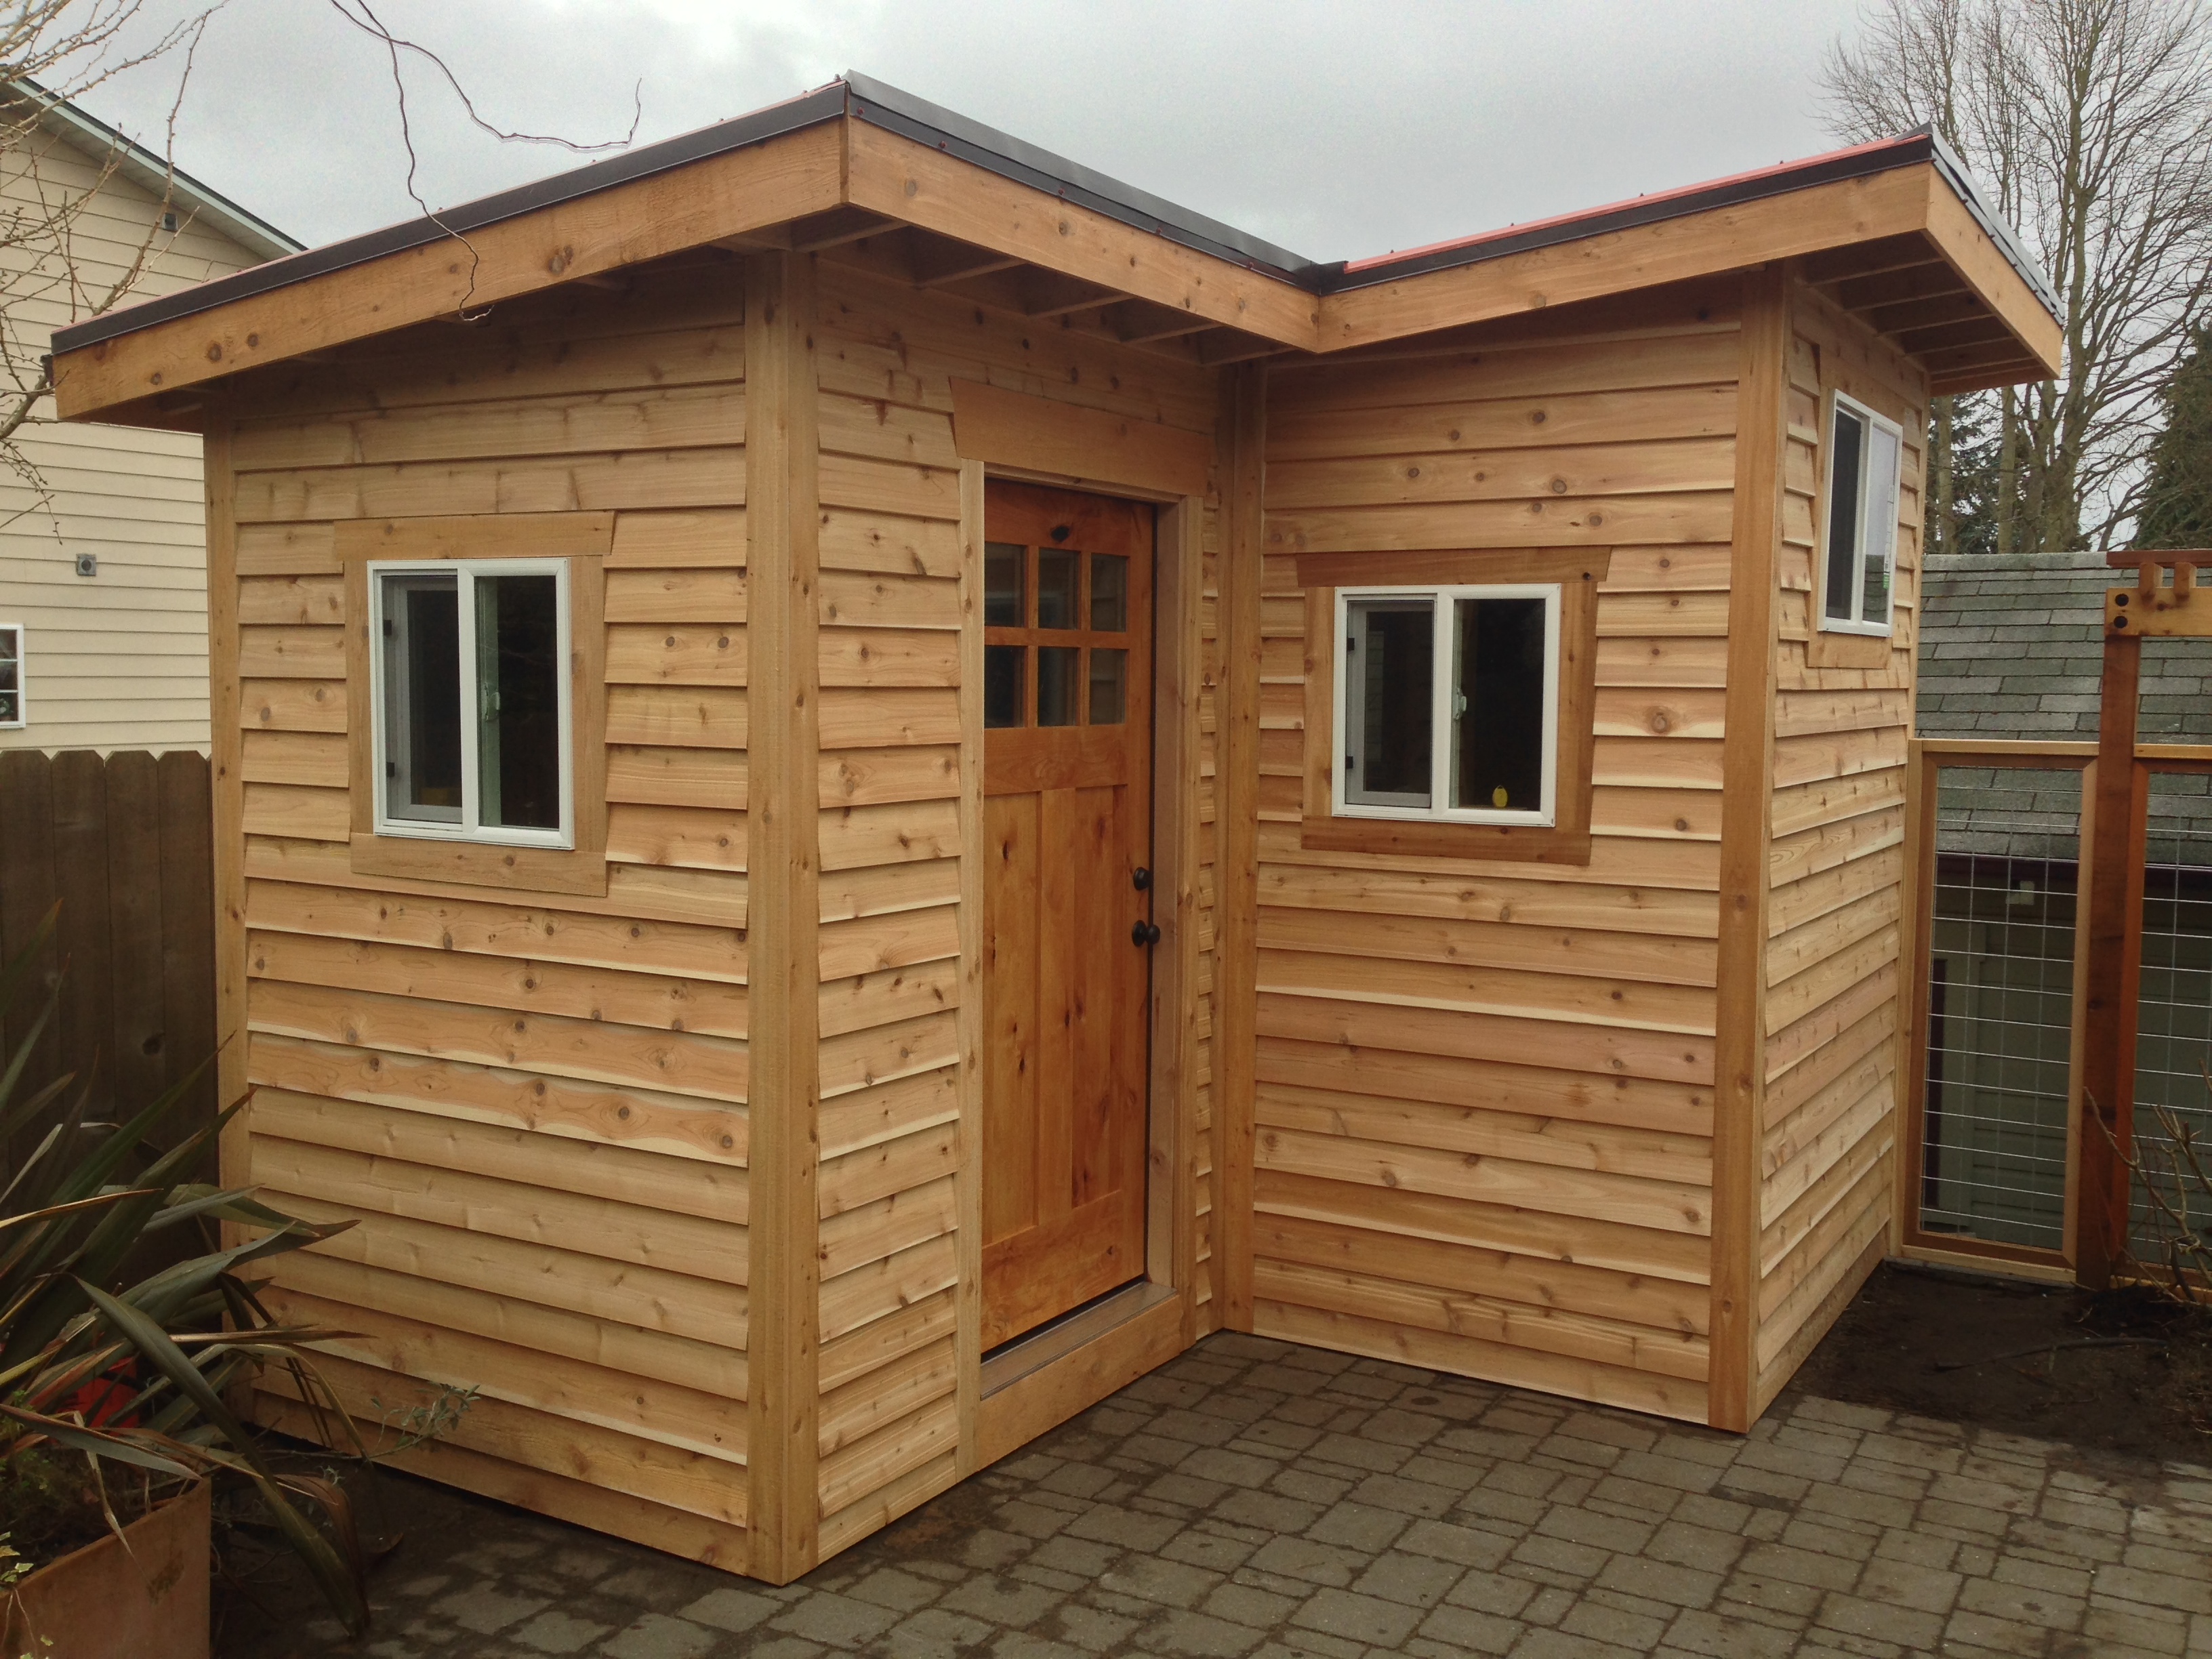
Update: 01/15/13 – the project is finished, with the interior insulated and drywalled. I’ll be staining the structure when the weather stabilizes, perhaps in a couple of months.